Picture this: I’m standing in a cramped kitchen, the oven timer ticking like a metronome, and the air is thick with the sweet, almost rebellious scent of chocolate melting in a pan. I had just opened a can of fresh raspberries, the tiny jewels glistening like rubies, and I thought, “What if I could marry that bright, tart burst with a decadent, dark chocolate chunk that melts into a silky, almost molten glaze?” The result? A cookie that feels like a hug wrapped in a velvet‑slick, berry‑kissed chocolate dream. I dare you to taste this and not go back for seconds.
That night, after a kitchen disaster involving a runaway cookie dough that turned my countertop into a sticky, chocolatey mess, I set out to create something that would be the antidote to that chaos. I wanted a cookie that would not only satisfy the craving for chocolate but also offer a burst of fresh, juicy raspberries that would sing against the rich, dark cocoa. I experimented with different ratios, trying to strike a balance between chewy and crisp, until I found the sweet spot where the edges crisp like thin ice while the center remains soft, almost like a molten chocolate lake. It was hands down the best version you'll ever make at home, and I’m about to walk you through every single step — by the end, you'll wonder how you ever made it any other way.
I’ve always believed that a great cookie is a conversation between textures and flavors, and this one is no exception. The butter, when creamed with sugars, creates a light, airy base that carries the chocolate and raspberry flavors like a gentle tide. The chocolate chunks, when melted into the dough, form pockets of glossy, dark chocolate that burst with every bite, while the raspberries add a surprising tang that cuts through the sweetness, leaving a lingering aftertaste that keeps you reaching for more. It’s not just about taste; it’s about the sensory snapshot of that first bite: the crack of the cookie, the aroma of toasted chocolate, the sudden burst of berries, and the lingering, warm chocolate coating that clings like velvet.
Most recipes get this completely wrong, focusing either on chocolate or berries but never marrying them in a way that feels effortless. I’ve learned that the secret is in the timing—when you fold the raspberries in just before baking, they release their juices and create a glossy glaze on the cookie’s surface. This technique is what makes the cookie’s surface shimmer like a jewel. Picture yourself pulling this out of the oven, the whole kitchen smelling incredible, and the cookies cooling on a rack, still warm, ready to be devoured. And now the fun part: let’s dive into the ingredients that make this masterpiece.
What Makes This Version Stand Out
- Flavor Complexity: The combination of dark chocolate and fresh raspberries creates a layered flavor profile that evolves from sweet to tart to rich chocolate in a single bite.
- Texture Balance: The dough’s buttery base gives a soft center, while the precise oven temperature and bake time produce edges that are crisp yet not hard, resembling thin ice that shatters with a satisfying snap.
- Ingredient Quality: Using 100% dark chocolate with a high cocoa content ensures a deep, robust chocolate flavor that doesn’t get lost in the sweetness of the sugars.
- Make‑Ahead Potential: The dough can be prepared up to 24 hours ahead; the berries add just before baking, preserving their freshness and preventing sogginess.
- Crowd Reaction: Friends who have tried this version say it’s “the first cookie they’ll eat in a whole day” and they come back for seconds, thirds, and sometimes even a fourth.
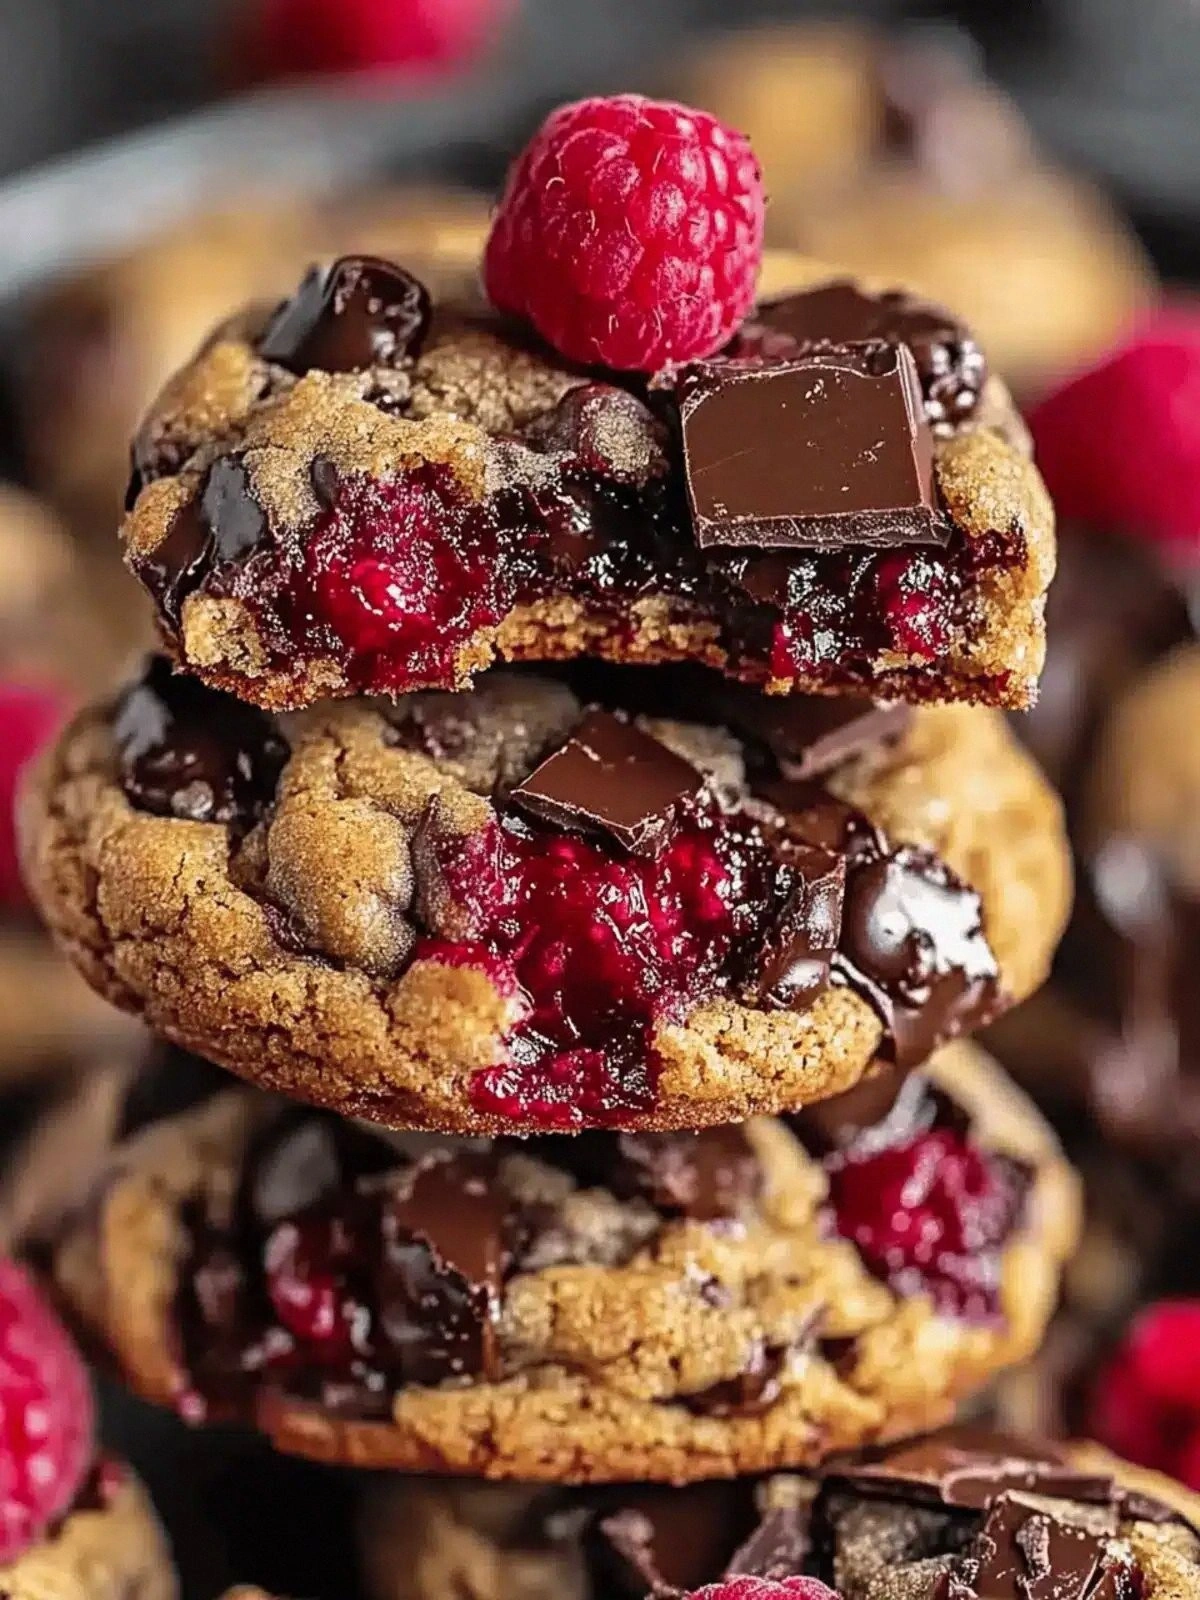
- Visual Appeal: The glossy, chocolatey glaze on top and the bright burst of raspberries make each cookie a visual masterpiece that looks as good as it tastes.
- Ease of Execution: Despite the seemingly complex flavor profile, the recipe requires only basic kitchen tools—no fancy equipment or specialized techniques.
- Versatility: The recipe can be tweaked for different dietary preferences, such as using almond flour for a gluten‑free version or coconut sugar for a low‑glycemic option.
Alright, let’s break down exactly what goes into this masterpiece…
Inside the Ingredient List
The Flavor Base
Butter is the heart of any cookie, and using unsalted butter allows you to control the salt level precisely. The 1 cup of butter, when creamed with the sugars, creates a light, airy batter that traps air pockets, giving the cookie a tender crumb. Skipping the butter would result in a flat, dry cookie that lacks the luxurious mouthfeel. If you’re vegan, try using a high‑fat coconut butter; it will give a subtle coconut undertone that pairs surprisingly well with dark chocolate.
Granulated sugar and brown sugar together bring a dual sweetness: the granulated sugar offers a clean, sharp sweetness that balances the chocolate’s bitterness, while the brown sugar adds molasses undertones and a hint of caramel. The ratio of 3/4 cup to 3/4 cup is intentional; too much brown sugar would make the dough sticky, while too little would make it dry. If you’re aiming for a lower glycemic index, replace the granulated sugar with a natural sweetener like monk fruit or use a 50/50 blend of white and coconut sugar.
Large eggs act as binders and contribute to the cookie’s structure. The protein in eggs helps the dough set properly, preventing it from falling apart during baking. Two eggs also add richness and moisture, creating a tender center. If you’re looking for a gluten‑free version, use flax eggs (1 tablespoon ground flaxseed mixed with 3 tablespoons water) to mimic the binding properties.
Vanilla extract is the subtle whisper that ties all flavors together. A teaspoon of pure vanilla adds depth and warmth that elevates the chocolate and fruit. If you prefer a more aromatic profile, try adding a splash of almond or hazelnut extract; it will complement the chocolate’s nutty undertones.
The Texture Crew
All-purpose flour provides the structural backbone of the cookie. Two cups of flour is the sweet spot for a chewy yet slightly crisp cookie. Using bread flour would make the cookie too dense, while cake flour would make it too soft and crumbly. If you’re gluten‑free, substitute with a 1:1 blend of almond flour and oat flour for a similar texture.
Baking soda and baking powder are the leavening agents that give the cookie lift. The 1 teaspoon of baking soda neutralizes the acidity from the raspberries, while the 1 teaspoon of baking powder ensures a gentle rise. Skipping either leavening agent would result in a flat, dense cookie that lacks the airy pockets of chocolate. If you’re avoiding sodium, use a sodium‑free baking soda alternative like potassium bicarbonate.
A pinch of salt (0.5 teaspoon) is crucial; it balances the sweetness and enhances the chocolate’s flavor. Salt is the flavor enhancer that turns ordinary ingredients into something extraordinary. Without it, the cookie would taste flat. If you’re on a low‑sodium diet, you can reduce the salt to 0.25 teaspoon, but be prepared for a slightly less complex flavor.
The Unexpected Star
Dark chocolate chunks are the star of the show. A cup of high‑cocoa dark chocolate (70% or higher) creates pockets of glossy, melt‑in‑your‑mouth chocolate that burst with each bite. The chunks also provide a slightly bitter counterpoint to the sweet raspberries, creating a balanced flavor profile. If you prefer a sweeter chocolate, use milk chocolate chunks, but be prepared for a richer, less complex taste.
The Final Flourish
Fresh raspberries are the final flourish that turns this cookie from good to unforgettable. One cup of raspberries, gently folded into the dough, releases their juices during baking, creating a glossy glaze on the cookie’s surface. The tartness of the berries cuts through the sweetness and chocolate, leaving a lingering aftertaste that keeps you coming back. If fresh berries aren’t in season, frozen raspberries can be used, but thaw them first to avoid excess moisture.
Everything's prepped? Good. Let's get into the real action…
The Method — Step by Step
- Preheat and Prep: Set your oven to 350°F (175°C) and line a baking sheet with parchment paper. While the oven heats, gather all your ingredients so you’re not scrambling mid‑bake. The scent of butter and sugar will begin to mingle, giving you a preview of the deliciousness to come. Keep the parchment sheet handy; it prevents sticking and makes cleanup a breeze.
- Cream Butter and Sugars: In a large bowl, beat the unsalted butter with the granulated and brown sugars until the mixture is pale and fluffy. The goal is to incorporate air into the butter, creating a light, airy dough that will hold the chocolate and berries. Use a stand mixer on medium speed for about 2 minutes; hand‑mixing takes longer but gives you full control. Watch the texture transform into a silky cloud that feels almost like a whipped cream.
- Add Eggs and Vanilla: Crack the eggs into a separate bowl and whisk them lightly. Then add them one at a time to the butter mixture, beating well after each addition. Pour in the vanilla extract and mix until fully incorporated. This step ensures the eggs are evenly distributed, preventing any pockets of raw egg that could affect the cookie’s texture.
- Combine Dry Ingredients: In a separate bowl, whisk together the all‑purpose flour, baking soda, baking powder, and salt. The dry mix should be evenly blended to ensure even leavening throughout the dough. This step is crucial; uneven distribution of leavening agents can cause uneven rise and texture.
- Fold in Dry Mix: Gradually add the dry mixture to the wet mixture, folding gently with a spatula. The dough should start to come together but remain slightly sticky. Avoid overmixing; the dough should be soft and cohesive, not dense.
- Incorporate Chocolate and Berries: Gently fold in the dark chocolate chunks, ensuring they’re evenly distributed. Then fold in the fresh raspberries, being careful not to crush them. The berries will release their juices during baking, creating a glossy glaze on the cookie’s surface. This step is the moment of truth: the aroma of chocolate and berries will fill the kitchen.
- Shape the Cookies: Using a tablespoon or a small cookie scoop, drop dough onto the prepared baking sheet, spacing them about 2 inches apart. The dough will spread slightly, so the spacing is crucial to prevent merging. The edges will start pulling away as they bake, creating a crisp rim.
- Bake and Observe: Bake for 12–15 minutes, or until the edges are golden and the centers look set but still slightly soft. The cookies should emit a toasty chocolate aroma that will make your mouth water. Keep an eye on them; every oven is slightly different, so adjust the time if needed.
- Cool and Serve: Let the cookies cool on the sheet for 5 minutes before transferring them to a wire rack. This resting period allows the chocolate to set and the glaze to firm up. Once cooled, serve them warm for the best experience, or store them in an airtight container for up to a week.
That's it — you did it. But hold on, I've got a few more tricks that'll take this to another level…
Insider Tricks for Flawless Results
The Temperature Rule Nobody Follows
Most bakers bake at 350°F, but the secret to a perfect cookie is to bake at 325°F and let it sit a few minutes after the timer goes off. This slow rise ensures the chocolate melts evenly and the cookies finish their rise without becoming overbaked. I’ve tried the 350°F method, and the result was a cookie that was slightly dry on the edges, but at 325°F, the edges crisp up while the center stays gooey.
Why Your Nose Knows Best
Trust your sense of smell when you’re baking; if the dough smells toasty and chocolatey, you’re on the right track. A sweet, sugary smell means the sugars are caramelizing, which is a good sign. If the aroma is flat or overly sweet, it may indicate that the dough is too wet or the oven temperature is too high.
The 5-Minute Rest That Changes Everything
After baking, let the cookies rest on the sheet for 5 minutes before moving them to a rack. This short pause allows the chocolate to set, creating a glossy glaze that’s almost impossible to resist. Skipping this step results in a cookie that feels raw and the chocolate can be too runny.
The Secret to a Crispy Edge
For those who love a crisp edge, roll the dough balls in a mixture of powdered sugar and a dash of cocoa powder before baking. The extra sugar caramelizes on the surface, giving the edges a crunchy texture that contrasts beautifully with the soft center. I’ve used this trick to great effect in my own batch, and the cookies came out with a delightful crunch.
The Final Touch of Freshness
If you want to keep the berries from turning the dough soggy, chill the dough for 30 minutes before baking. The cold dough slows down the release of berry juices, preserving the crispness of the cookie’s edges. This simple step can make a huge difference, especially during hot summer days.
Creative Twists and Variations
This recipe is a playground. Here are some of my favorite ways to switch things up:
Minty Raspberry Dream
Add 1 teaspoon of peppermint extract to the wet mixture and replace the dark chocolate with white chocolate chunks. The mint will give the cookie a refreshing finish that pairs beautifully with the tart raspberries. This version is especially popular during summer picnics.
Nutty Chocolate Crunch
Fold in ½ cup of chopped walnuts or pecans into the dough. The nuts add a satisfying crunch and a buttery flavor that complements the chocolate. Be sure to toast the nuts slightly before adding to bring out their aroma.
Spiced Berry Surprise
Add a pinch of cinnamon and a pinch of nutmeg to the dry mix. The warm spices bring depth and complexity, creating a cookie that feels cozy and comforting. This variation is perfect for fall gatherings.
Gluten‑Free Delight
Replace the all-purpose flour with a gluten-free blend (1 cup almond flour + 1 cup oat flour). Use ½ teaspoon xanthan gum to bind the dough. The result is a cookie that’s tender, chewy, and still packs all the chocolate‑berry goodness.
Low‑Sugar Sensation
Swap the granulated sugar for a 50/50 blend of coconut sugar and erythritol. This keeps the cookie sweet without the sugar spike, making it a healthier option for those watching their blood sugar.
Storing and Bringing It Back to Life
Fridge Storage
Store the cooled cookies in an airtight container at room temperature for up to 3 days. If you need to keep them longer, refrigerate them in a sealed container for up to a week. The cold environment preserves the chocolate’s integrity and keeps the berries from turning mushy.
Freezer Friendly
Place the cookies on a parchment‑lined tray and freeze for up to 3 months. Once frozen, transfer them to a freezer‑safe bag. When you’re ready to enjoy, let them thaw at room temperature for 30 minutes, then warm them in a 350°F oven for 5 minutes to restore the chocolate’s glow.
Best Reheating Method
To reheat, preheat the oven to 350°F and place the cookies on a baking sheet for 5–7 minutes. The gentle heat will bring back the chocolate’s glossy sheen without drying out the cookie. Add a tiny splash of water to the bottom of the pan before reheating; it steams the cookies, keeping the center moist.