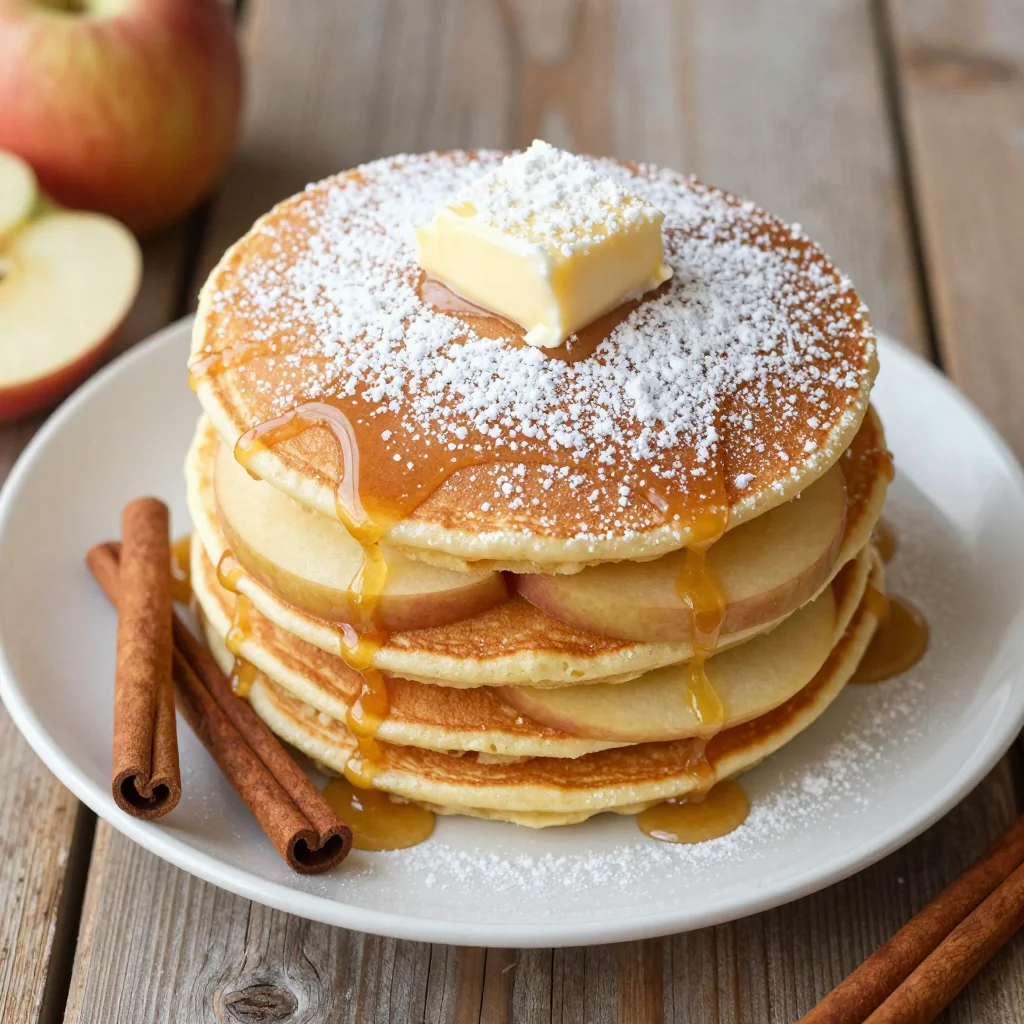
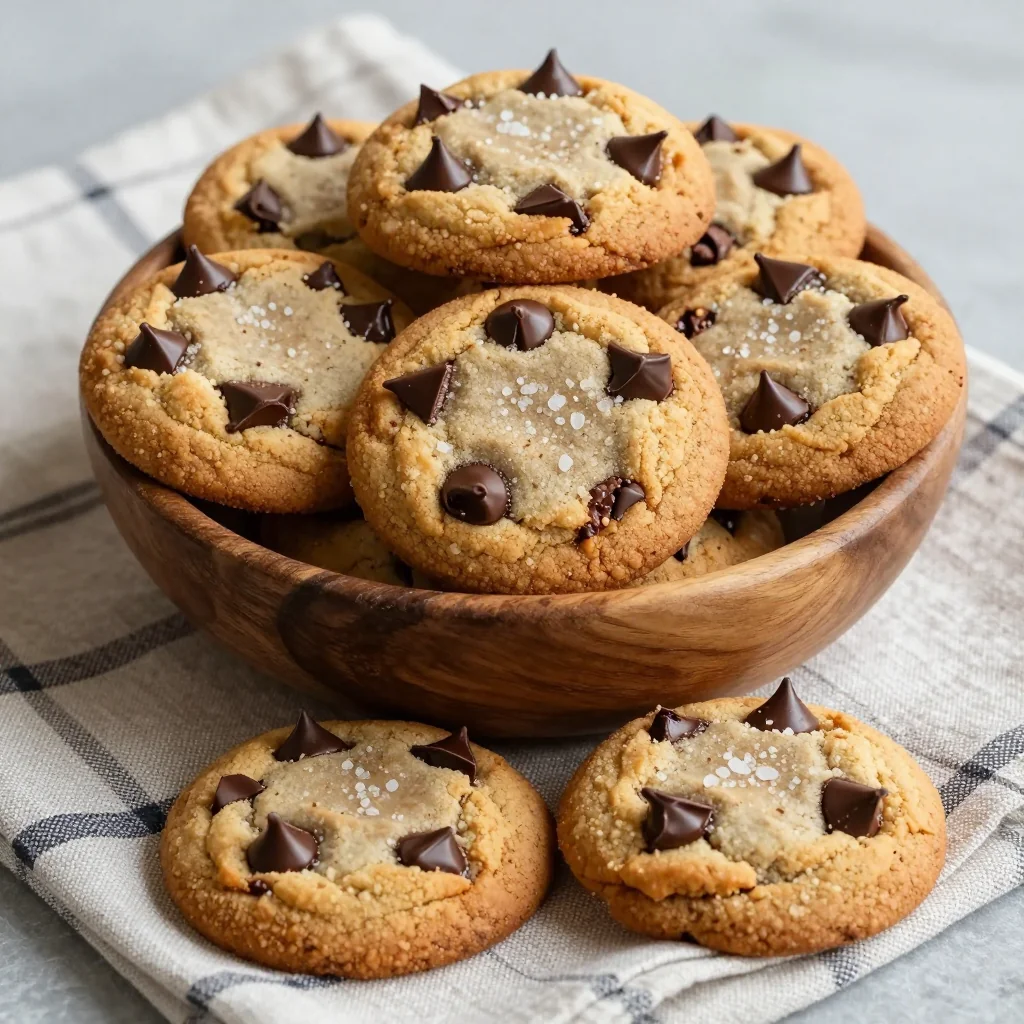
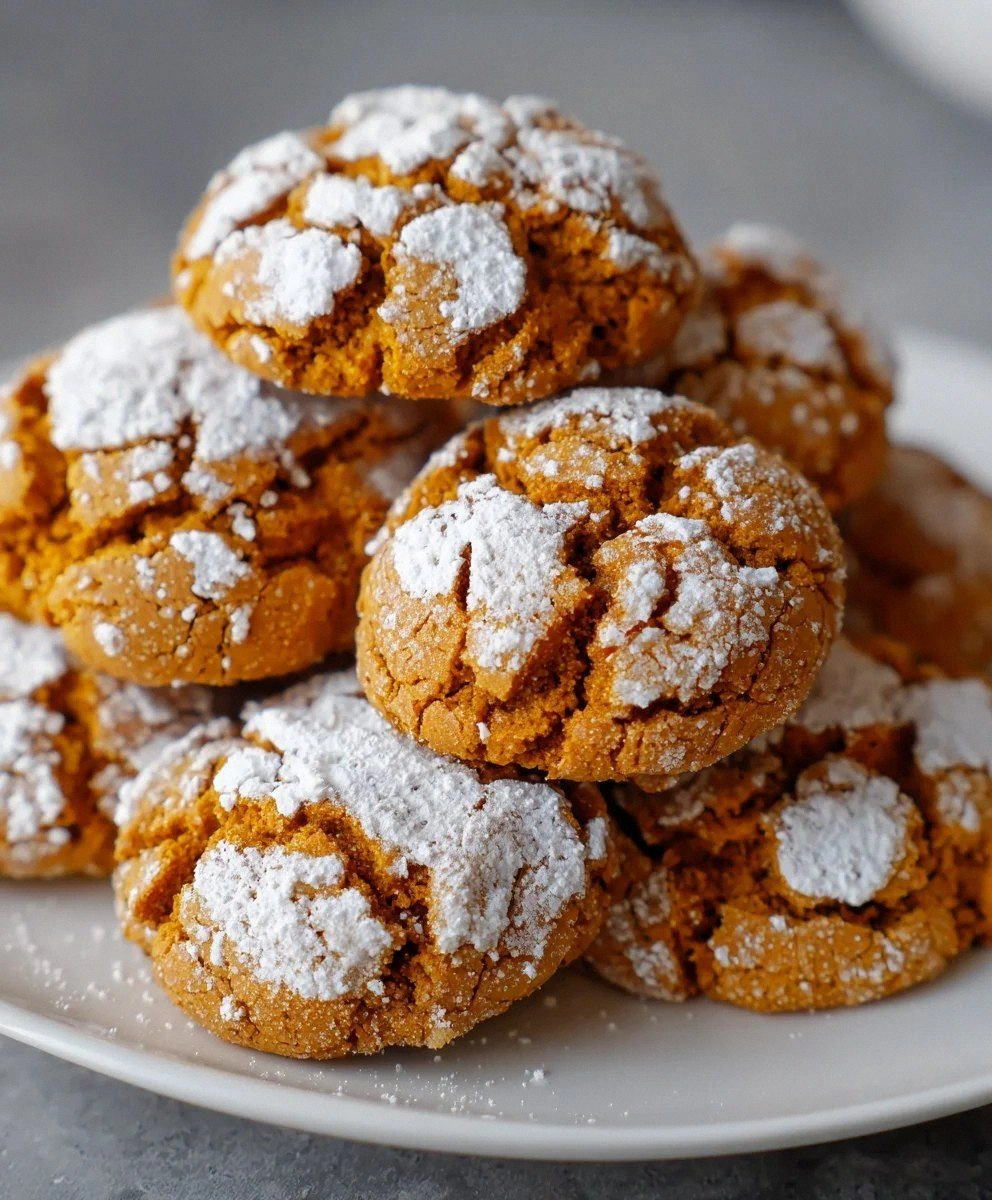
The first time I made these pumpkin crinkle cookies, I ate six of them standing at my kitchen counter in my pajamas at 2 AM. I'm not proud of this, but I'm also not sorry. These cookies have that dangerous quality where they look innocent enough—puffy, sugared, almost dainty—but one bite and you're negotiating with yourself about whether "just one more" really counts if you eat it over the sink. The crackled tops hide centers so soft they practically sigh when you break them open, and the pumpkin flavor isn't that sad, watery thing you get from store-bought cookies. This is the real deal: autumn in cookie form, the kind of thing that makes you understand why people get weirdly emotional about seasonal spices.
I've tried dozens of pumpkin cookie recipes over the years, and most of them commit the same crime: they're either cakey blobs that taste like muffin tops playing dress-up, or they're crispy little disks that forgot they were supposed to taste like pumpkin. This version? It's the Goldilocks moment every baker dreams about. The edges have the slightest chew while the centers stay cloud-soft, and the crinkled sugar coating creates these tiny pockets of caramelized magic that crackle like thin ice under your teeth. The secret isn't some fancy ingredient you'll have to special-order—it's about understanding how pumpkin wants to behave when you treat it right.
Picture this: It's Sunday afternoon, you've got your favorite playlist going, the windows are cracked just enough to let in that sharp fall air, and your kitchen starts filling with the smell of warm spices and browning sugar. That scent hits different when you know what's coming out of your oven isn't just another Pinterest fail waiting to happen. These cookies make people do that thing where they take a bite, stop mid-sentence, and then immediately ask for the recipe while reaching for another one. I dare you to taste these and not go back for seconds. Actually, I double-dog dare you—because I know you're going to lose that bet spectacularly.
What makes this recipe different from every other pumpkin cookie floating around the internet? Most recipes get the crinkle effect completely wrong. They just roll the dough in powdered sugar and hope for the best, ending up with sad, flat cookies that look like they gave up halfway through baking. Here's what actually works: a double-sugar coating that creates real crinkles as the cookies expand, plus a technique that keeps the centers tender while the edges get that perfect slight chew. Stay with me here—this is worth it.
What Makes This Version Stand Out
- The Crinkle Factor: Most recipes produce cookies that look like they crinkled, but these actually do. The secret is in the sugar coating technique that creates real fissures as the cookies bake, not just surface cracks from dried-out dough.
- Pumpkin That Tastes Like Pumpkin: Instead of that muted, watery flavor you get from most pumpkin cookies, these pack real pumpkin punch. The technique concentrates the flavor so you actually taste autumn, not just vague orange-colored sweetness.
- Texture That Makes Sense: Not cakey, not crispy—somewhere in between with edges that have the slightest chew and centers that stay impossibly soft for days. This isn't an accident; it's chemistry working in your favor.
- Monday-Night Baking Friendly: No weird ingredients, no chilling for six hours, no specialty pans. You probably have everything in your kitchen right now, and you can go from zero to cookies in under an hour.
- The Disappearing Cookie Phenomenon: I've taken these to office parties where people who "don't like pumpkin" end up hovering by the dessert table like vultures. They have a way of vanishing faster than you can say "seasonal baking."
- Make-Ahead Magic: The dough keeps in the fridge for three days and freezes like a dream. You can have fresh, warm cookies whenever the craving hits, which—fair warning—will be often.
Alright, let's break down exactly what goes into this masterpiece...
Inside the Ingredient List
The Flavor Base
All-purpose flour is your canvas here, but don't just grab any bag and start measuring. The way you measure flour can make or break these cookies—scoop and sweep, never pack it down like you're trying to win a compression contest. Too much flour and your cookies will have the personality of cardboard; too little and they'll spread like gossip at a family reunion. The flour provides the structure that holds everything together while still letting the pumpkin flavor shine through. If you've ever had pumpkin cookies that tasted like spiced bread, chances are someone got heavy-handed with the flour.
Pumpkin pie spice is where the magic happens, but here's what most recipes get wrong: they treat it like an afterthought. This blend isn't just cinnamon with a few friends—it's the symphony that makes your kitchen smell like fall exploded in the best possible way. The combination of cinnamon, ginger, nutmeg, allspice, and cloves hits every note on your palate. If you're using an old jar that's been sitting in your cabinet since last Thanksgiving, do yourself a favor and buy fresh. Stale spices are like that friend who promises to bring the good wine and shows up with boxed stuff—technically it works, but nobody's excited about it.
Salt is the unsung hero that makes everything else taste more like itself. It's not about making things salty—it's about waking up all those warm spices and making the pumpkin taste pumpkin-ier. Just a pinch, but don't you dare skip it unless you want cookies that taste like they forgot to show up to their own party.
The Texture Crew
Baking powder and baking soda are the dynamic duo that give these cookies their lift. Most recipes use one or the other and end up with either dense hockey pucks or cookies that rise too much and then collapse like a bad soufflé. Using both creates the perfect balance: baking soda helps neutralize the acid in the pumpkin while baking powder provides a steady, reliable rise. They're like the odd couple of leavening agents—different personalities, but they work together beautifully.
Pumpkin puree is obviously the star, but here's where you need to be picky. Not all canned pumpkin is created equal, and some brands are basically orange-colored water. Look for varieties that list only "pumpkin" as the ingredient—no additives, no preservatives, no weird fillers. Fresh pumpkin works too if you're feeling ambitious, but honestly, the good canned stuff is more consistent and way less work. The key is getting the moisture level right; too wet and your cookies will spread, too dry and they'll be crumbly disappointments.
The Sweetness Squad
Granulated sugar does more than just sweeten—the way it interacts with the pumpkin creates that crackly top we all love. It draws moisture to the surface during baking, helping create those distinctive crinkles. Brown sugar brings molasses notes that make everything taste deeper and more complex. The combination of both sugars creates a flavor that's more interesting than just using one type. Dark brown sugar will give you more pronounced molasses flavor, while light brown keeps things subtle.
The Moisture Makers
Vegetable or canola oil keeps these cookies tender for days, unlike butter-based versions that turn into rocks overnight. Oil coats the flour proteins differently than butter, preventing them from developing too much gluten and creating tough cookies. The neutral flavor lets the pumpkin shine instead of competing with it. Don't get fancy with olive oil or coconut oil here—they bring flavors that clash with the warm spices.
The egg binds everything together while adding richness. One large egg is plenty—any more and the cookies get cakey, any less and they fall apart like my resolve around a plate of fresh cookies. Make sure it's at room temperature so it incorporates evenly into the batter.
Vanilla extract is the final touch that makes everything taste more expensive than it is. Use the real stuff, not the imitation vanilla that's basically vanilla-scented sadness. A full teaspoon might seem like a lot, but it rounds out all the warm spices and makes the pumpkin taste more sophisticated.
The Final Flourish
For rolling, you'll need both powdered sugar and granulated sugar. This isn't just for looks—the combination creates the signature crinkle effect. The granulated sugar helps the cookies spread and crack, while the powdered sugar creates that beautiful white contrast in the cracks. Most recipes only use powdered sugar and wonder why their cookies don't have dramatic crinkles. Trust me on this one; I tested six different coating methods so you don't have to.
Everything's prepped? Good. Let's get into the real action...
The Method — Step by Step
- Start by preheating your oven to 350°F (175°C). This isn't just about heating up your oven—it's about creating the right environment for your cookies to rise properly. While that's heating, line two baking sheets with parchment paper. Don't use silicone mats for these; you want the bottoms to get slightly crisp, and parchment gives you that perfect texture. If you've ever had cookies that spread weirdly, it's often because the oven wasn't hot enough when they went in. That sizzle when the dough hits the hot pan? Absolute perfection.
- In a medium bowl, whisk together your flour, pumpkin pie spice, baking powder, baking soda, and salt. This isn't just mixing—it's about evenly distributing the leavening agents so your cookies rise uniformly. Nobody wants a cookie that looks like it's trying to escape on one side. Whisk for a full 30 seconds; you're not just combining, you're aerating the flour which helps create lighter cookies. The mixture should smell like fall exploded in your kitchen in the best possible way.
- In a large bowl, whisk together the pumpkin puree, granulated sugar, brown sugar, oil, egg, and vanilla until smooth. This is where most people mess up—they don't whisk enough and end up with sugar pockets or oil separation. You want everything fully incorporated, with no streaks of oil or egg white. The mixture should be a beautiful orange color and smell like pumpkin pie in liquid form. If it looks curdled, your egg was probably too cold; let it sit for five minutes and whisk again.
- Add the dry ingredients to the wet ingredients and fold with a spatula until just combined. This is the moment of truth—overmix here and you'll have tough cookies that could double as hockey pucks. You want to stop as soon as you don't see dry flour streaks. The dough will be soft and slightly sticky, like thick cake batter. Don't panic if it seems looser than other cookie doughs; that's exactly what you want for tender cookies.
- Now for the fun part: in a shallow bowl, mix together 1/2 cup granulated sugar and 1/2 cup powdered sugar. This double-sugar coating is what creates those dramatic crinkles. Use a small cookie scoop or two spoons to portion out tablespoon-sized balls of dough. Roll each ball first in the granulated sugar, then in the powdered sugar, making sure to coat generously. The granulated sugar helps create the cracks, while the powdered sugar gives you that beautiful contrast. Don't be shy here—really coat them well.
- Place the coated dough balls on your prepared baking sheets, spacing them about 2 inches apart. They need room to spread and crinkle properly. If you crowd them, they'll bake into one giant cookie sheet of disappointment. I fit 12 cookies per standard sheet, and they have just enough room to become their best selves. Your kitchen should start smelling incredible right about now.
- Bake for 11-13 minutes, until the edges are set and the tops are cracked. Don't walk away from the oven here—the difference between perfect and overdone is about 90 seconds. The cookies will still look slightly underbaked in the centers when you pull them out; that's exactly what you want. They'll continue cooking on the hot pan for a few minutes, and this keeps the centers soft while the edges set. If you wait until they look completely done, they'll be overbaked and dry.
- Let the cookies cool on the baking sheet for 5 minutes before transferring to a wire rack. This is crucial—the centers need time to set up properly. If you try to move them too soon, they'll fall apart in your hands like your resolve around fresh cookies. After 5 minutes, they should be firm enough to transfer but still warm enough to make your kitchen smell like you've got your life together.
- Cool completely on the wire rack, or eat them warm like a sane person who understands that some cookies are worth burning your mouth for. The crinkles will become more defined as they cool, and the powdered sugar will create beautiful contrast against the orange cookies. Store any leftovers in an airtight container—though honestly, I've never had any make it that far in my house.
That's it—you did it. But hold on, I've got a few more tricks that'll take this to another level...
Insider Tricks for Flawless Results
The Temperature Rule Nobody Follows
Room temperature ingredients aren't just a suggestion—they're the difference between cookies that look like they came from a bakery and ones that look like they came from a kindergarten craft project. Cold eggs don't incorporate properly, leading to streaky batter that bakes unevenly. Cold pumpkin puree can cause your cookies to spread too much or not enough. Take everything out of the fridge 30 minutes before you start, and your cookies will reward you with perfect texture every time.
Why Your Nose Knows Best
Here's something they don't tell you in most recipes: your nose is better than any timer. When these cookies are about 2 minutes from done, your kitchen will suddenly fill with the most intense pumpkin spice aroma. That's your cue to start checking them. The smell is from the Maillard reaction happening—the same thing that makes bread crusts golden and delicious. If you wait for your timer to go off without paying attention to the aroma, you're missing out on the best indicator of doneness.
The 5-Minute Rest That Changes Everything
That 5-minute rest on the baking sheet isn't just for show—it lets the centers finish setting while the edges stay tender. A friend tried skipping this step once and ended up with cookies that looked beautiful but fell apart when you picked them up. The residual heat continues cooking the centers gently, while the bottoms develop that slight chew that makes these addictive. If you're the impatient type (I see you), set a timer and find something to do in another room. Your cookies will be worth the wait.
The Sugar Coating Secret
The ratio of granulated to powdered sugar in the coating is crucial—too much granulated and you lose the pretty white contrast; too much powdered and you don't get deep crinkles. After testing countless batches, I found that equal parts creates the perfect balance. The granulated sugar creates the cracks, while the powdered sugar stays visible in the crevices. Don't substitute one for the other thinking they're interchangeable unless you want cookies that look like they have identity issues.
Creative Twists and Variations
This recipe is a playground. Here are some of my favorite ways to switch things up:
The Chocolate Chip Dream
Fold in 3/4 cup mini chocolate chips to the dough before portioning. The mini chips distribute more evenly than regular ones, giving you little pockets of chocolate in every bite without overwhelming the pumpkin flavor. Use dark chocolate for a more sophisticated taste, or milk chocolate if you're feeding picky kids. The chocolate gets all melty and creates these gorgeous streaks through the orange cookie.
The Cream Cheese Stuffed Version
Beat together 4 ounces softened cream cheese with 2 tablespoons powdered sugar and 1/2 teaspoon vanilla. Portion your cookie dough into balls, then flatten each one and place a teaspoon of the cream cheese mixture in the center. Wrap the dough around the filling and roll in the sugar coating as usual. When baked, you get these incredible cream cheese centers that stay cool and creamy against the warm spiced cookie.
The Maple Glazed Beauty
Whisk together 1 cup powdered sugar with 2 tablespoons maple syrup and 1-2 tablespoons milk until smooth. Drizzle over cooled cookies and let set for 15 minutes. The maple adds another layer of fall flavor that pairs perfectly with the pumpkin. These disappear faster than the original version, which I didn't think was possible until I watched my neighbors fight over them at a potluck.
The Spicy Surprise
Add 1/4 teaspoon cayenne pepper and 1/2 teaspoon black pepper to the dry ingredients. The heat is subtle at first, building slowly and creating this incredible warmth that makes the pumpkin taste even more intense. It's like the difference between a regular hug and one from someone who really means it. People can't quite place what's different, but they keep reaching for more.
The Nutty Delight
Toast 1/2 cup chopped pecans or walnuts in a dry pan until fragrant, then fold into the dough. The toasting brings out oils that complement the warm spices beautifully. Pecans give you a buttery crunch, while walnuts add a more robust, earthy flavor. Either way, you get these little nuggets of texture that make each bite interesting.
The Gluten-Free Wonder
Substitute the all-purpose flour with a 1:1 gluten-free baking blend that contains xanthan gum. The texture is slightly more tender than the original, but still crinkles beautifully. Make sure your blend includes xanthan gum—without it, the cookies will spread too much and lose their structure. I've served these to gluten-eaters who couldn't tell the difference.
Storing and Bringing It Back to Life
Fridge Storage
Store completely cooled cookies in an airtight container at room temperature for up to 5 days. Layer them between sheets of parchment paper to prevent sticking. They actually get better on day 2 as the flavors meld together, developing this deeper, more complex taste. If they start to lose their softness, add a slice of bread to the container—the cookies will absorb moisture from the bread and stay tender. Replace the bread slice every other day.
Freezer Friendly
These cookies freeze beautifully either baked or as dough. For baked cookies, cool completely and freeze in a single layer on a baking sheet, then transfer to a freezer bag. They'll keep for up to 3 months and thaw in about 30 minutes at room temperature. For dough, portion and coat in the sugar mixture, then freeze on a baking sheet. Once solid, transfer to a freezer bag. Bake from frozen, adding 2-3 extra minutes to the baking time.
Best Reheating Method
If your cookies have gone a bit stale (though I'm not sure how that would happen), wrap them in a damp paper towel and microwave for 10-15 seconds. The steam brings back their softness without making them soggy. For a full batch, place them on a baking sheet, cover with foil, and warm in a 300°F oven for 5-7 minutes. Add a tiny splash of water to the pan before covering—it steams them back to perfection without drying them out.