Picture this: it's Tuesday night, you're scrolling through delivery apps like a zombie, and suddenly that primal hunger hits — the kind that makes you want something crispy, juicy, and downright soul-satisfying. You could gamble on lukewarm takeout that costs more than your monthly streaming subscriptions, or you could transform your kitchen into the best katsu joint this side of Tokyo. I'm telling you, once you master this crispy chicken katsu recipe, you'll never look at restaurant versions the same way again. The first time I nailed this method, I actually did a victory lap around my kitchen island while the oil was still popping, waving tongs like a culinary conductor who just discovered a masterpiece.
Here's the brutal truth: most home cooks murder their katsu before it even hits the plate. They either burn the coating into bitter charcoal, or they play it so safe the chicken emerges pale and flabby, like it got scared and refused to tan. Meanwhile, I'm over here achieving that shatteringly crisp, golden armor that cracks like a crème brûlée lid when you press your fork through. The secret isn't some mystical Japanese technique passed down by ancient monks — it's a few simple tweaks that anyone can master, starting with the right oil temperature and a double-coating method that creates microscopic air pockets between layers. When that first cutlet hits the hot oil, the sound alone should make your neighbors jealous, a sizzling symphony that promises greatness.
What really sets this version apart is how we build flavor directly into the coating itself, not just rely on the sauce afterward. We're talking about a seasoned flour blend that includes a whisper of five-spice and ultra-fine panko that we crush ourselves for maximum surface area contact. Every bite delivers that explosive crunch followed by succulent, perfectly cooked chicken that stays juicy even if you accidentally leave it in the oil thirty seconds too long. And trust me, you will accidentally leave it longer than planned because you'll be hypnotized watching the golden bubbles dance around the edges like liquid sunshine.
I dare you to taste this and not go back for seconds, thirds, or whatever shameful amount you consume standing over the stove before it even reaches the table. The first time I made this for my family, I had to physically block my teenage son from grabbing pieces straight from the cooling rack, claiming he was "quality control testing" each batch. By the third round of testing, I caught him hiding cutlets in his hoodie pockets like a squirrel preparing for winter. This recipe creates that level of obsession, and I'm not even sorry about it. Let me walk you through every single step — by the end, you'll wonder how you ever made it any other way.
What Makes This Version Stand Out
- Double-Crunch Coating: We use a revolutionary three-stage breading process with custom-crushed panko that creates micro-layers of crunch, delivering that restaurant-quality shatter you thought only existed in Japanese kitchens. The coating actually stays crisp for hours, not minutes.
- Flavor-Infused Chicken: Instead of bland meat hidden under sauce, we marinate the chicken in a umami bomb mixture that penetrates every fiber, so every bite explodes with savory depth that makes your taste buds do a happy dance.
- Fail-Proof Frying Method: Most recipes leave you guessing when the oil is ready, but our visual and audio cues guarantee perfect results every single time, even if you've never deep-fried anything more intimidating than frozen fries.
- Sauce That Actually Sticks: We thicken the traditional tonkatsu sauce slightly so it clings to every ridge and valley of the crispy coating instead of sliding off like water on a freshly waxed car.
- Make-Ahead Magic: Prep everything up to the frying stage and freeze the breaded cutlets on a baking sheet, then fry directly from frozen for impromptu katsu nights that taste like you spent hours preparing.
- Kitchen Confidence Builder: This recipe teaches you fundamental techniques that transfer to other dishes — you'll master oil temperature control, breading without the mess, and timing that makes you look like a professional chef.
Alright, let's break down exactly what goes into this masterpiece...
Inside the Ingredient List
The Flavor Base
Forget everything you think you know about seasoning chicken — we're building flavor from the inside out, starting with boneless skinless chicken breasts that we butterfly and pound to an even quarter-inch thickness. This isn't just about tenderness (though that's crucial); it's about creating maximum surface area for our flavor-packed marinade to penetrate. We combine soy sauce, mirin, rice vinegar, and a touch of sesame oil that seeps into every microscopic channel of the meat, transforming bland chicken into something that tastes like it came from a Tokyo kitchen that's been perfecting the craft for generations. The key is timing: twenty minutes is the sweet spot where the chicken absorbs maximum flavor without turning the texture rubbery, which happens when salt draws out moisture for too long.
Fresh ginger and garlic form the aromatic backbone, but here's where most recipes go wrong — they add them raw and harsh. Instead, we microplane them directly into the marinade where the acids gently cook the alliums, mellowing their bite while preserving their bright, zingy essence. A touch of sugar balances the salt and helps with caramelization during frying, creating those gorgeous golden-brown spots that signal deep flavor development. If you've ever wondered why restaurant katsu tastes more complex than yours, it's likely because they're layering flavors at every stage, not just relying on the final sauce.
The Texture Crew
Panko breadcrumbs are non-negotiable here, but not all panko is created equal — we're looking for the jumbo flakes that look like tiny shards of edible snow, not the fine dust you find in generic brands. The magic happens when we combine these with regular flour, cornstarch, and a secret ingredient: potato starch, which creates those lacy, extra-crispy edges that shatter like thin ice when you bite through them. Season this mixture aggressively with salt, white pepper, and a whisper of five-spice powder — yes, five-spice in katsu is unconventional, but it adds this haunting background note that makes people ask "what's that amazing flavor I can't identify?"
The egg wash gets an upgrade too — instead of plain beaten eggs, we whisk in a tablespoon of the marinade for extra flavor cohesion, plus a splash of cold water to thin it slightly, ensuring it coats evenly without creating thick, gloopy spots that prevent proper adhesion. Cold water is crucial here because it keeps the egg proteins from tightening up too quickly in the hot oil, which can cause the coating to separate from the chicken like a bad toupee in a windstorm.
The Unexpected Star
Here's where we get a little wild: we add a tablespoon of mayonnaise to our egg wash. Stay with me here — this is worth it. The emulsified oil in mayo helps create an even more secure bond between chicken and coating, plus it adds subtle richness that makes the final product taste more indulgent without being greasy. The acidity in the mayo also helps tenderize the surface of the chicken, ensuring every bite is juicy and succulent, not dry and stringy like so many home-cooked chicken breasts become.
For our frying oil, we want something neutral with a high smoke point — peanut oil is my go-to because it adds the faintest nuttiness that complements the chicken beautifully, but refined canola or vegetable oil works if allergies are a concern. The oil temperature is where most people mess up, either too cool (resulting in greasy, pale sadness) or too hot (creating a burnt exterior with raw chicken inside). We're looking for 350°F, which sounds specific because it is — this temperature cooks the coating to golden perfection while giving the chicken time to cook through without drying out.
The Final Flourish
Traditional tonkatsu sauce is delicious but often too thin, running off the crispy coating like water off a duck's back. We solve this by reducing the sauce slightly with a cornstarch slurry, creating a glossy coating that clings lovingly to every ridge and valley of our crispy creation. The sauce gets depth from Worcestershire, sweetness from ketchup, tang from rice vinegar, and umami from a splash of the chicken marinade — nothing goes to waste in this kitchen, and everything harmonizes like a well-rehearsed orchestra.
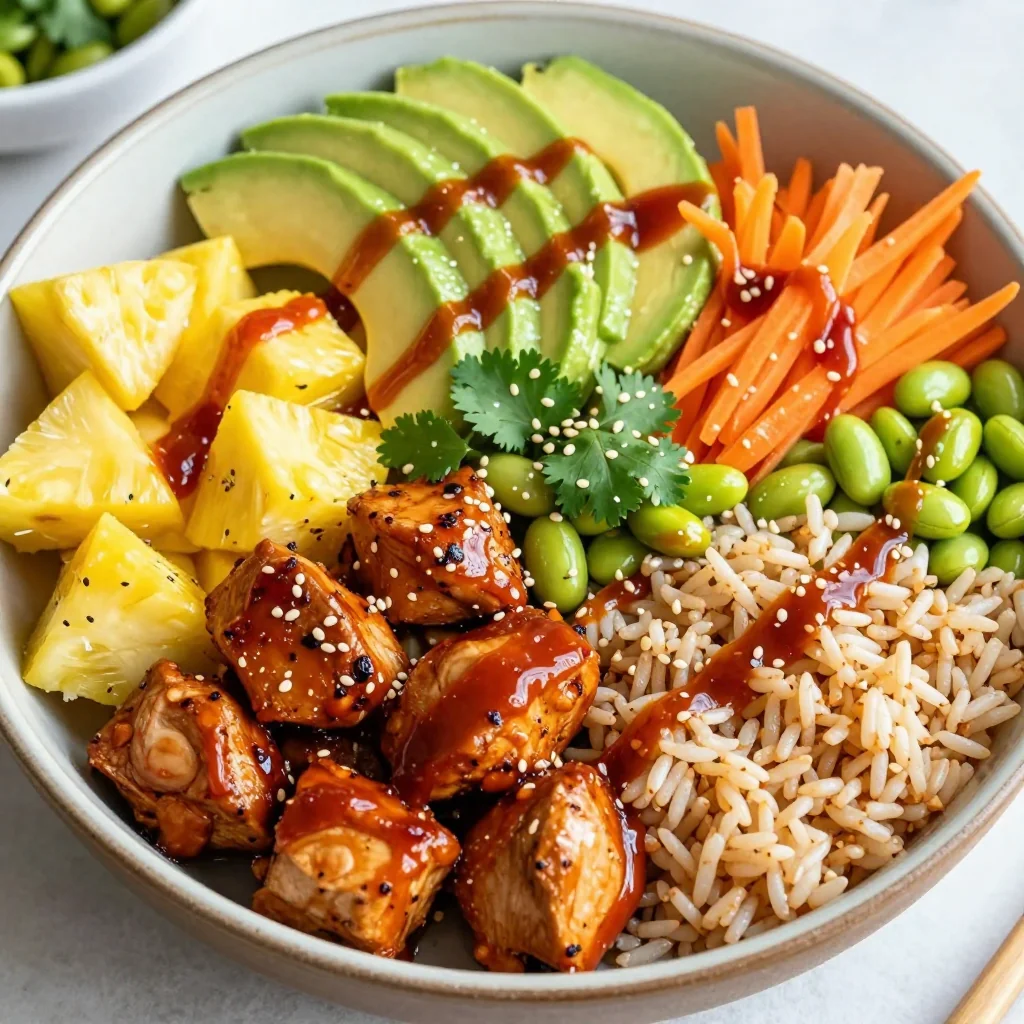
Shredded cabbage isn't just a pretty garnish — its peppery crunch provides the perfect counterpoint to the rich, fried chicken, while a sprinkle of toasted sesame seeds adds nuttiness and visual appeal. A wedge of lemon might seem optional, but that bright acidity cuts through the richness like a ray of sunshine through clouds, making each bite feel less heavy and more balanced. These aren't afterthoughts; they're essential players in the symphony that is perfect chicken katsu.
Everything's prepped? Good. Let's get into the real action...
The Method — Step by Step
- Start with your chicken breasts on a cutting board, and here's where precision matters more than you'd think. Butterfly each breast by slicing horizontally through the middle, stopping about half an inch from the other edge, then open it like a book — this technique ensures even cooking and creates more surface area for our flavor bomb marinade. Place each butterflied piece between two sheets of plastic wrap, and pound with a meat mallet or heavy skillet until uniformly quarter-inch thick, working from the center outward in gentle, even strokes. If you've ever struggled with chicken that cooks unevenly, this step is your salvation — those thick edges that stay raw while the thin parts turn to leather will be a thing of the past. The plastic wrap prevents tearing while containing any raw chicken splatter, because nobody wants to scrub salmonella off their backsplash at 8 PM on a Tuesday.
- Whisk together your marinade in a bowl large enough to comfortably fit all the chicken — we're talking soy sauce, mirin, rice vinegar, sesame oil, microplaned ginger and garlic, and that crucial teaspoon of sugar that helps with caramelization later. The mixture should taste bold and slightly too salty, because most of it will be discarded after marinating, and we need enough flavor to penetrate the chicken thoroughly. Submerge each pounded cutlet in the marinade, turning to coat completely, then let it rest for exactly twenty minutes while you prep your breading station. Set a timer here — longer isn't better, as the acids will start to break down the chicken proteins and create that weird, slightly mushy texture you get from over-marinated meat. While you wait, the kitchen will start smelling like a Japanese izakaya, and family members will mysteriously appear asking "what smells so good?"
- Now for the breading assembly line — set up three shallow dishes in this order: seasoned flour mixture (flour, cornstarch, potato starch, salt, white pepper, and five-spice), egg wash (eggs, mayo, water, and a splash of marinade), and panko that's been partially crushed for maximum crunch adhesion. The key here is using one hand for wet ingredients and one for dry — designate your non-dominant hand as the "dry hand" and your dominant as the "wet hand" to avoid the dreaded club-hand that looks like you've been finger-painting with glue. Take a piece of marinated chicken, letting excess drip off, then press firmly into the flour mixture, ensuring every millimeter is coated — this dry layer creates a barrier that prevents the coating from sliding off during frying. Shake off excess flour before dipping into the egg wash, letting it drip slightly before moving to the panko station.
- Here's where most home cooks rush and ruin everything — the panko coating needs to be pressed on firmly, almost aggressively, to create those microscopic air pockets that will expand during frying and create our shatteringly crisp texture. Take a handful of the crushed panko and press it onto the chicken, then flip and repeat, building up a substantial coating that looks almost too thick — trust me, it will compact during frying. The coating should completely obscure the chicken underneath, like a protective armor of crunchy goodness that will transform into golden perfection. Place each breaded cutlet on a wire rack set over a baking sheet, and let them rest for ten minutes — this crucial step allows the coating to hydrate slightly and adhere better, preventing it from separating like a bad toupee when it hits the hot oil.
- Heat your oil in a heavy-bottomed pot or deep skillet to exactly 350°F, using a deep-fry thermometer because guessing temperatures is how good intentions become greasy disappointments. The oil should be about two inches deep — enough to allow the cutlets to float freely without crowding, which prevents the temperature from dropping too dramatically when you add the chicken. While the oil heats, you'll notice the kitchen filling with anticipation, and that first wisps of heat will start to make the panko coating look even more tempting. Test the oil by dropping in a small piece of panko — it should sizzle immediately and turn golden brown in about thirty seconds, not sink and sit there like a lazy fish or burn instantly like it's been insulted.
- Gently lower one cutlet into the oil, laying it away from you to prevent splashing, and watch as the magic begins — the coating will puff slightly, creating those gorgeous ridges and valleys that catch sauce like edible topographical maps. Don't overcrowd the pot; one or two cutlets maximum depending on size, because adding too much at once drops the oil temperature and results in greasy, soggy coating that tastes like disappointment. Fry for about four minutes per side, using tongs to flip once, until the coating is deep golden brown and the chicken is cooked through — you'll know it's ready when the sizzling sound becomes slightly quieter and the coating looks like it belongs in a food magazine photo shoot.
- The moment of truth arrives when you lift that first cutlet from the oil — hold it above the pot for a few seconds to let excess oil drain off, then transfer to your wire rack set over fresh paper towels. This elevation allows air to circulate underneath, preventing the bottom from steaming and becoming soggy like those sad, flat-bottomed cutlets you get from mediocre restaurants. The coating should be so crisp that you can hear it crack when you gently flex the cutlet, like breaking very thin ice or stepping on perfectly frozen snow. Let it rest for at least five minutes before slicing — this allows the juices to redistribute and prevents them from flooding out like a chicken tsunami when you cut into it.
- While your chicken rests, prepare the sauce by combining tonkatsu sauce ingredients in a small saucepan over medium heat, whisking in a cornstarch slurry to thicken it slightly — you're looking for a consistency that coats the back of a spoon but still flows like warm honey. The sauce should be glossy and slightly reduced, not watery like the bottled stuff that runs off your cutlet faster than guests leaving a party when the host starts cleaning up. Taste and adjust — it should be tangy, sweet, and deeply savory all at once, like liquid umami that makes your tongue do backflips of joy. Keep it warm over low heat while you slice your chicken, but don't let it boil or the cornstarch will break down and you'll lose that perfect clingy texture.
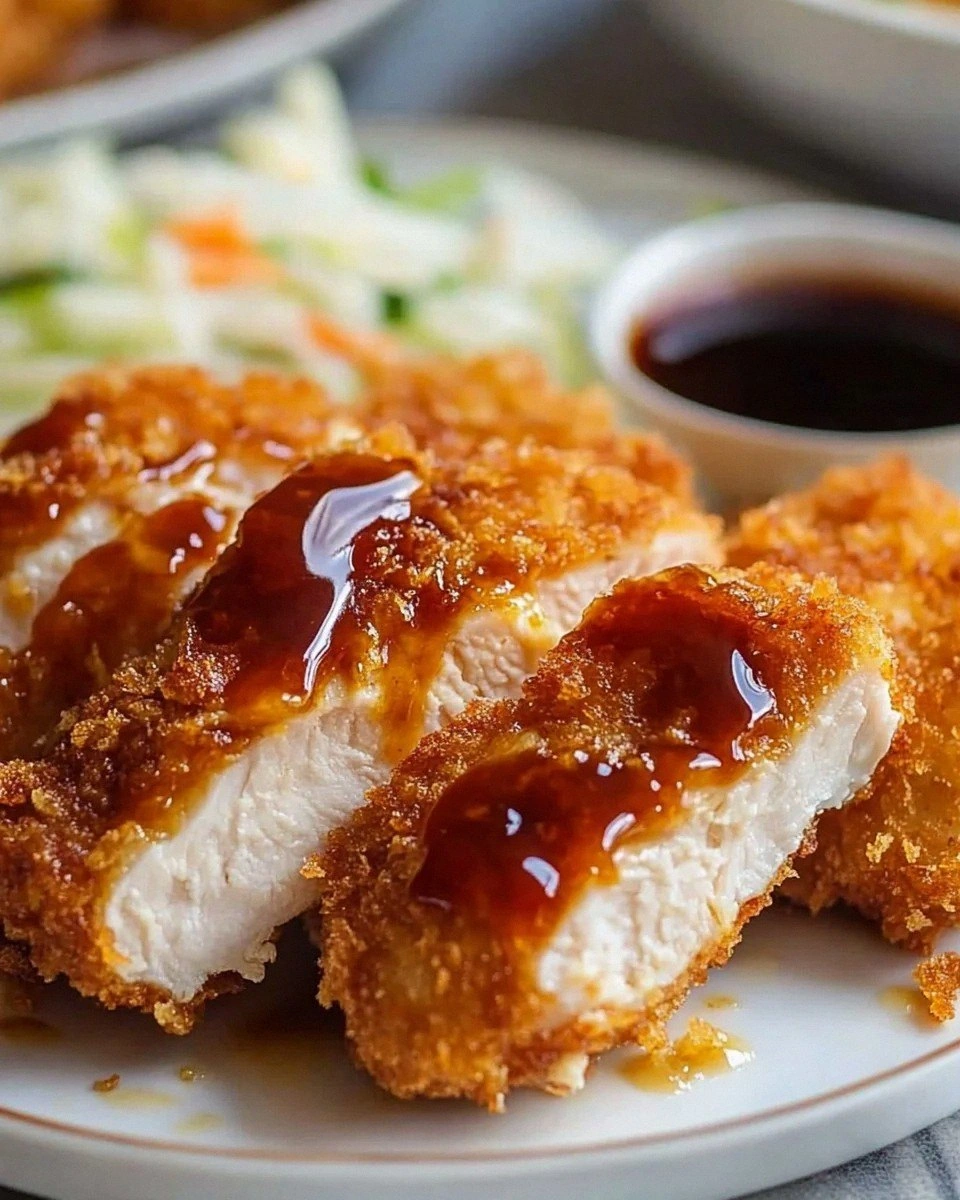
- Slice each cutlet into strips about three-quarters of an inch wide, using a very sharp knife and a gentle sawing motion to avoid crushing that precious crispy coating you've worked so hard to achieve. The cross-section should reveal juicy, perfectly cooked chicken with no pink remaining, but also no dry, stringy texture that makes you reach for water like you've been wandering through a desert. Arrange on a platter with a mound of shredded cabbage, a lemon wedge, and a ramekin of your thickened sauce for dipping — or go rogue and drizzle the sauce artistically over the top like you're plating for a cooking competition. That first bite should produce an audible crunch that echoes through your kitchen, followed by juicy, flavor-packed chicken that makes you close your eyes involuntarily like you're starring in your own food commercial.
- Serve immediately while the coating is at peak crispiness, because katsu waits for no one — it's a fleeting moment of textural perfection that starts declining the second it leaves the oil. If you've got a crowd to feed, keep finished cutlets warm in a 250°F oven on a wire rack set over a baking sheet, but honestly, they're best when served fresh from the fryer while the coating still shatters like autumn leaves underfoot. Garnish with toasted sesame seeds and maybe a sprinkle of chopped scallions if you're feeling fancy, but honestly, this katsu is so good it doesn't need gilding — it's like putting lipstick on a supermodel. Watch as your family or guests take their first bite, because that moment when their eyes widen slightly and they pause mid-chew is when you know you've achieved katsu nirvana.
That's it — you did it. But hold on, I've got a few more tricks that'll take this to another level...
Insider Tricks for Flawless Results
The Temperature Rule Nobody Follows
Here's the thing about oil temperature — everyone obsesses over the number on the thermometer, but they ignore the recovery time, which is actually more important for achieving that perfect texture. When you drop cold chicken into hot oil, the temperature plummets, and if you don't give it time to recover between batches, you'll end up with greasy, sad cutlets that taste like they've been swimming in an oil slick. The pros know to wait a full minute between adding each piece, letting the oil climb back to temperature before introducing the next contender. I learned this the hard way when I tried to rush through a double batch for a dinner party, ending up with cutlets so oily they practically slid off the plate when I tried to serve them — my guests politely dabbed them with paper napkins like they were performing surgery.
But here's the real game-changer: use a heavy cast iron Dutch oven instead of a lightweight skillet — the thermal mass holds heat better and recovers faster, meaning more consistent results and less waiting around like you're watching paint dry. A friend tried skipping this step once, using a thin aluminum pan because "how much difference could it make?" Let's just say her katsu came out looking like it had been fried in lukewarm bathwater, pale and greasy instead of golden and crisp. The investment in a good heavy pot pays dividends not just for katsu, but for everything from fried chicken to homemade doughnuts.
Why Your Nose Knows Best
After you've made this recipe a few times, you'll start to recognize the exact moment when the coating is perfectly cooked by smell alone — it's a nutty, toasty aroma that wafts up just before the coating turns from golden to brown. This is your cue to flip or remove from the oil, and it's more reliable than any timer because every piece of chicken is slightly different, and oil temperature can vary based on altitude, humidity, and whether Mercury is in retrograde. The human nose contains about six million receptors specifically tuned to detect these caramelization compounds, making it more sophisticated than any kitchen gadget you can buy online at 2 AM.
I dare you to taste this and not go back for seconds once you master this smell test — it's like developing a sixth sense for when food is perfectly cooked. My neighbor thought I was being pretentious when I told her about the "aroma method," until she tried it herself and texted me later that she'd finally achieved katsu nirvana after months of mediocre attempts. Now she claims she can smell when anyone in our building is making katsu, like some kind of fried food bloodhound with a supernatural gift.
The 5-Minute Rest That Changes Everything
Most people want to dive right into their freshly fried katsu, but here's where patience pays off in spades — let those cutlets rest on a wire rack for exactly five minutes before slicing, and something magical happens. The internal temperature continues to rise slightly, finishing the cooking process while the juices redistribute throughout the meat instead of flooding your cutting board like a chicken tsunami when you slice too early. This resting period also allows steam to escape from the coating, setting the crust and preventing it from becoming soggy when it hits the cooler air of your dining room.
Picture yourself pulling this out of the oven, the whole kitchen smelling incredible, and having the willpower to wait those crucial five minutes — it's like being a culinary zen master who understands that good things come to those who wait. I've seen grown adults hover over resting katsu like vultures, asking every thirty seconds "is it ready yet?" like impatient children on a road trip. But when they finally slice into that perfectly rested, juicy chicken with its shatteringly crisp coating intact, they understand why the wait was worth every agonizing second.
Creative Twists and Variations
This recipe is a playground. Here are some of my favorite ways to switch things up:
Spicy Katsu with Gochujang Glaze
Replace the traditional tonkatsu sauce with a glossy glaze made from gochujang, honey, rice vinegar, and a touch of butter for richness that clings to the crispy coating like a spicy-sweet hug. The fermented Korean chili paste adds depth and gentle heat that builds slowly instead of assaulting your taste buds, while the honey provides balance and helps the sauce caramelize slightly under a quick broil. This version is perfect for those who find traditional katsu too mild and want something with a little more personality — it's like your katsu went backpacking through Korea and came back with exciting stories and a new wardrobe. Serve with quick-pickled cucumbers and a sprinkle of toasted sesame seeds for a fresh counterpoint to the rich, spicy coating.
Cheese-Stuffed Katsu Bombs
Before breading, place a slice of good melting cheese (I like provolone or fontina) in the center of each butterflied chicken piece, then fold and seal with toothpicks before proceeding with the breading process. When fried, the cheese melts into a molten core that oozes out like liquid gold when you cut into the crispy exterior — it's essentially a Japanese-inspired chicken cordon bleu that will make cheese lovers weep with joy. The key is using cheese that melts smoothly without becoming oily, and sealing the edges completely so the cheese doesn't leak out during frying like a dairy volcano. These are dangerously addictive and perfect for game day or any time you want to impress guests with something that looks way more complicated than it actually is.
Pork Katsu with Apple-Cabbage Slaw
Swap the chicken for pork loin cutlets and serve with a fresh slaw of shredded cabbage, julienned apples, rice vinegar, and a touch of Dijon mustard for a German-Japanese fusion that somehow works beautifully. The sweetness of the apples plays off the savory pork while the vinegar cuts through the richness of the fried coating, creating a balanced bite that doesn't leave you feeling like you need a nap afterward. This variation is particularly good in autumn when apples are at their peak and you're craving something that feels both comforting and fresh at the same time. The pork stays juicier than chicken and has a more robust flavor that stands up to the bold accompaniments.
Vegetarian Eggplant Katsu
Thick slices of Japanese eggplant become the star here, salted and pressed to remove excess moisture before being breaded and fried to crispy perfection — the result is a vegetarian version that even carnivores crave. The eggplant's natural creaminess mimics the texture of perfectly cooked chicken, while its ability to absorb flavors makes it an ideal canvas for our umami-rich marinade and crispy coating. This is perfect for meatless Mondays or when you want to impress your vegetarian friends with something more exciting than another sad portobello mushroom sandwich. The key is using young, firm eggplants and not over-crowding the pan, which can make them steam instead of fry.
Breakfast Katsu Sandwich
Transform leftovers into the ultimate breakfast by placing a sliced katsu cutlet between two pieces of thick toast with a fried egg, some arugula, and a spread of katsu sauce mixed with a little mayo — it's like a Japanese-inspired breakfast sandwich that will ruin all other morning meals for you forever. The combination of crispy coating, runny egg yolk, and peppery greens creates a textural and flavor explosion that makes ordinary breakfast sandwiches seem like sad, dry affairs. This is my go-to for weekend brunch when I want something indulgent but don't feel like making pancakes or dealing with hollandaise sauce that could break at any moment. Plus, it's the best way to use leftover katsu that might have lost some of its crunch overnight.
Mini Katsu Bites for Parties
Cut chicken into one-inch pieces before marinating, then bread and fry for bite-sized katsu that's perfect for parties — serve with toothpicks and a variety of dipping sauces from traditional tonkatsu to spicy mayo to yuzu kosho for a build-your-own flavor adventure. These disappear faster than you can fry them, so make extra and keep them warm in the oven for continuous service throughout your gathering. The small size means they cook in about two minutes, making them ideal for feeding a crowd without spending your whole party chained to the stove like some kind of culinary prisoner. Kids love them because they're essentially fancy chicken nuggets, and adults love them because they taste like childhood upgraded to first class.
Storing and Bringing It Back to Life
Fridge Storage
Store leftover katsu in an airtight container in the refrigerator for up to three days, but here's the crucial part — place a paper towel in the container to absorb excess moisture that would otherwise turn your crispy coating into a sad, soggy mess. Layer the cutlets between sheets of parchment paper to prevent them from sticking together like conjoined twins that refuse to separate without tearing the precious coating. The chicken will stay safe to eat beyond three days, but the quality starts to decline noticeably as the coating absorbs moisture from the refrigerator's humid environment, turning your once-shatteringly crisp creation into something that tastes like it was left out in the rain. If you've ever struggled with storing fried foods, you're not alone — and I've got the fix that will change your leftover game forever.
Freezer Friendly
Here's where this recipe really shines — you can freeze the breaded, uncooked cutlets on a baking sheet until solid, then transfer to freezer bags with parchment between layers for up to two months. When the katsu craving strikes, fry directly from frozen for just a minute or two longer than fresh, resulting in a cutlet that's almost indistinguishable from the original. This is perfect for those nights when you want something impressive but don't feel like going through the whole breading process, or when you want to impress unexpected guests with homemade food that tastes like you planned ahead. The key is freezing them flat first so they don't stick together in one solid block that would make a caveman jealous of your ice age preservation techniques.
Best Reheating Method
Whatever you do, avoid the microwave unless you enjoy eating rubbery coating that tastes like it was steamed in a sauna — instead, reheat in a 400°F oven on a wire rack set over a baking sheet for 8-10 minutes, flipping halfway through. The wire rack allows hot air to circulate underneath, crisping the bottom instead of steaming it into submission like a sad, defeated kitchen towel. For an extra crispy revival, spray the coating lightly with cooking spray before reheating — this reactivates the oil in the breading and helps recreate that fresh-from-the-fryer texture that makes angels sing. If you're really serious about texture, reheat in an air fryer at 375°F for 3-4 minutes, which produces results so close to fresh that you might fool yourself into thinking you just made a whole new batch.