Love this? Pin it for later! 📌
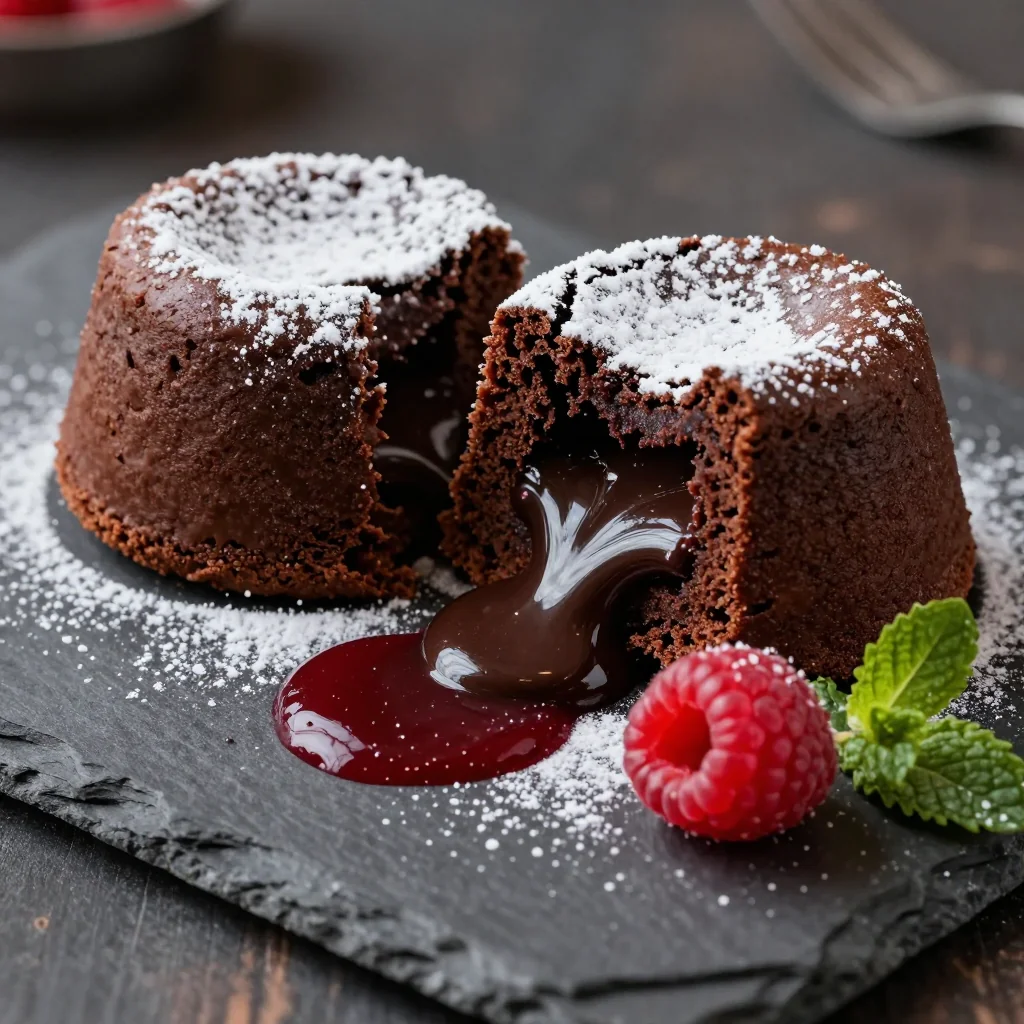
Silky, decadent, and irresistibly gooey—this is the dessert that makes grown-ups close their eyes and sigh with delight.
I still remember the first time I tasted a chocolate lava cake. It was at a tiny bistro in Paris, candlelight flickering against the worn wood tables, the hum of conversation around me fading to white noise as my fork pierced that delicate cake wall and molten chocolate came rushing out like liquid velvet. One bite and I was ruined for all other desserts. Since then I’ve baked my way through dozens of recipes—some too eggy, others that baked up cakey—until I landed on this version. It’s the one I make for milestone anniversaries, for snow-day surprises, for Valentine’s when the florist is sold out of roses and the only thing left is the language of chocolate. If you can hold a whisk and set a timer, you can master this restaurant-worthy showstopper at home—no pastry degree required.
Why This Recipe Works
- Perfect Chocolate Ratio: A balanced mix of bittersweet bar chocolate and Dutch-process cocoa delivers both deep flavor and fluid molten centers.
- Room-Temperature Eggs: They whip higher, giving the batter structure so the exterior bakes while the interior stays saucy.
- Chilled Molds: A quick 10-minute freeze helps the edges set faster, widening that coveted lava window.
- Make-Ahead Magic: Mix can be portioned into ramekins and frozen up to one month—bake straight from frozen for impromptu entertaining.
- Gluten-Free Friendly: Just 2 Tbsp of flour (or cornstarch) keeps the texture silky; swap in almond flour for a GF version with zero sacrifice.
- 12-Minute Sweet Spot: After rigorous testing, 450 °F for 12 minutes produces the thinnest crust with the moltenest middle—set your timer and trust it.
Ingredients You'll Need
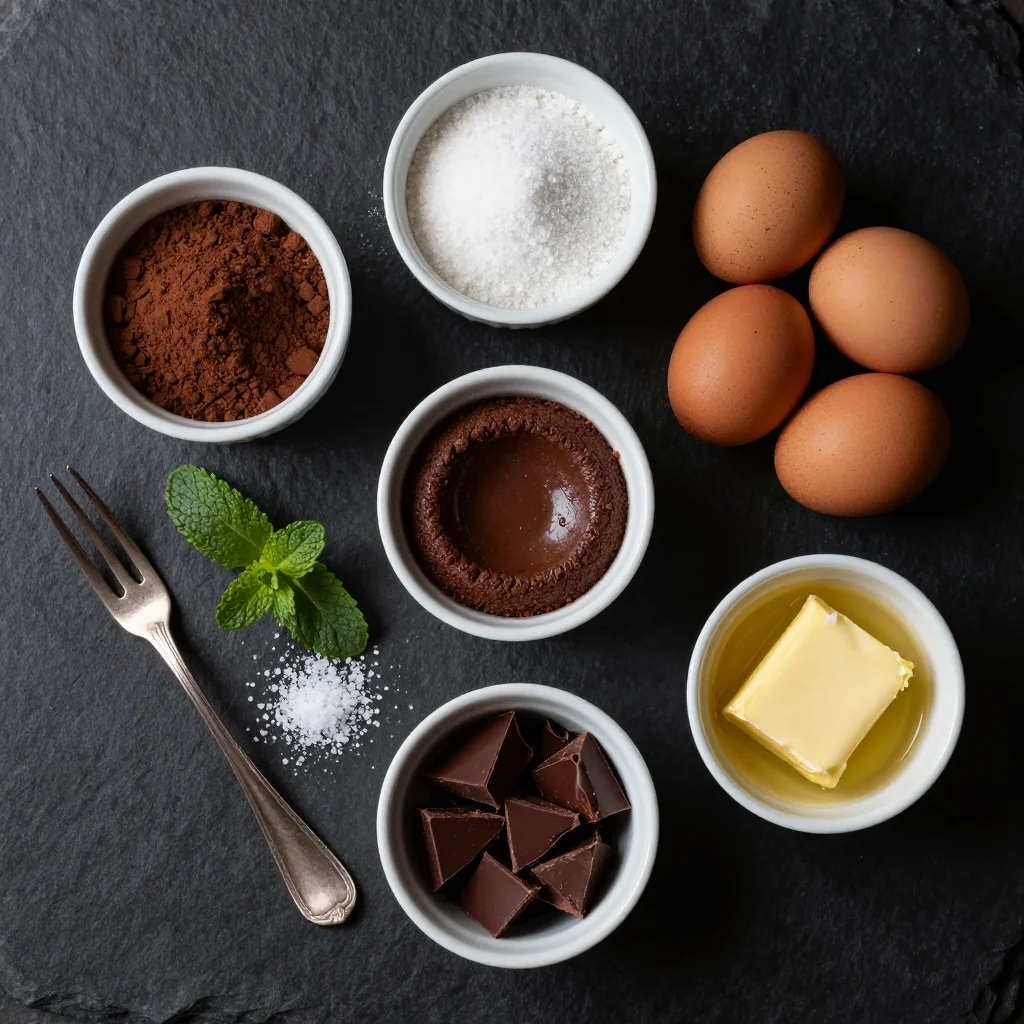
Great chocolate is non-negotiable here—splurge on the best bar you can find. The following quantities fill six 4-oz ramekins; scale as needed for romance or a dinner party.
- Bittersweet Chocolate (70% cacao): 4 oz / 113 g—look for brands with cocoa butter as the first fat; avoid chips with stabilizers that inhibit melting.
- Unsalted Butter: 4 Tbsp / 56 g—European-style (82% fat) adds extra richness.
- Dutch-Process Cocoa Powder: 1 tsp for backbone depth; natural cocoa works in a pinch but the flavor will be brighter and slightly tangy.
- Large Eggs: 2, plus 1 extra yolk for added lava volume.
- Granulated Sugar: ¼ cup / 50 g—superfine sugar dissolves faster if you keep it on hand.
- Vanilla Extract: ½ tsp—use pure extract; paste is lovely if you want those flecks.
- All-Purpose Flour: 2 Tbsp / 16 g—sift to avoid white specks. Substitute equal parts cornstarch for a silkier crumb or almond flour for gluten-free.
- Fine Sea Salt: ⅛ tsp—amplifies chocolate the way a frame showcases art.
- Optional Espresso Powder: ⅛ tsp—coffee’s roasted bitterness makes chocolate taste more chocolatey without reading as mocha.
- For Dusting: 1 tsp cocoa + 1 tsp sugar to buttered ramekins—creates a micro-crust that releases like magic.
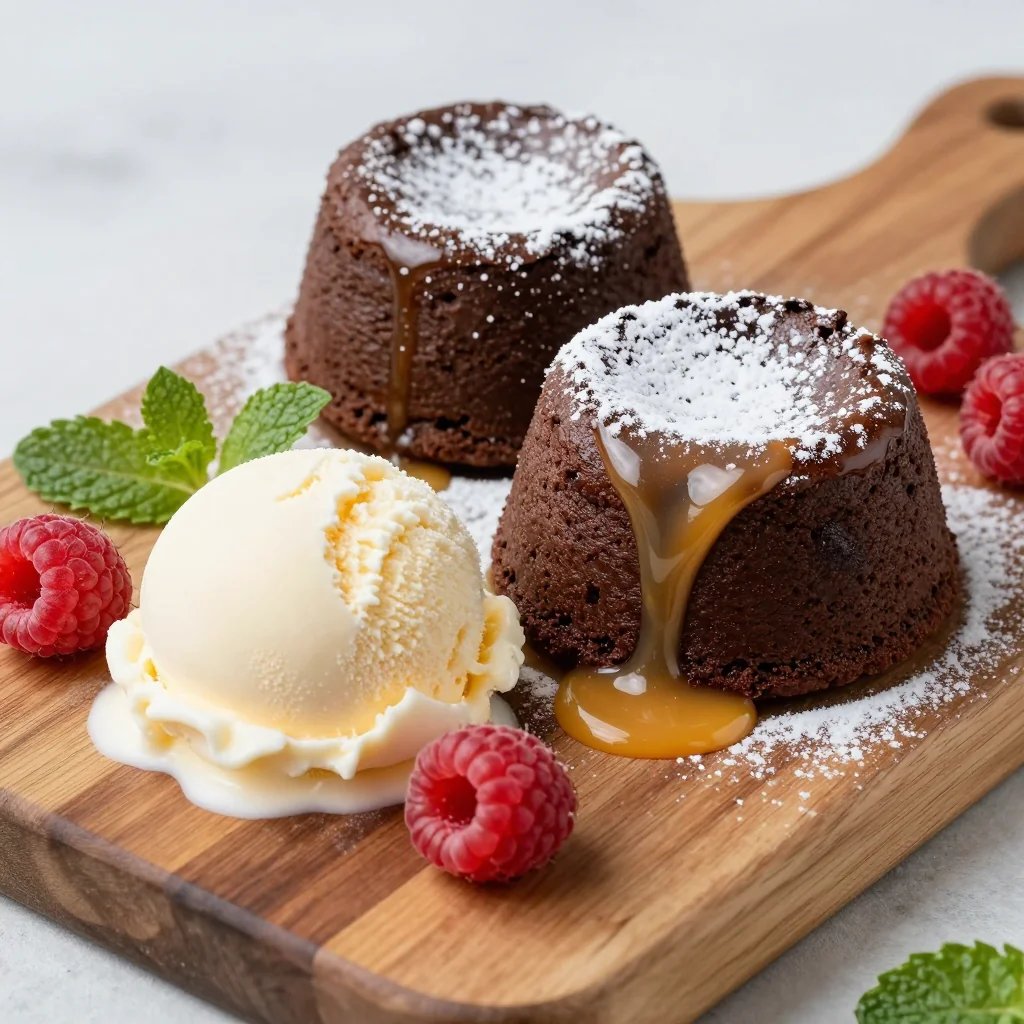
- Serving Suggestions: powdered sugar, raspberries, cold brew whipped cream, or a shot of espresso for the full Italian experience.
How to Make Warm Molten Chocolate Lava Cakes for Dessert
Prep Ramekins
Generously brush six 4-oz ramekins with softened butter, brushing upward strokes to help rising. Dust with the cocoa-sugar mixture, tapping out excess. Place on a small sheet pan and freeze for 10 minutes while you mix the batter.
Melt Chocolate & Butter
In a heat-proof bowl set over a pan of barely simmering water, combine chopped chocolate and butter. Stir frequently until melted and glossy. Remove bowl from heat and whisk in cocoa powder and espresso powder until smooth; let stand 5 minutes to cool slightly so the eggs don’t scramble.
Whip Eggs & Sugar
In a separate bowl, whisk eggs, yolk, sugar, vanilla, and salt vigorously for 60 seconds—you’re looking for a pale, slightly thickened mixture that ribbons when lifted. A handheld mixer on medium speed works here if you prefer.
Combine & Fold
Pour cooled chocolate mixture onto egg mixture; fold with a silicone spatula until homogenous. Sprinkle flour over top and fold just until you no longer see dry streaks. Over-mixing develops gluten and can thicken the lava.
Portion
Divide batter among chilled ramekins, filling ¾ full (about ⅓ cup each). Tap pan gently to level tops. At this point you can cover with plastic wrap and refrigerate up to 24 hours, or freeze up to 1 month. If freezing, wrap each ramekin individually once solid.
Preheat Oven
Place oven rack in lower third and preheat to 450 °F / 230 °C. Allow at least 15 minutes for the oven to stabilize; a screaming-hot environment sets the exterior quickly while the heart stays fluid.
Bake
Slide pan into oven and bake 12 minutes exactly. Edges should look firm and matte, centers still a little jiggly and glossy. If baking from frozen, add 2–3 minutes and check with the gentle poke test.
Unmold & Serve
Set a small plate (preferably warm) on top of a ramekin, grasp both with oven-gloved hands and invert. Let stand 20 seconds, then lift ramekin—cake should release with a gentle nudge. Dust with powdered sugar, add berries, and serve immediately; lava waits for no one.
Expert Tips
Use an Oven Thermometer
Home ovens can drift 25–50 °F. A $8 thermometer guarantees the precise heat that separates lava from cake.
No Mixer? No Problem
A balloon whisk and elbow grease build just enough air; think of it as your forearm workout before dessert.
Chocolate Matters
Choose bars you’d happily nibble plain. Cheap baking chips contain stabilizers that resist melting, robbing you of lava.
Check at 10 Minutes
If your ramekins are shallow or your oven runs hot, start peeking early. A gentle poke should feel like gelatin, not cake.
Serve on Warm Plates
Cold ceramic steals heat fast. Rinse plates under hot water, dry, and your lava will flow all the way to the table.
Clean Release Trick
Run a thin knife around the edge immediately after baking, then invert—gravity plus a dusted ramekin equals flawless unmolding.
Variations to Try
-
Peanut Butter
Flavor: Drop 1 tsp chilled peanut butter into center before baking for a Reese’s-style core.
-
Spiced Mexican
Flavor: Add ¼ tsp cinnamon and a pinch of cayenne to the chocolate for subtle warmth.
-
White Chocolate Raspberry
Flavor: Swap bittersweet for quality white chocolate and press 3 raspberries into each center.
-
Dairy-Free
Flavor: Replace butter with refined coconut oil; use 60% dark dairy-free chocolate.
-
Orange Zest
Flavor: Whisk ½ tsp finely grated orange zest into sugar before mixing for a perfumed lift.
-
Matcha Lava
Flavor: Stir 1 tsp matcha into flour for earthy color and subtle tea bitterness that balances sweetness.
Storage Tips
Make-Ahead: Fill ramekins, cover tightly, and refrigerate up to 24 hours. When ready to serve, bake straight from the fridge, adding 1 extra minute. For longer storage, freeze the filled ramekins until solid, then wrap in a double layer of plastic and foil; bake from frozen 14–15 minutes.
Leftovers: If you somehow have uneaten cakes, refrigerate in the ramekin. Reheat in a 350 °F oven for 8 minutes; the center will be fudgy rather than molten but still delicious. Microwaves work in a pinch (20-second bursts), though texture suffers.
Freezing Baked Cakes: Cool completely, unmold, wrap individually, and freeze up to 1 month. Thaw overnight in the fridge, then warm 8 minutes at 325 °F for a dessert emergency.
Frequently Asked Questions
Warm Molten Chocolate Lava Cakes for Dessert
Ingredients
Instructions
- Prep: Brush six 4-oz ramekins with butter, dust with cocoa-sugar, and freeze 10 minutes.
- Melt: Combine chocolate and butter over simmering water; stir until smooth. Whisk in cocoa and espresso; cool 5 minutes.
- Whip: Whisk eggs, yolk, sugar, vanilla, and salt until pale and thick.
- Combine: Fold chocolate into egg mixture, then fold in flour just until combined.
- Portion: Divide batter into ramekins (¾ full). Refrigerate or freeze as desired.
- Bake: Preheat oven to 450 °F. Bake 12 minutes (add 2–3 min if frozen) until edges are firm, centers jiggly.
- Serve: Invert onto warm plates, dust with powdered sugar, add berries, and enjoy immediately.
Recipe Notes
For gluten-free, substitute 2 Tbsp almond flour or cornstarch. Cakes can be frozen unbaked up to 1 month; bake straight from frozen adding 2–3 minutes. Serve with cold brew whipped cream or a shot of espresso.