I still remember the day I ruined a perfectly good sheet cake. It was one of those humid Texas afternoons where the air feels like warm syrup, and I was trying to impress my future mother-in-law with her own family recipe. The cake stuck to the pan like it had mortgage papers attached, the frosting seized up into something resembling asphalt, and I may have cried into the dish towel for a solid five minutes. Fast forward three years, and that same woman now texts me every other week begging for these Texas Sheet Cake Cookies. The irony is sweeter than the chocolate.
What started as a kitchen disaster became an obsession. I spent months chasing that same fudgy texture, that deep cocoa flavor that punches you in the taste buds before melting into buttery bliss, that thin layer of glossy frosting that crackles like thin ice when you bite through it. Traditional sheet cake is magnificent, but it's also needy — it requires a jelly roll pan, precise timing, and the patience of a saint. Cookies, though? Cookies are forgiving. Cookies are portable. Cookies can be hidden in your desk drawer for emergency chocolate situations.
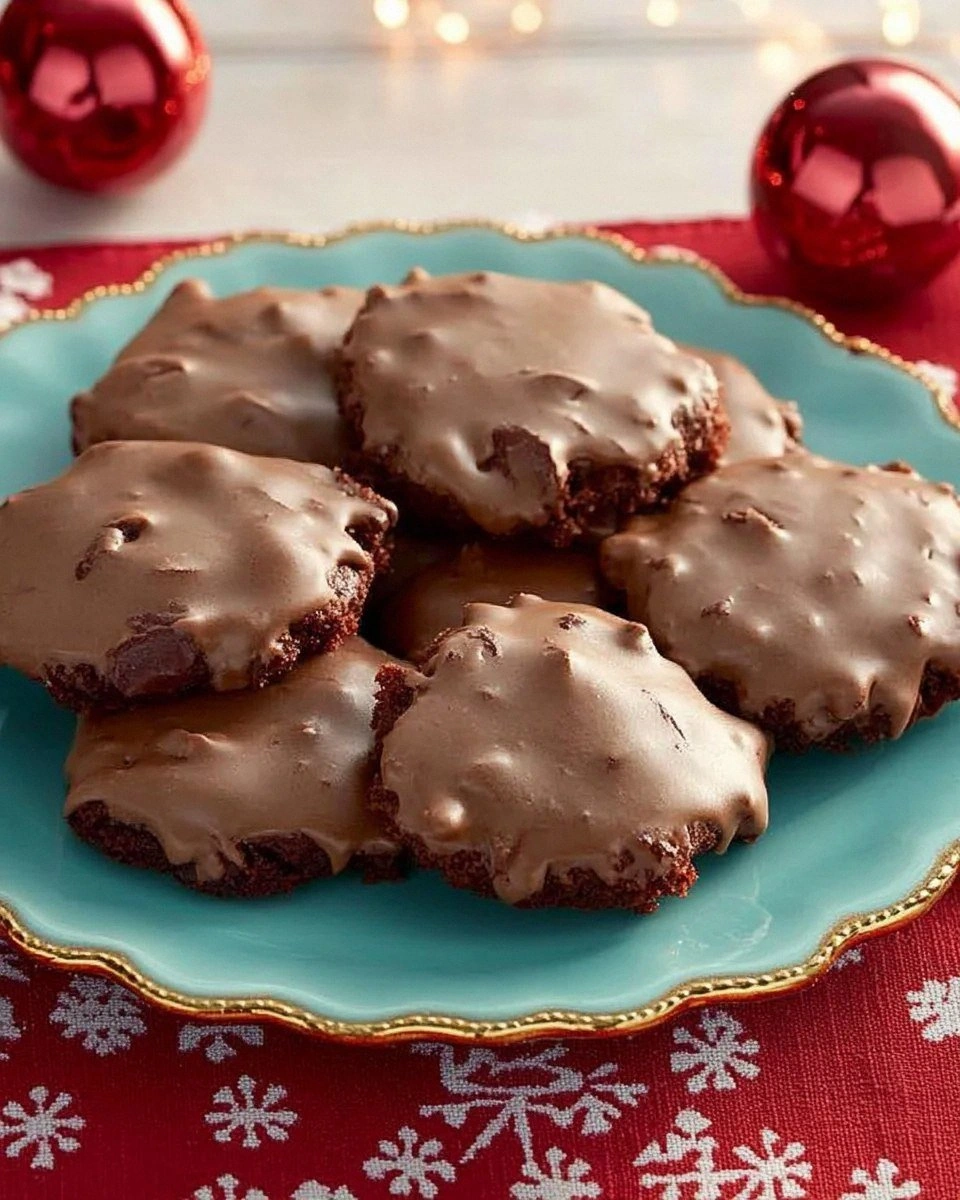
Picture this: it's 9:47 PM on a Tuesday, you're wearing the same sweatpants you've had since college, and suddenly you need chocolate like oxygen needs lungs. These cookies answer that call in under thirty minutes. They start with a dough that comes together in one bowl — no mixer required, no chilling time, no rolling pins or cookie cutters. While they're baking, you whisk together a warm frosting that you pour over the cookies the moment they come out of the oven. The heat from the cookies melts the frosting into every nook and cranny, creating this glossy chocolate shell that crackles when you bite into it.
But here's the real kicker — these aren't just chocolate cookies with frosting. These are the essence of Texas sheet cake distilled into handheld form. That means they're supposed to be a little messy. They're supposed to be rich enough that you can't eat more than two without questioning your life choices. They're supposed to have edges that crisp like caramel and centers that stay soft for days. Let me walk you through every single step — by the end, you'll wonder how you ever made it any other way.
What Makes This Version Stand Out
Lightning Fast: From zero to cookie in twenty-two minutes flat. No chilling, no waiting, no "let the dough rest overnight" nonsense. This recipe understands that when you want chocolate, you want it now, not tomorrow after you've contemplated your existence for eight hours.
One-Bowl Wonder: Everything mixes in a single bowl using just a whisk and wooden spoon. No stand mixer taking up counter space, no four different bowls for dry and wet ingredients. We're making cookies here, not performing brain surgery.
Foolproof Frosting: The warm frosting gets poured over warm cookies, creating a natural bond that won't slide off like other cookie frostings. It's like they were made for each other, which technically they were, but still.
Texture Heaven: Crispy edges that shatter like thin ice, chewy centers that stay soft for days, and that glossy chocolate top that cracks like crème brûlée when you bite through it. It's a textural experience that'll make your mouth confused in the best possible way.
Pantry Staples Only: No buttermilk, no corn syrup, no specialty chocolate that costs more than your monthly coffee budget. Everything comes from the baking aisle of any grocery store, which means you can make these at 2 AM when the craving hits.
Make-Ahead Magic: The dough keeps in the fridge for three days, and the baked cookies freeze like champions for up to three months. Make a double batch, freeze half, and you'll be the hero of future you's midnight snack attacks.
Crowd Control: One batch makes exactly twenty-four cookies, which sounds like plenty until you realize you're going to eat six while they're still warm. I dare you to taste this and not go back for seconds. Actually, I double dog dare you.
Alright, let's break down exactly what goes into this masterpiece...
Inside the Ingredient List
The Flavor Base
Butter is the foundation here, and not just any butter — we're talking the good stuff, the European-style butter with 82% fat content that makes regular butter taste like disappointment. It gives these cookies their rich, almost caramel-like flavor that makes people close their eyes when they take the first bite. Don't even think about substituting margarine unless you want your cookies to taste like sad birthday parties from 1987. The butter gets melted and slightly browned, which adds those nutty, toasty notes that make people ask "what's that flavor?" while reaching for their third cookie.
Dark cocoa powder is what gives these cookies their almost black color and intense chocolate flavor. Don't grab that pale, wimpy cocoa from the back of your pantry — we're going for the Dutch-processed stuff that looks like powdered midnight. It has less acidity than natural cocoa, which means it plays nicer with the baking soda and creates a deeper, more complex chocolate flavor. If all you have is regular cocoa, you can use it, but know that you're missing out on what could have been a religious experience.
The Texture Crew
Granulated sugar does more than sweeten — it creates those crispy edges that snap when you break a cookie in half. The crystals cut through the butter as it melts, creating tiny air pockets that give us structure. Brown sugar brings moisture and chew, plus those butterscotch notes that make people ask if there's toffee in the cookies. I use a 2:1 ratio of white to brown because I want crispy edges more than I want chewy centers, but you can flip that ratio if you're a chewy cookie person.
Eggs are the glue that holds everything together, but they also add richness and help create that glossy top. One whole egg plus one egg yolk is my secret weapon — the extra yolk adds fat and emulsifiers that make the cookies almost fudgy in the center. Save the white for an omelet tomorrow, or better yet, make a half-batch of meringue cookies while these are baking. Multi-tasking at its finest.
The Unexpected Star
Espresso powder is my secret ingredient, and no, it doesn't make the cookies taste like coffee. It amplifies the chocolate flavor in a way that makes people say "wow, these are really chocolatey" without being able to pinpoint why. Just a quarter teaspoon is enough to make the cocoa taste more chocolatey, which sounds like witchcraft but is actually food science. If you don't have espresso powder, you can substitute with instant coffee ground to a powder, but reduce it to an eighth of a teaspoon unless you want mocha cookies.
Cinnamon is the Texas in Texas Sheet Cake, that whisper of warmth that makes people ask for the recipe. It's subtle — just a pinch — but it bridges the gap between the chocolate and the buttery frosting in a way that makes perfect sense once you taste it. Some recipes use more, but I find that too much cinnamon turns these into Mexican chocolate cookies, which are delicious but not what we're making here.
The Final Flourish
Buttermilk in the frosting is what makes it pourable and gives it that tangy note that keeps it from being cloyingly sweet. If you don't have buttermilk, you can make a substitute by adding a teaspoon of white vinegar to regular milk and letting it sit for five minutes. The acid reacts with the baking soda in the cookies and creates a more tender crumb, plus it adds that authentic tang that makes people ask if you used cultured butter.
Pecans are traditional in Texas sheet cake, but I make them optional because I have strong feelings about nuts in desserts. If you're a pecan person, toast them first in a dry pan until they smell like popcorn and your kitchen smells like a Texas roadhouse. Chop them medium-fine — not so big they interfere with the frosting, not so small they disappear into the background. And if you're anti-nut, just leave them out. These cookies are magnificent either way.
Everything's prepped? Good. Let's get into the real action...
The Method — Step by Step
- Start by preheating your oven to 350°F and lining two baking sheets with parchment paper. Don't use silicone mats here — we're going for crispy bottoms, and parchment helps achieve that caramelized edge that makes these cookies special. While the oven heats, melt one cup of butter in a medium saucepan over medium heat. You're looking for it to foam and sizzle, then quiet down as the water evaporates. Keep swirling the pan until you see little brown speckles forming and it smells like hazelnuts. This takes about 4-5 minutes, but don't walk away — butter goes from perfect to burnt faster than your ex's new relationship.
- While the butter cools slightly (you want it warm but not hot enough to scramble eggs), whisk together the flour, cocoa powder, baking soda, salt, and espresso powder in a large bowl. Use a whisk to break up any cocoa lumps — nobody wants to bite into a pocket of dry cocoa. The mixture should look like midnight-colored snow, dark and inviting. If you've got kids around, this is when they lose their minds over how black the cocoa makes everything look.
- Pour the warm browned butter over the sugar in your biggest mixing bowl. Add the brown sugar and stir until it looks like wet sand at a chocolate beach. The heat from the butter will start dissolving the sugar, which helps create that glossy top we're after. Let it sit for a minute while you separate your egg, then whisk in the whole egg, egg yolk, and vanilla. The mixture should look like caramel and smell like a bakery.
- Here's where most recipes get it completely wrong. They dump everything together and wonder why their cookies are tough. We're going to fold the dry ingredients in three additions, mixing just until the flour disappears. Over-mixing develops gluten, which turns your tender cookies into hockey pucks. The dough will be soft and slightly shiny, like chocolate play-doh that's been left in a warm car.
- Scoop the dough into rounded tablespoons and roll them into balls. Place them two inches apart on your prepared sheets — these cookies spread like gossip in a small town. I use a #40 cookie scoop, which gives me exactly 24 cookies and makes me feel like I have my life together. If you're rolling by hand, aim for balls the size of ping pong balls, not golf balls. Bigger cookies mean under-baked centers and burnt edges.
- Bake for 9-11 minutes, rotating the pans halfway through. You're looking for edges that look set but centers that still seem underdone. They'll continue cooking on the hot pan, so pull them when they look like they need another minute. The tops should be cracked and glossy, like brownies that decided to become cookies. If you've ever struggled with this, you're not alone — and I've got the fix. Err on the side of under-baking; you can always pop them back in, but you can't un-bake an overdone cookie.
- While the cookies bake, make the frosting because timing is everything here. Combine the butter, cocoa, and buttermilk in a small saucepan and bring it to a gentle boil. You want the butter fully melted and the mixture to look like chocolate soup. Remove from heat and whisk in the powdered sugar until smooth. It should coat the back of a spoon like velvet and smell like a chocolate factory. If it seems too thick, add buttermilk a teaspoon at a time. Too thin? More powdered sugar.
- The moment the cookies come out of the oven, pour the warm frosting over them. Use the back of a spoon to spread it into a thin, even layer that covers every cookie. The heat from the cookies keeps the frosting fluid just long enough to settle into a glossy sheet. If you're using pecans, sprinkle them on now while the frosting is still warm. Work quickly — once that frosting starts to set, it's not inviting any nuts to the party.
- Let the cookies cool on the pan for 10 minutes before transferring to a wire rack. This is the hardest part because they smell like chocolate heaven and look like they want to be eaten immediately. Resist. The frosting needs time to set into that signature crackly top. If you try to move them too early, they'll fall apart in your hands like chocolate confetti. Ten minutes feels like an eternity, but it's the difference between cookies and cookie crumbs.
- That's it — you did it. But hold on, I've got a few more tricks that'll take this to another level...
Insider Tricks for Flawless Results
The Temperature Rule Nobody Follows
Room temperature ingredients aren't just for snobby baking blogs — they actually matter here. Cold eggs won't incorporate properly into the warm butter, leaving you with streaky dough that bakes unevenly. Take your eggs out 30 minutes before you start, or if you're impatient like me, submerge them in warm tap water for five minutes. Same goes for the buttermilk — cold buttermilk will seize your frosting faster than you can say "chocolate emergency."
Why Your Nose Knows Best
Don't rely on timers alone — your nose is the most accurate baking tool you own. When these cookies are perfectly baked, your kitchen will smell like a chocolate factory had a baby with a caramel shop. If you smell something toasty and nutty, they're probably done. If you smell something burnt, you've gone too far and need to start over with a new batch. A friend tried skipping this step once — let's just say it didn't end well for her cookie reputation.
The 5-Minute Rest That Changes Everything
After mixing the dough, let it rest for exactly five minutes before scooping. This allows the flour to fully hydrate and the butter to cool slightly, which means your cookies won't spread into chocolate puddles. It also gives the baking soda time to start working, creating little air pockets that make the cookies lighter. Set a timer — five minutes is the sweet spot. Less and they spread too much, more and they become dense little chocolate bricks.
Frosting Consistency Secrets
The frosting should coat your spoon but still pour easily — think warm maple syrup, not thick pudding. If it's too thick, it won't spread smoothly over the cookies. Too thin and it'll run off the edges and pool underneath, creating a sticky mess. The test: dip a spoon in the frosting, pull it out, and count to three. The frosting should stop dripping by the count of three but still look glossy and fluid. Adjust with milk or powdered sugar until you nail this consistency.
Storage That Actually Works
These cookies stay fresh for up to five days in an airtight container, but here's the secret: add a slice of sandwich bread to the container. The bread will go stale while the cookies stay soft, like some kind of moisture-transfer magic trick. Replace the bread every other day. I've kept these cookies soft for a full week using this method, which is either impressive or concerning depending on how fast you eat cookies.
Creative Twists and Variations
This recipe is a playground. Here are some of my favorite ways to switch things up:
Mexican Hot Chocolate Cookies
Add a teaspoon of cinnamon and a quarter teaspoon of cayenne to the dough. Replace the vanilla with almond extract and sprinkle the frosted cookies with cinnamon-sugar. The heat builds slowly, hitting you after you swallow, like a chocolate surprise party in your mouth. These are perfect for people who think dessert should be an adventure, not just a sweet ending.
White Chocolate Texas Cookies
Swap the cocoa powder for an equal amount of flour and add white chocolate chips to the dough. For the frosting, use white chocolate instead of cocoa powder and add a teaspoon of vanilla bean paste. They're like the albino cousin of the original — different but equally addictive. The white chocolate frosting sets into a fudge-like consistency that's completely different from the original but equally dangerous.
PB&J Texas Style
Replace half the butter with peanut butter and press a thumbprint into each cookie before baking. Fill the indentations with grape jelly after frosting. It's like elementary school lunch got a sophisticated makeover. The peanut butter adds protein, which means these are basically health food, right? Right.
Salted Caramel Upgrade
Drizzle warm caramel sauce over the frosted cookies and finish with flaky sea salt. The salt cuts through the sweetness and makes the chocolate taste more chocolatey, which seems impossible but isn't. Use good salt here — the cheap stuff tastes like chemicals and will ruin your cookies faster than you can say "Himalayan pink."
Mint Chocolate Madness
Add a teaspoon of peppermint extract to both the dough and the frosting. Use Andes mints instead of pecans on top. These taste like thin mints had a baby with Texas sheet cake, and that baby grew up to be delicious. They're especially good frozen, which is either brilliant or dangerous depending on your self-control.
Double Down Chocolate
Add a cup of mini chocolate chips to the dough and use dark cocoa in both the cookies and frosting. These are for serious chocolate lovers only — people who think milk chocolate is for children and dark chocolate is a food group. They're almost black and taste like chocolate squared, which is either your dream or your nightmare.
Storing and Bringing It Back to Life
Fridge Storage
These cookies actually benefit from a night in the fridge — the flavors meld and the frosting firms up into a truffle-like consistency. Store them in an airtight container with parchment between layers. They'll keep for up to a week, though good luck making them last that long. The cold intensifies the chocolate flavor, making them taste like expensive candy bars from a boutique chocolate shop.
Freezer Friendly
Freeze the cookies in a single layer on a baking sheet until solid, then transfer to a freezer bag with parchment between layers. They'll keep for three months, which is approximately how long it takes for the next chocolate craving to hit. Thaw at room temperature for 30 minutes, or microwave for 10 seconds if you're impatient. The frosting might crack slightly when thawed, but it just adds to the homemade charm.
Best Reheating Method
Skip the microwave unless you like soggy cookies. Instead, wrap cookies in foil and warm them in a 300°F oven for 5-7 minutes. Add a tiny splash of water before sealing the foil — it steams back to perfection. The frosting will get glossy again, and the edges will crisp up like they just came out of the oven. It's like time travel for cookies, minus the paradoxes and complicated physics.