Picture this: a rainy Saturday afternoon, the kind where you’re stuck between a half‑finished novel and a gnawing craving for something that feels both indulgent and bright. I was in the kitchen, half‑heartedly whipping up a batch of generic lemon bars, when the batter decided to betray me and turned into a gloopy mess that clung to the spoon like a bad ex. I stared at the disaster and thought, “If I’m going to ruin my day, at least I’ll make it spectacular.” That moment sparked a reckless dare to the universe: I would reinvent the lemon bar, fuse it with coconut, and create a dessert so creamy it would make the original weep with envy. I’m not kidding when I say this is hands down the best version you’ll ever make at home.
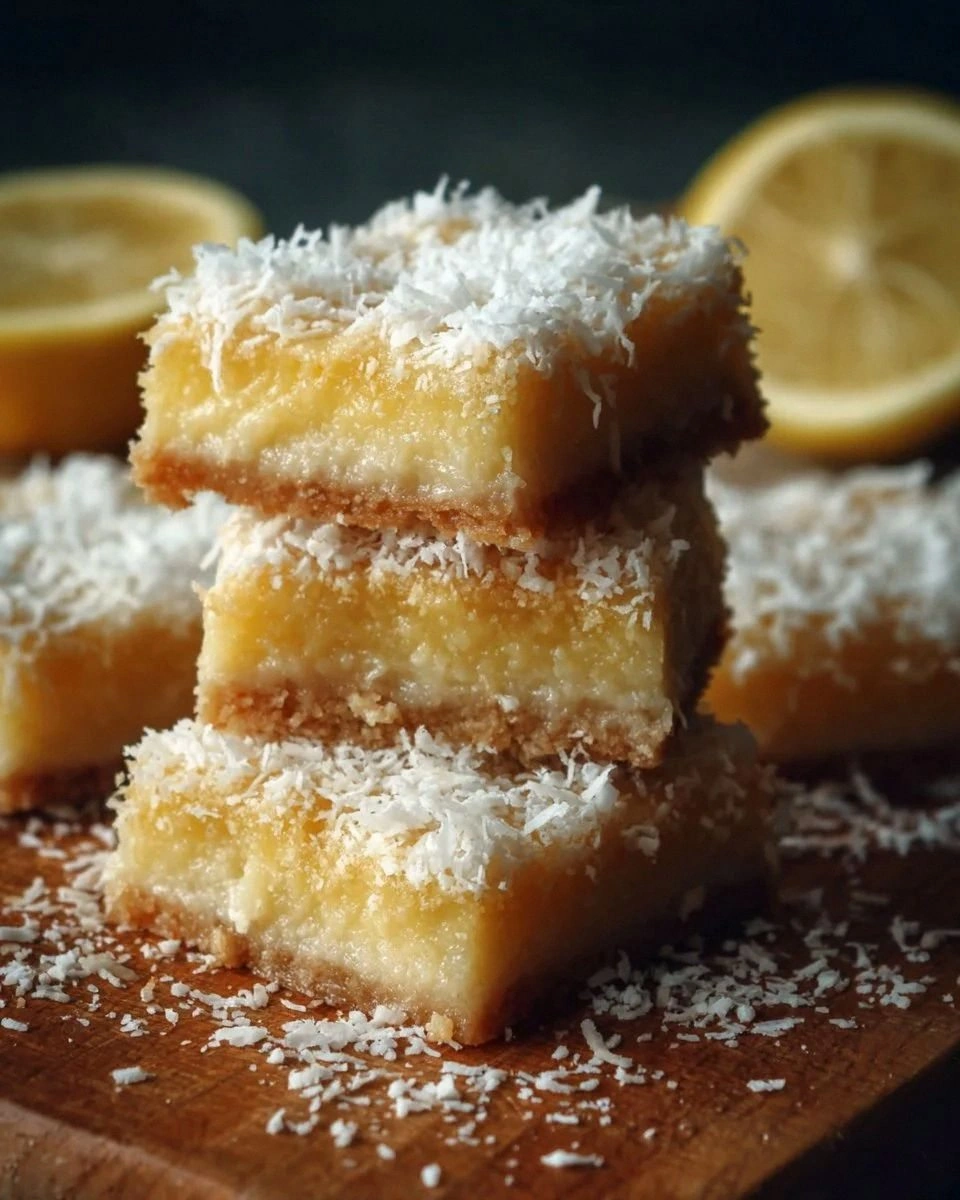
The first bite is a symphony of sunshine and tropical breeze. The crust is buttery, with a whisper of powdered sugar that caramelizes just enough to give it a delicate crunch that shatters like thin ice under your fork. Then the filling swoops in, a silky, lemon‑kissed custard that clings to the tongue like velvet, while toasted coconut flakes add a subtle, nutty crunch that makes each mouthful feel like a mini vacation. The aroma that fills the kitchen is a head‑on collision of citrus zest and toasted coconut, a scent so intoxicating that even the neighbor’s cat pauses at the window, tail flicking in awe. I dare you to taste this and not go back for seconds.
Most recipes get this completely wrong. They either drown the lemon in sugar, leaving a cloying sweetness, or they skip the coconut, losing that exotic texture that makes this dessert unforgettable. Here’s what actually works: a balanced sweet‑sour ratio, a crust that stays crisp under the weight of the filling, and a secret ingredient—sweetened shredded coconut—that adds body without making the filling heavy. The result? A bar that’s bright enough for summer yet comforting enough for winter, perfect for any occasion, from brunches to birthday parties. I’ll be honest—I ate half the batch before anyone else got to try it, and I have no regrets.
Okay, ready for the game‑changer? I’m about to walk you through every single step—by the end, you’ll wonder how you ever made it any other way. We’ll talk about why each ingredient matters, the exact temperatures that turn a good bar into a great one, and a few tricks that will make your kitchen feel like a professional pastry studio. Picture yourself pulling this out of the oven, the whole kitchen smelling incredible, the golden tops glistening with a hint of coconut oil. Stay with me here—this is worth it.
What Makes This Version Stand Out
- Taste: The lemon is sharp but never harsh, balanced by the subtle sweetness of coconut that rounds out the flavor profile.
- Texture: A buttery, crumbly crust meets a custardy, melt‑in‑your‑mouth filling with a whisper of toasted coconut crunch.
- Simplicity: Only ten ingredients, all pantry‑friendly, and no fancy equipment—just a regular baking pan.
- Uniqueness: The addition of sweetened shredded coconut transforms a classic lemon bar into a tropical delight.
- Crowd Reaction: Guests constantly ask for the recipe, and the leftovers disappear faster than you can say “lemon‑coconut bliss.”
- Ingredient Quality: Using fresh lemon juice and zest makes a world of difference compared to bottled alternatives.
- Cooking Method: A two‑stage bake ensures the crust sets perfectly before the filling rises.
- Make‑Ahead Potential: These squares keep beautifully in the fridge for up to four days, making them perfect for meal‑prep or party planning.
Inside the Ingredient List
The Flavor Base
The fresh lemon juice and zest are the heart of this dessert. The juice provides that bright, tangy punch while the zest adds aromatic oils that sit on top of the palate, giving you that “just‑squeezed” feel without the bitterness that comes from over‑zesting. If you ever wonder why a recipe calls for both juice and zest, it’s because the juice gives acidity, and the zest gives fragrance—together they create a full‑spectrum lemon experience. If you’re out of fresh lemons, a high‑quality bottled juice can work, but never skip the zest; it’s the secret sauce of flavor.
The Texture Crew
All‑purpose flour appears twice in this recipe, and that’s intentional. The larger 1.5‑cup portion builds the crust’s structure, while the 0.25‑cup addition in the filling helps thicken the custard without making it gummy. Powdered sugar in the crust dissolves instantly, preventing grainy pockets, and the unsalted butter provides a rich, buttery flavor without the surprise of extra salt. The sweetened shredded coconut not only adds a tropical crunch but also contributes moisture, ensuring the filling stays creamy and doesn’t dry out.
The Unexpected Star
Granulated sugar might seem ordinary, but in this context it’s the sweet backbone that balances the lemon’s acidity. Because the filling is cooked on the stovetop before baking, the sugar dissolves completely, creating a glossy, smooth texture that feels like a silk scarf on your tongue. The baking powder, a modest 0.25 teaspoon, is the quiet hero that gives the filling a subtle lift, preventing it from becoming a dense pudding.
The Final Flourish
Eggs are the emulsifiers that bind the filling together, creating that custard‑like consistency we all adore. Using large eggs ensures enough liquid and structure; if you’re using medium eggs, add a splash of extra lemon juice to maintain the same acidity level. When you whisk the eggs with sugar, you’re not just mixing—you’re incorporating air, which helps the filling set with a light, airy texture rather than a rubbery one. And finally, a pinch of salt (optional, not listed in the core ingredients) can enhance the overall flavor, pulling all the sweet and sour notes together.
Everything’s prepped? Good. Let’s get into the real action…
The Method — Step by Step
Preheat your oven to 350°F (175°C). While the oven warms up, line a 9‑by‑13‑inch baking pan with parchment paper, leaving an overhang on the sides for easy removal later. This step might sound simple, but a properly preheated oven is the secret to a crust that sets fast enough to hold the filling without becoming soggy. The kitchen will start to smell faintly of toasted butter within minutes—trust that scent; it’s a good sign.
In a large mixing bowl, combine 1.5 cups all‑purpose flour, 0.5 cup powdered sugar, and a generous pinch of salt if you like. Add the 0.5 cup unsalted butter, cut into small cubes. Using a pastry cutter or your fingertips, rub the butter into the dry ingredients until the mixture resembles coarse crumbs with some pea‑size pieces. That’s the texture you’re aiming for—not a dough, but not completely dry either.
Kitchen Hack: If the butter starts melting in your hands, pop the bowl in the freezer for 5 minutes; cold butter stays solid longer, preserving crumbly texture.Stir in 1 cup sweetened shredded coconut until evenly distributed. The coconut will add a subtle sweetness and a pleasant chew that prevents the crust from feeling too dry. Press this mixture firmly into the prepared pan, using the back of a measuring cup to flatten it into an even layer. The edges should be slightly higher than the center; this little ridge will help the crust stay intact when you cut the squares later.
Bake the crust for 12‑15 minutes, or until the edges turn a light golden brown and you can hear a faint, nutty aroma. This stage is crucial: an under‑baked crust will become soggy, while an over‑baked one will turn brittle. When you pull the pan out, let the crust cool on a wire rack while you prepare the filling—this prevents the heat from the crust from cooking the eggs prematurely.
Meanwhile, in a medium saucepan, whisk together 1 cup granulated sugar and 2 large eggs until the mixture is pale and slightly thickened. This is the point where the sugar dissolves and the eggs begin to emulsify, creating a glossy base. Add 0.5 cup fresh lemon juice, 2 lemon zests, and 0.25 teaspoon baking powder, whisking continuously. The mixture will start to thicken and emit a fragrant citrus steam—if you can smell that bright, clean lemon scent, you’re on the right track.
In a separate bowl, sift together the remaining 0.25 cup all‑purpose flour. Sifting prevents lumps and ensures the flour integrates smoothly into the custard. Gradually whisk the sifted flour into the lemon‑egg mixture, making sure each addition is fully incorporated before adding the next. This gradual method prevents the dreaded grainy texture that can ruin a custard.
Return the saucepan to low heat, stirring constantly with a silicone spatula. The filling will begin to bubble gently—do not let it boil aggressively, or the eggs will scramble. Keep stirring until the mixture reaches a thick, coat‑the‑back‑of‑spoon consistency, about 5‑7 minutes. The edges will start to pull away from the sides of the pan, a visual cue that the custard is ready.
Once thickened, remove the saucepan from heat and let the filling cool for a minute—this prevents it from melting the crust when poured. Then, carefully pour the lemon‑coconut custard over the pre‑baked crust, spreading it with a spatula to an even layer. The contrast between the warm, glossy filling and the cool crust is part of the magic; you’ll see tiny bubbles rise to the surface, a sign that the custard is still alive and ready to set perfectly.
Place the pan back into the oven and bake for an additional 20‑25 minutes, or until the filling is just set—its center should still have a slight wobble when you gently shake the pan. The top will develop a very light golden hue, and a faint caramel aroma will drift up. Let the whole thing cool completely on a wire rack; this cooling period is essential for the squares to firm up without cracking.
After cooling, use the parchment overhang to lift the entire slab onto a cutting board. Slice into 12 even squares with a sharp knife, wiping the blade between cuts for clean edges. Serve at room temperature or chilled—each bite should deliver that perfect balance of tangy lemon, buttery crust, and coconut crunch.
Kitchen Hack: Warm the knife in hot water, dry it, and slice; a warm blade glides through the custard without dragging, giving pristine squares.
That's it — you did it. But hold on, I've got a few more tricks that'll take this to another level…
Insider Tricks for Flawless Results
The Temperature Rule Nobody Follows
Never bake the crust and filling at the exact same temperature. Start the crust at a slightly higher 375°F (190°C) for the first 5 minutes, then drop to 350°F for the rest. This initial blast creates a quick set on the bottom, preventing sogginess later. I once tried a single temperature and ended up with a soggy bottom that ruined the whole batch—lesson learned.
Why Your Nose Knows Best
Trust the aromas. When the crust turns a light golden brown and you catch a nutty, buttery scent, it’s ready. Likewise, when the filling starts to give off a bright lemon perfume, you’re within minutes of perfection. Your nose is a more reliable timer than any oven beep, especially if your oven runs hot or cold.
The 5‑Minute Rest That Changes Everything
After the final bake, let the squares rest uncovered for exactly five minutes before refrigerating. This short air‑dry period allows the surface to set a thin skin, which later prevents condensation from making the top soggy when you chill them. I once skipped this step, and the chilled bars turned mushy—don’t make that mistake.
Butter Temperature Hack
Softened butter works, but for the crispiest crust, use butter that’s just barely cold—about 55°F (13°C). It creates larger pockets of air when mixed, leading to a flaky texture. If you’re in a rush, cube the butter and toss it into the freezer for 10 minutes; that’s the sweet spot.
Finishing Flourish: The Glaze
If you want a glossy finish, brush the top with a thin layer of warmed apricot jam mixed with a teaspoon of water right after the final bake. It adds a subtle sheen and a hint of fruitiness that pairs beautifully with the lemon‑coconut duo. This step is optional but makes the squares look bakery‑ready for guests.
Creative Twists and Variations
This recipe is a playground. Here are some of my favorite ways to switch things up:
Tropical Mango Burst
Swap half of the lemon juice for mango purée and add a tablespoon of finely diced dried mango to the crust. The result is a sunny, tropical bar that feels like a beach vacation in every bite. Perfect for a summer potluck.
Chocolate‑Covered Delight
After the squares have cooled, drizzle melted dark chocolate over the top and sprinkle with toasted coconut flakes. The bitter chocolate balances the bright lemon, creating a sophisticated flavor contrast that impresses even the most discerning sweet tooth.
Almond‑Infused Crunch
Replace half of the shredded coconut with finely ground almond meal, and toast a handful of sliced almonds to scatter over the crust before baking. The almond adds a nutty depth that pairs beautifully with the citrus.
Spiced Autumn Version
Introduce ½ teaspoon of ground ginger and a pinch of cinnamon into the filling for a warm, cozy twist. This variation shines during cooler months, offering the same bright lemon base but with a comforting spice undertone.
Vegan Adaptation
Swap the butter for coconut oil, use a flax‑egg mixture (1 tablespoon ground flaxseed + 3 tablespoons water per egg), and replace the dairy‑free shredded coconut with a vegan sweetened coconut. The texture remains luscious, and the flavor stays true to the original.
Storing and Bringing It Back to Life
Fridge Storage
Place the cooled squares in an airtight container and store in the refrigerator for up to four days. The custard stays silky, and the crust retains its crunch thanks to the coconut’s natural moisture barrier.
Freezer Friendly
Wrap each square individually in plastic wrap, then place them in a zip‑top freezer bag. They’ll keep for up to two months. When you’re ready to enjoy, let them thaw in the fridge overnight, then bring to room temperature for the best texture.
Best Reheating Method
To revive that fresh‑out‑of‑the‑oven feel, preheat your oven to 300°F (150°C), place the squares on a parchment‑lined sheet, and add a tiny splash of water (about a teaspoon) around the edges. The steam generated will re‑moisturize the custard while the crust crisps up again. In just 8‑10 minutes, you’ll have a bar that tastes like it just left the oven.