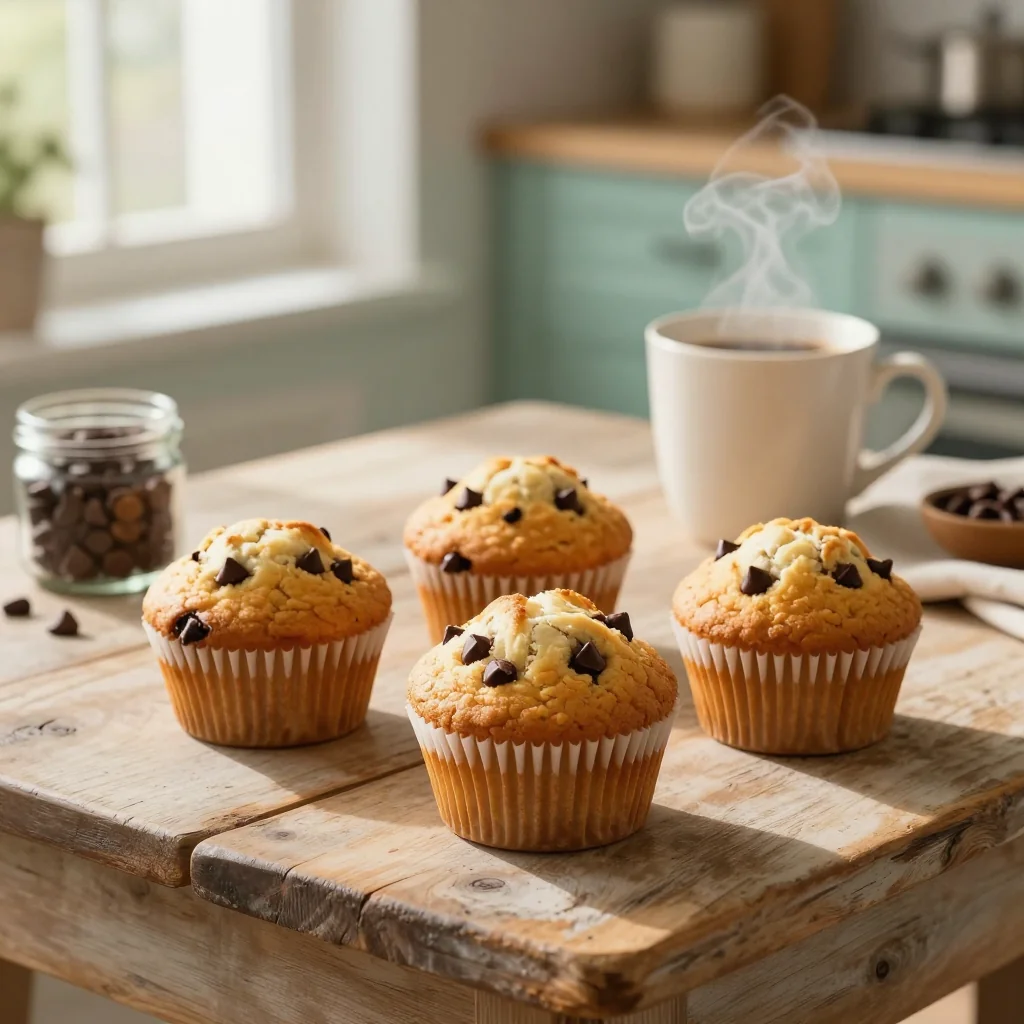
Golden‑brown, soft‑centered muffins that taste like they just came out of a boutique bakery.
When I was ten, my grandmother’s kitchen smelled like warm butter, vanilla, and melted chocolate. Every Saturday she’d pull a tray of muffins from the oven, and the moment they cracked open, a cloud of sweet steam would swirl around us, turning the whole house into a sanctuary of comfort. I remember stealing a warm muffin while she wasn’t looking, feeling like I’d uncovered a secret treasure.
These muffins belong to the timeless tradition of American bakery treats: simple, portable, and endlessly satisfying. The classic chocolate chip muffin has been a staple in diners and coffee shops for decades, yet the bakery‑style version adds a touch of elegance with a crisp, slightly caramelized top and a tender crumb that melts in your mouth.
In this article, I’ll walk you through every nuance—from selecting the perfect chocolate chips to mastering the “bloom” of butter that gives the tops their signature sheen. You’ll learn how to achieve a bakery‑level rise without a professional oven, and why a brief rest before baking makes all the difference.
Grab your mixing bowl, preheat the oven, and let’s create muffins that will make your kitchen feel like a boutique patisserie.
🌟 Why This Recipe Will Win Your Heart
These muffins combine the nostalgic flavor of classic chocolate chip with a sophisticated bakery texture that will impress both kids and adults.
- ✨ Foolproof Rise: The precise balance of baking powder and soda creates a lofty dome without a dry interior, even for novice bakers.
- ✨ Melt‑In‑Your‑Mouth Crumb: Using melted butter instead of softened butter coats the flour, resulting in a tender, moist crumb.
- ✨ Perfect Chocolate Distribution: Coating the chips in a light dusting of flour prevents them from sinking, ensuring every bite has chocolate.
- ✨ Versatile Serving: Great for breakfast, a snack, or a dessert; they pair beautifully with coffee, tea, or a glass of cold milk.
- ✨ Easy Customization: Swap in white chocolate, dried cranberries, or a sprinkle of sea salt for endless variations.
- ✨ Shelf‑Stable Delight: They stay soft for up to four days at room temperature, making them perfect for make‑ahead breakfasts.
🥗 Ingredients
📝 Complete Ingredient List
For the Muffin Batter:
For the Chocolate Chips:
Optional Topping:
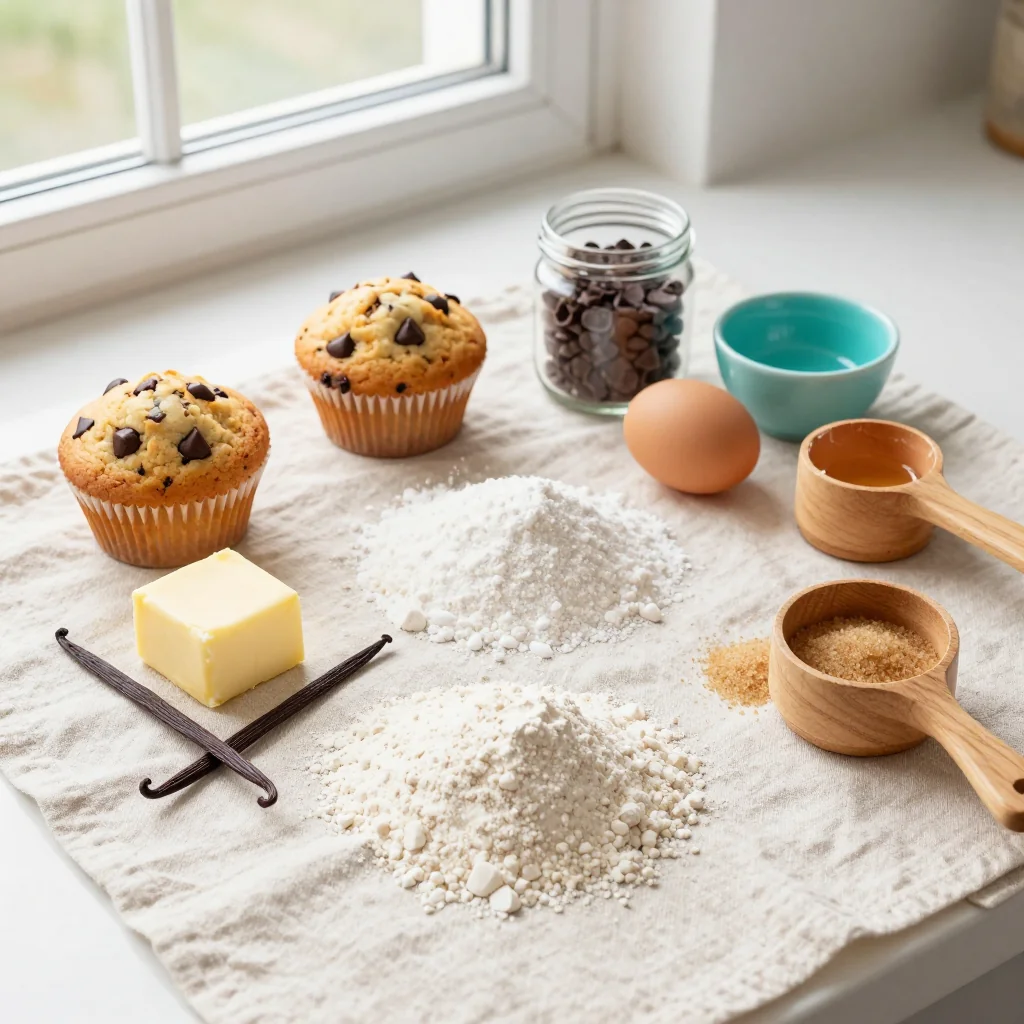
🔍 Focus on Key Ingredients
All‑Purpose Flour
Flour provides the structural backbone. Using a standard all‑purpose flour ensures the right amount of gluten development for a tender crumb without becoming tough. If you prefer a lighter texture, you can sift the flour twice before measuring.
Brown Sugar
Brown sugar adds moisture and a subtle caramel note that deepens the flavor profile. Its molasses content keeps the muffins moist, especially important when baking at higher temperatures for a crisp top.
Semi‑Sweet Chocolate Chips
These chips balance sweetness with a hint of cocoa bitterness. Tossing them in a tablespoon of flour before folding prevents them from sinking to the bottom, guaranteeing chocolate in every bite.
🔄 Quick Substitutions
| If you don’t have… | Use instead… |
|---|---|
| All‑purpose flour | Pastry flour (use 1 cup + 2 tbsp) |
| Unsalted butter | Equal amount of melted coconut oil |
| Semi‑sweet chocolate chips | Milk chocolate chips or chopped dark chocolate |
👨🍳 Step‑by‑Step Instructions
Follow these detailed steps to achieve perfectly risen, bakery‑style muffins every time.
📋 Phase 1: Preparation & Mise en Place
Gather your tools, measure, and pre‑heat the oven to set the stage for success.
Preheat and Prepare Pan
Set your oven to 190 °C (375 °F) and allow it to fully preheat for at least 10 minutes. While the oven warms, line a 12‑cup muffin tin with paper liners or lightly grease each cup with butter. This ensures easy release and a clean presentation.
Combine Dry Ingredients
In a large bowl, whisk together the flour, granulated sugar, brown sugar, baking powder, baking soda, and salt. Whisking aerates the mixture, which helps create a light crumb. Once combined, set the bowl aside.
🔥 Phase 2: Mixing & Baking
Integrate wet components and bake to a golden finish.
Blend Wet Ingredients
In a separate bowl, whisk the melted butter, milk, eggs, and vanilla extract until smooth. The melted butter should be warm (not hot) to avoid cooking the eggs. This mixture adds richness and helps the muffins rise evenly.
Combine Wet and Dry
Make a well in the center of the dry ingredients and pour in the wet mixture. Using a rubber spatula, gently fold until just incorporated. The batter should be slightly lumpy; over‑mixing will develop gluten and make the muffins dense.
Fold in Chocolate Chips
Sprinkle the flour‑coated chocolate chips over the batter and fold them in with a gentle motion. The coating prevents sinking, ensuring an even distribution of chocolate throughout each muffin.
✨ Phase 3: Finishing & Serving
Finalize the bake, check for doneness, and present beautifully.
Scoop and Sprinkle
Using a ¼‑cup ice‑cream scoop, divide the batter evenly among the prepared muffin cups, filling each about ¾ full. If you like a crunchy top, sprinkle a pinch of coarse sugar over each muffin now.
Bake to Perfection
Place the tin in the center of the oven and bake for 18‑22 minutes. The muffins are done when a toothpick inserted into the center comes out with a few moist crumbs, and the tops have turned a deep golden‑brown.
Cool Slightly
Allow the muffins to rest in the pan for 5 minutes; this helps them set and makes removal easier. Then transfer them to a wire rack to cool completely, preserving the soft interior.
Serve Warm or Room Temperature
Enjoy the muffins warm with a pat of butter, or let them come to room temperature for a firmer bite. They pair wonderfully with a cup of coffee or a glass of cold milk.
💡 Expert Tips & Tricks
🛒 Choosing the Right Ingredients
Always opt for high‑quality unsalted butter; the flavor difference is noticeable. Look for chocolate chips that are at least 60 % cacao for a balanced sweet‑bitter profile. When buying flour, check the packaging date – fresher flour yields a lighter crumb.
🔪 Preparation Techniques
Measure dry ingredients by weight, not volume, for consistency. When melting butter, do it gently over low heat to avoid browning. Let the melted butter cool slightly before mixing with the eggs to prevent curdling.
🌡️ Mastering the Bake
Rotate the muffin tin halfway through baking if your oven has hot spots. The initial high heat creates the “bloom” on top, while the later lower temperature ensures a moist interior.
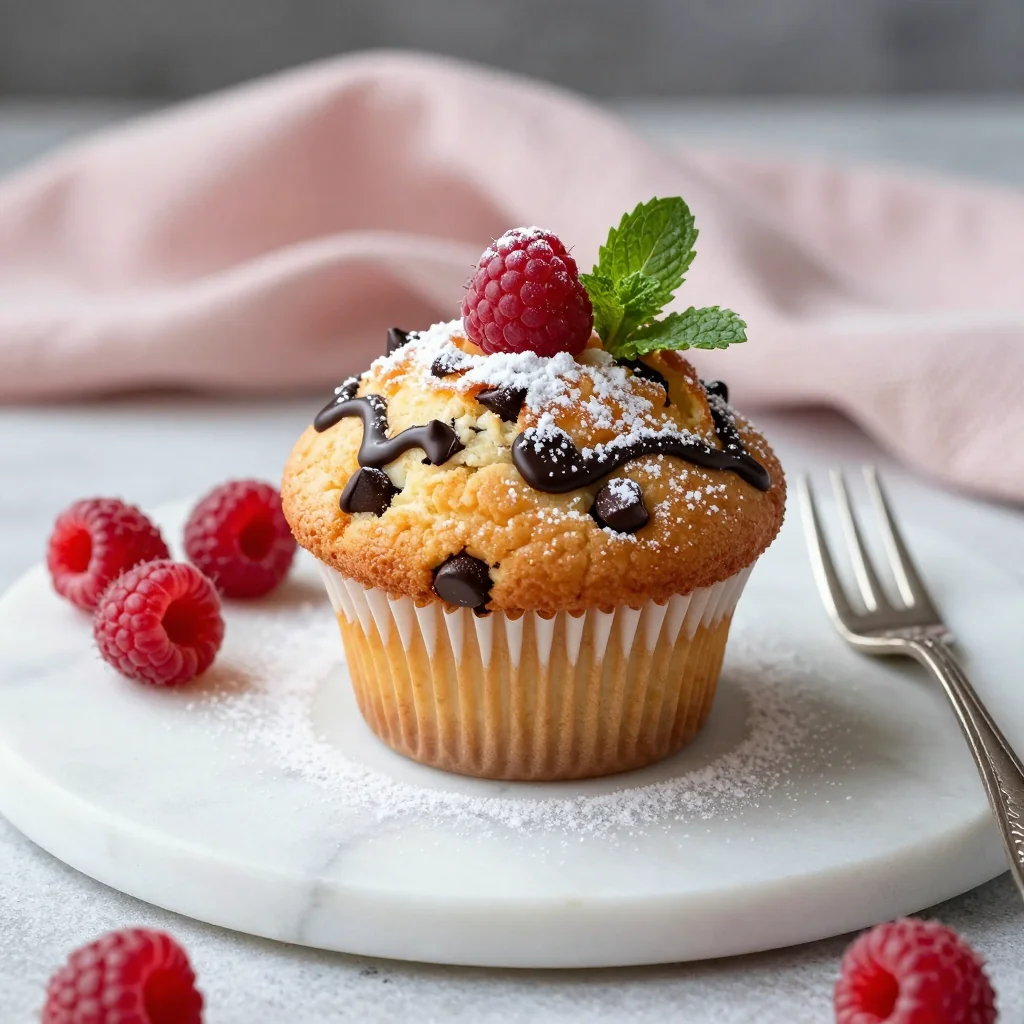
🍽️ Presentation & Service
For a professional look, dust the tops lightly with powdered sugar just before serving. Arrange muffins on a wooden board with a few fresh berries for color contrast.
🏆 Pro Tips
Elevate your muffins from homemade good to bakery‑level great with these insider secrets.
- 🎯 Chill the Batter: Refrigerate the batter for 30 minutes before scooping. The colder batter holds its shape better, leading to taller muffins with a more pronounced dome.
- 🎯 Use a Light Touch with Flour: Sifting the flour twice removes lumps and aerates it, preventing a dense texture. Over‑sifting can cause the batter to become too thin, so stop after two passes.
- 🎯 Add a Pinch of Cream of Tartar: This acid stabilizes the egg whites, giving the muffins extra lift without altering flavor.
- 🎯 Bake on a Pre‑heated Baking Stone: Placing the muffin tin on a hot stone transfers heat instantly, creating a crisp, bakery‑style crust.
- 🎯 Finish with Sea Salt Flakes: A tiny sprinkle of flaky sea salt right after baking heightens the chocolate flavor and adds a sophisticated finish.
- 🎯 Store in a Bread Box: Keeping muffins in a bread box maintains humidity, preserving softness longer than a sealed plastic bag.
"The secret to a perfect muffin is not just the ingredients, but the timing and temperature you give it." — Thomas Keller
🔄 Variations & Adaptations
Feel free to experiment – these muffins are a versatile canvas for flavors and dietary needs.
🥬 Vegetarian / Vegan Version
Swap the eggs for a flax‑egg (1 tbsp ground flaxseed + 3 tbsp water) and use plant‑based milk (almond or oat). Replace butter with melted coconut oil. The texture remains tender, and the flavor stays rich.
- Flax‑egg: Mix ground flaxseed with water and let sit 5 minutes.
- Coconut oil: Use the same volume as butter; it adds a subtle tropical note.
🌶️ Flavor Variations
Change the flavor profile by adding complementary ingredients or swapping chocolate types.
Spicy Version
Add ½ tsp cayenne pepper to the dry mix and use dark chocolate chips for a bittersweet contrast.
Mediterranean Version
Incorporate chopped dried apricots and a sprinkle of toasted pine nuts on top. Use white chocolate chips for a subtle sweetness.
Asian Inspired Version
Replace chocolate chips with white chocolate and toasted sesame seeds, and add a dash of matcha powder to the batter for a green hue and earthy flavor.
⚠️ Dietary Adaptations
Gluten‑Free
Use a 1:1 gluten‑free flour blend (rice flour, tapioca starch, potato starch). Add 1 tsp xanthan gum to mimic gluten’s elasticity.
Lactose‑Free
Replace butter with lactose‑free margarine and use almond milk or oat milk instead of dairy milk.
Low‑Calorie
Substitute half the butter with unsweetened applesauce, reduce sugar by 25 %, and use mini chocolate chips to lower calorie density.
👶 Kid‑Friendly Version
For picky eaters, reduce the amount of chocolate chips and add a swirl of strawberry jam on top before baking. The jam creates a sweet surprise that children love.
📦 Storage & Reheating
🧊 Conservation
Refrigerator
- Duration: 4 days
- Container: Airtight glass jar or plastic container
- Tip: Place a paper towel at the bottom to absorb excess moisture.
Freezer
- Duration: 3 months
- Method: Wrap each muffin individually in parchment paper, then seal in a freezer‑safe bag.
- Defrost: Transfer to the fridge overnight or microwave for 20 seconds.
💡 Note: For best texture, reheat from frozen rather than thawing fully first.
♨️ Reheating
Oven (Recommended)
- Preheat to 175 °C (350 °F).
- Place muffins on a baking sheet, cover loosely with foil.
- Heat for 8‑10 minutes.
- Remove foil for the last 2 minutes to crisp the tops.
Microwave (Quick)
- Place a muffin on a microwave‑safe plate.
- Cover with a damp paper towel.
- Heat on medium power for 30‑45 seconds.
- Check and add 10 seconds if needed.
Stovetop
Heat a non‑stick skillet over low heat, add a splash of water, and cover. Warm for 2‑3 minutes, allowing steam to soften the interior.
🍷 Perfect Pairings
🥗 Accompaniments
- Fresh Mixed Berries: Their acidity balances the sweetness of the muffins.
- Greek Yogurt with Honey: Adds creaminess and a touch of floral sweetness.
- Apple Slices with Cinnamon: A warm, spiced side that complements chocolate.
🍷 Wine & Beverage Pairings
- Milk Chocolate Stout: Its roasted malt notes echo the muffin’s caramelized crust.
- Late Harvest Riesling: A sweet, aromatic wine that matches the chocolate richness.
- Non‑Alcoholic: A chilled glass of vanilla‑infused almond milk.
🍰 Complementary Courses
Start with a light citrus salad to awaken the palate, follow the muffins with a scoop of vanilla bean ice cream, and finish with a drizzle of espresso‑infused caramel sauce for a decadent dessert trio.
❓ Frequently Asked Questions
Q: Can I use whole‑wheat flour instead of all‑purpose?
A: Yes, but replace only half of the all‑purpose flour with whole‑wheat to maintain a light crumb. Whole‑wheat adds a nutty flavor and extra fiber, though it can make the muffins denser if used exclusively.
Q: Why do my muffins sometimes sink in the middle?
A: Sinking usually occurs when the batter is over‑mixed or the oven temperature is too low. Ensure you mix just until ingredients are combined and preheat the oven fully. Also, avoid opening the oven door during the first 10 minutes of baking.
Q: How can I make the tops extra crunchy?
A: Sprinkle a thin layer of coarse sugar or a mixture of brown sugar and melted butter on each muffin before baking. The sugar caramelizes, creating a delightful crunch.
Q: Are these muffins suitable for freezing before baking?
A: Absolutely. Prepare the batter, scoop into liners, and freeze on a tray. Once solid, transfer to a freezer bag. Bake from frozen, adding 3‑4 minutes to the original baking time.
Q: Can I add nuts without affecting the texture?
A: Yes, fold in ½ cup of chopped toasted walnuts or pecans after adding the chocolate chips. Nuts add crunch and a subtle buttery flavor without compromising the soft crumb.
Q: What’s the best way to measure the flour accurately?
A: Spoon the flour into a measuring cup and level it with a straight edge. For ultimate precision, weigh the flour on a kitchen scale (240 g is the amount needed for this recipe).
🎉 To Your Oven!
These Chocolate Chip Muffins capture the magic of a bakery while being entirely achievable in a home kitchen. By mastering the balance of leavening, butter, and chocolate distribution, you’ll create muffins that are fluffy inside, with a golden, slightly crisp top that invites you to take another bite. Whether you serve them for a casual brunch or as a sweet finish to a dinner, they embody comfort, quality, and versatility.
Now it’s your turn: try the recipe, experiment with the variations, and share your results. Your feedback fuels the community, and your photos inspire fellow bakers. Don’t forget to leave a rating and comment below—your insights help us improve and bring more delicious ideas to the table.
You tried this recipe?
Leave a comment and a rating below! Share your photos on Instagram with #BakeryMuffins for a chance to be featured.
Chocolate Chip Muffins Bakery Style
Golden‑brown, soft‑centered muffins that taste like they just came out of a boutique bakery.
📝 Ingredients
Muffin Batter
Chocolate Chips
Optional Topping
👨🍳 Instructions
- Preheat oven to 190 °C (375 °F) and line a 12‑cup muffin tin.
- Whisk dry ingredients together in a large bowl.
- Mix wet ingredients (butter, milk, eggs, vanilla) until smooth.
- Combine wet and dry mixtures, folding just until incorporated.
- Fold in flour‑coated chocolate chips.
- Scoop batter into liners, ¾ full, and sprinkle coarse sugar if desired.
- Bake for 18‑22 minutes until a toothpick comes out with moist crumbs.
- Cool 5 minutes in pan, then transfer to a wire rack.
- Serve warm or at room temperature, with your favorite beverage.
- Enjoy the bakery‑style experience!
🥗 Nutrition (per serving)
*Values are estimates based on standard ingredients.


💬 Comments & Reviews
Leave a Comment
No comments yet. Be the first to share your thoughts!