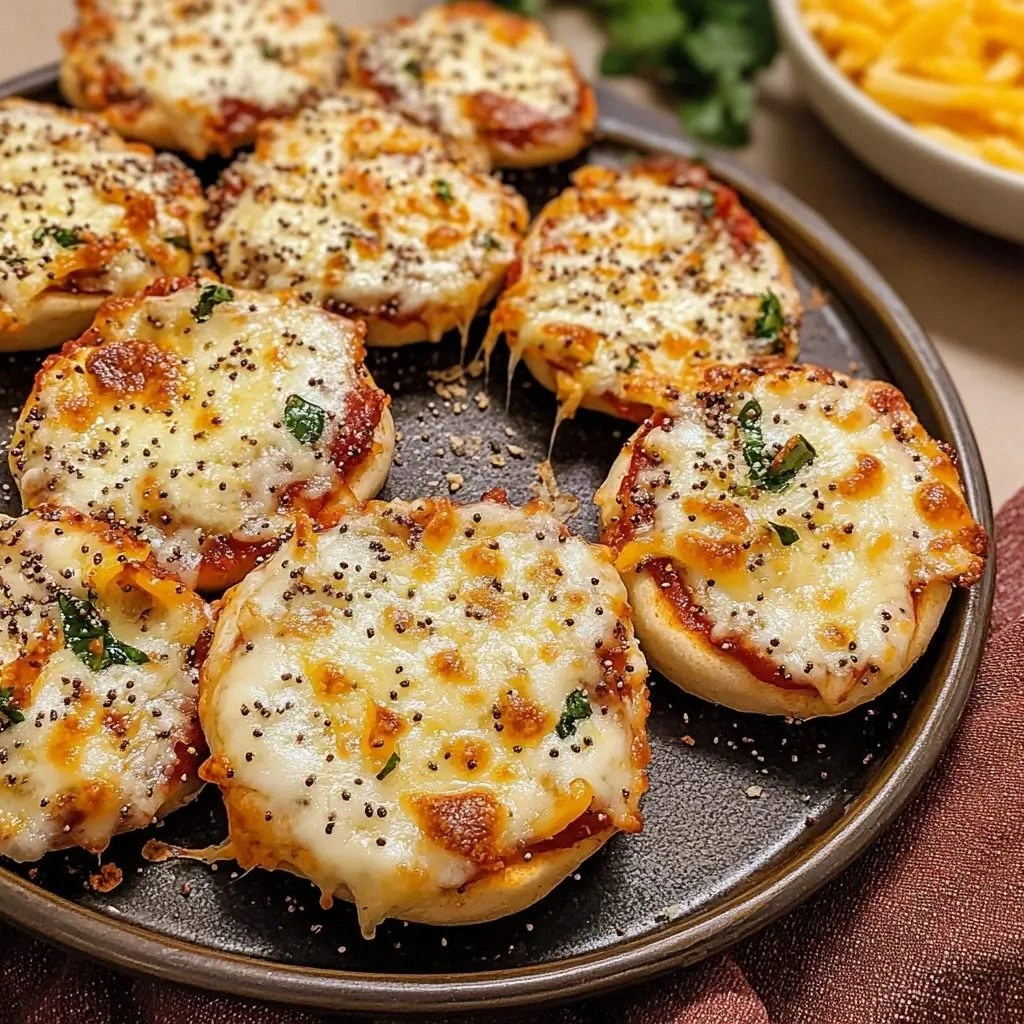
It started on a rainy Saturday, the kind of night where the kitchen feels like a refuge and the fridge is a treasure chest of possibilities. I was staring at a soggy, stale pizza crust that had been sitting in the back of the freezer for weeks, and a sudden craving for something rich, cheesy, and utterly comforting slammed into my senses like a thunderclap. I grabbed the crust, tossed it into the oven, and the air filled with a sweet, buttery aroma that made my eyes water in delight. That moment, that single bite, was the spark that ignited my obsession with the ultimate Three Cheese Everything Pizza.
Picture this: a golden, blistered crust that shatters like thin ice under your fork, a molten blanket of mozzarella, cheddar, and parmesan that oozes out like molten lava, and a scatter of pepperoni, olives, onions, and bell peppers that crackle with each bite. The sauce, a velvety tomato base seasoned with oregano and garlic, clings to the dough like a second skin. As you pull a slice from the pan, steam rises in ribbons, and the scent of basil and oregano envelops the kitchen, making you forget any worries you had before. The texture is a dance of crispy edges and a chewy center, with a cheesy bite that sings in your mouth.
Most pizza recipes out there are either too simple or too overcomplicated. This version is the sweet spot where simplicity meets indulgence, where every ingredient has a purpose and every bite is a revelation. I dare you to taste this and not go back for seconds because once you experience the harmonious blend of cheeses and the crunch of the toppings, the ordinary world of pizza will never feel the same again. I’ve been calling it the “ultimate” version because it’s hands down the best you’ll ever make at home, and I’ll be honest — I ate half the batch before anyone else got a chance to try it.
If you’ve ever struggled with making pizza that’s both flavorful and satisfying, you’re not alone. I’ve spent countless nights experimenting with dough ratios, cheese blends, and topping combinations. The result? A pizza that’s not just a meal but an experience. Picture yourself pulling this out of the oven, the whole kitchen smelling incredible, and the first bite sending a wave of cheesy bliss through your taste buds. Okay, ready for the game-changer? Let me walk you through every single step — by the end, you’ll wonder how you ever made it any other way.
What Makes This Version Stand Out
- Flavor: The triple cheese blend creates a depth of flavor that single cheeses can’t achieve. Each bite delivers a rich, creamy profile with a hint of sharpness from the parmesan.
- Texture: The crust is crisp on the outside and chewy on the inside, thanks to a precise hydration level and a short proofing time that locks in air pockets.
- Convenience: All the steps are streamlined; you can prep the dough and sauce in advance, saving you precious time on a busy weeknight.
- Visual Appeal: The colorful toppings make the pizza a feast for the eyes, turning an ordinary dinner into a showstopper.
- Crowd-pleaser: Whether you’re feeding a family or hosting friends, the bold flavors and generous cheese melt make it an instant hit.
- Quality Ingredients: Using high‑quality cheeses and fresh herbs elevates the dish from good to unforgettable.
- Make‑ahead Potential: The dough can be made a day ahead and stored in the fridge, and the sauce can be frozen for future use.
- Versatility: Swap out toppings or cheese types to suit dietary preferences or seasonal ingredients.
Alright, let's break down exactly what goes into this masterpiece...
Inside the Ingredient List
The Flavor Base
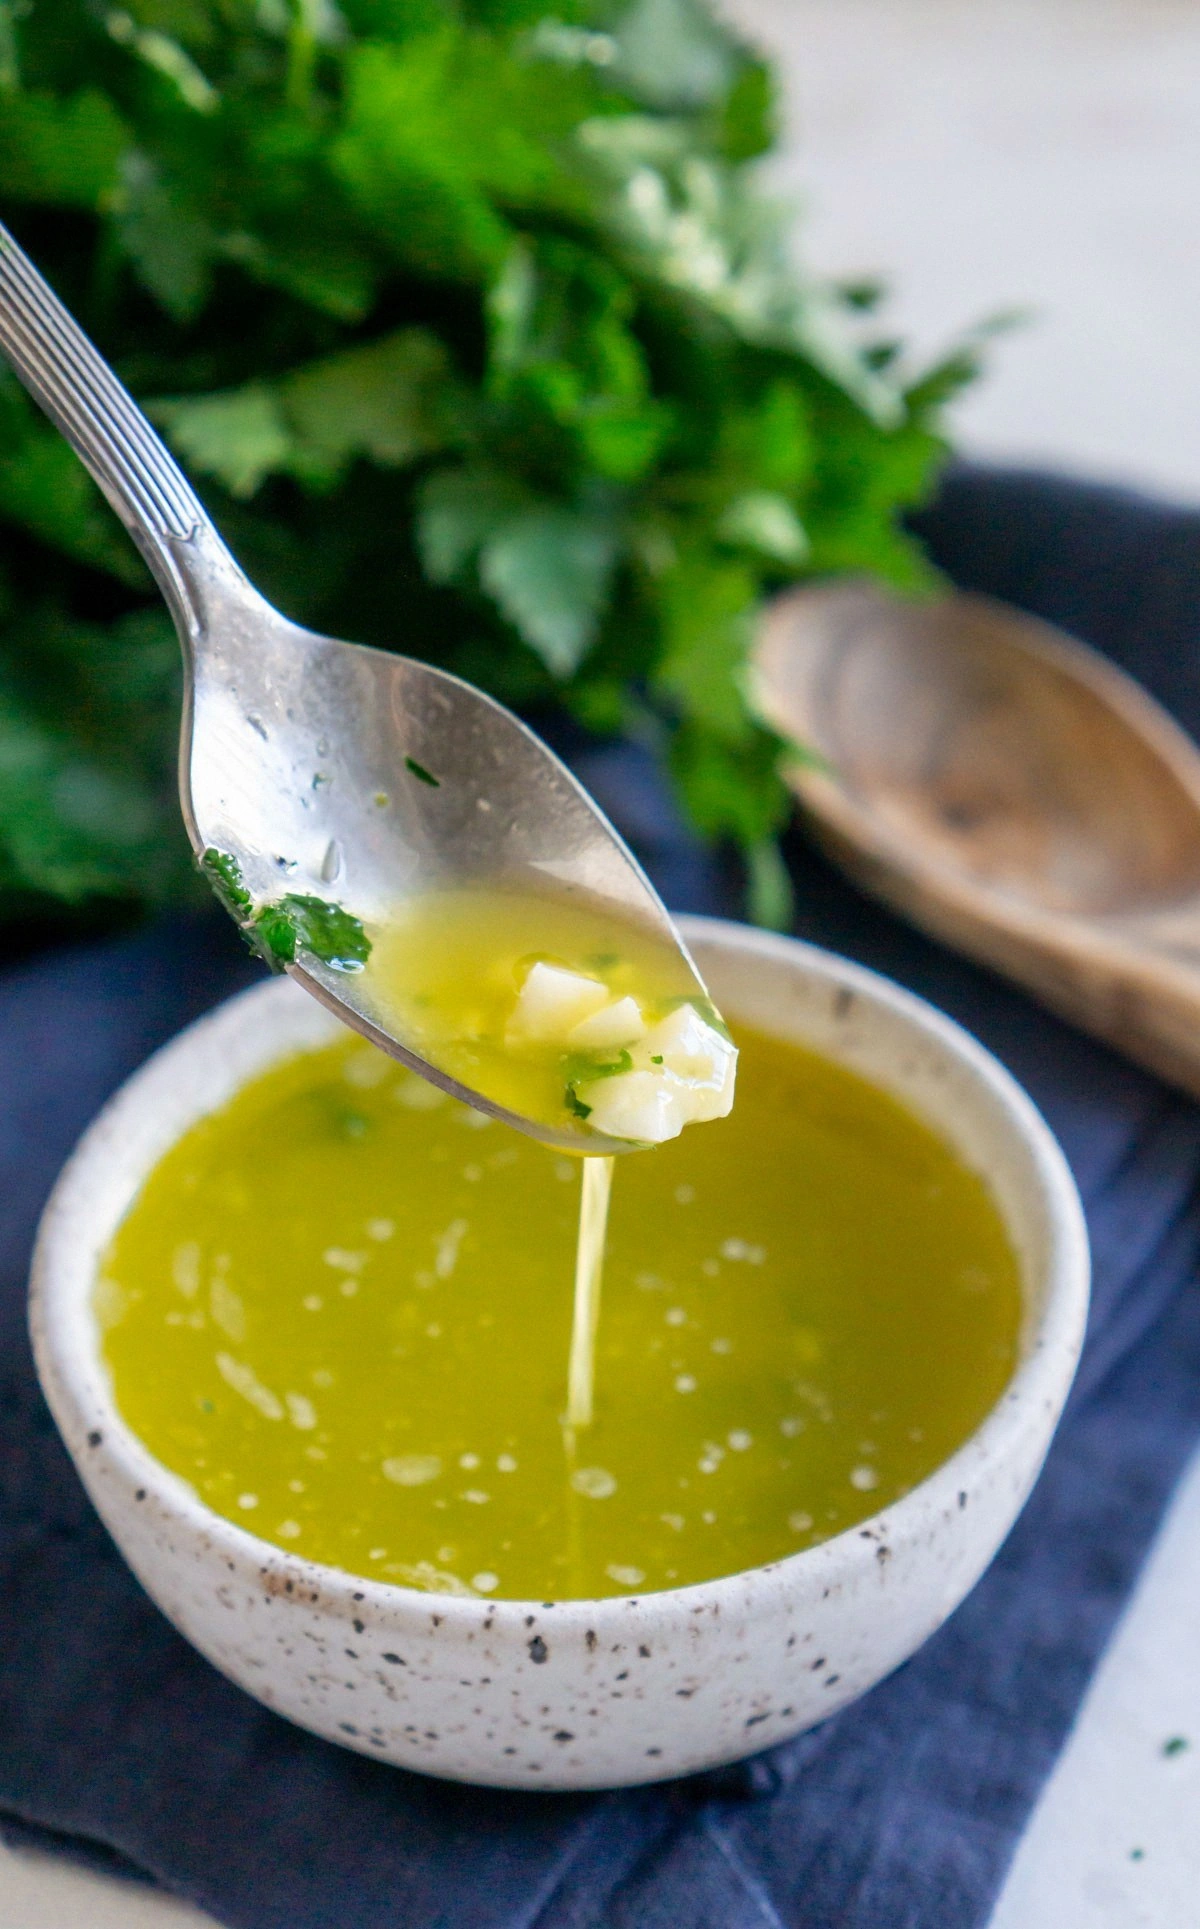
The foundation of any great pizza is its sauce and dough. I use a simple tomato sauce made from crushed San Marzano tomatoes, which gives a bright, slightly sweet flavor that balances the richness of the cheeses. The sauce is simmered with a pinch of oregano and garlic powder, then cooled before spreading on the dough. If you skip the sauce, the pizza will taste flat and dry. For an extra kick, a splash of red wine during simmering adds depth, but it’s optional.
The Texture Crew
The dough is the unsung hero. I start with 2 cups of all‑purpose flour, 1 cup warm water, 1 tsp active dry yeast, 1 tsp sugar, 1 tsp salt, and 1 tbsp olive oil. Knead until the dough is smooth and elastic; this creates a chewy interior. A short rise of 20 minutes at room temperature allows the dough to develop structure without becoming too airy. If you use whole wheat flour, the crust will be denser but more nutritious; just add an extra tablespoon of water to compensate.
The Unexpected Star
The cheese trio is what truly sets this pizza apart. Mozzarella provides the classic melt, cheddar adds a sharp, slightly sweet bite, and parmesan contributes a nutty, savory finish. The ratio is 1 cup each, but you can tweak it to 1½ cups mozzarella, ¾ cup cheddar, and ¾ cup parmesan if you prefer a stronger flavor. Skipping any cheese will alter the mouthfeel; the pizza will feel less cohesive and the flavor profile will be less complex.
The Final Flourish
Toppings are the final flourish that turns a simple pizza into a masterpiece. I use ½ cup sliced pepperoni, ¼ cup sliced black olives, ¼ cup diced red onion, ¼ cup diced bell pepper, and a tablespoon of chopped fresh basil. These add crunch, saltiness, and herbal brightness. If you’re vegetarian, swap pepperoni for sliced mushrooms or roasted red peppers. A pinch of crushed red pepper flakes gives a subtle heat that balances the richness.
Everything's prepped? Good. Let's get into the real action...
The Method — Step by Step
- Prepare the Dough: In a large bowl, combine the flour, yeast, sugar, and salt. Slowly pour in the warm water and olive oil, stirring until a shaggy dough forms. Knead for 8–10 minutes until smooth and elastic. Cover the dough with a damp towel and let it rise for 20 minutes at room temperature. The dough should double in size and feel airy. This is the moment of truth; if it doesn’t rise, the yeast might be dead.
- Make the Sauce: In a saucepan, heat 1 tablespoon of olive oil over medium heat. Add crushed tomatoes, oregano, garlic powder, and a pinch of salt. Simmer for 15 minutes, stirring occasionally, until the sauce thickens. Let it cool to room temperature before spreading on the dough. Watch out: if you cook the sauce too long, it can become too thick and lose its bright tomato flavor.
- Roll Out the Dough: Lightly flour a work surface and place the dough on it. Roll the dough into a 12-inch circle, pressing from the center outward. The dough should be about ¼ inch thick. If it tears, gently pull the edges and continue rolling. This step ensures even cooking and a uniform crust.
- Pre‑Bake the Crust: Place the rolled dough on a parchment‑lined baking sheet. Prick the dough all over with a fork to prevent air bubbles. Bake in a preheated oven at 425°F (220°C) for 8 minutes. The crust should be lightly golden but not fully cooked. Pre‑baking creates a crisp base that holds the toppings.
- Add the Sauce: Spread a thin layer of sauce over the pre‑baked crust, leaving a ½-inch border. The sauce should coat the dough like velvet. This layer is crucial for flavor distribution; too much sauce will make the pizza soggy.
- Layer the Cheeses: Sprinkle 1 cup mozzarella, 1 cup cheddar, and 1 cup parmesan evenly over the sauce. The cheeses should melt into each other, forming a cohesive, golden blanket. If you’re using pre‑shredded cheese, sprinkle lightly to avoid clumping.
- Top with Toppings: Distribute pepperoni, olives, onions, bell pepper, and basil evenly over the cheese layer. The toppings should be spaced to allow even baking and flavor release. The basil adds a fresh, herbal note that balances the richness.
- Final Bake: Return the pizza to the oven and bake for 12–15 minutes, or until the cheese is bubbly and the crust edges are golden brown. The pizza should emit a savory, melty aroma that makes you salivate. Keep a close eye on the edges; if they brown too quickly, reduce the temperature slightly.
- Rest and Serve: Let the pizza rest for 5 minutes on a cooling rack before slicing. This allows the cheese to set, preventing it from sliding off the slices. Slice into wedges and serve hot. The first bite should be a symphony of melt, crunch, and savory flavor.
That's it — you did it. But hold on, I've got a few more tricks that'll take this to another level...
Insider Tricks for Flawless Results
The Temperature Rule Nobody Follows
Many home cooks bake pizza at 350°F, which is too low and results in a soggy crust. I swear by 425°F (220°C) for a crisp base and perfectly melted cheese. Pre‑heat the oven for at least 30 minutes with a pizza stone or baking steel inside. This ensures the heat is evenly distributed and the crust cooks quickly.
Why Your Nose Knows Best
Before you even open the oven door, listen for the subtle sizzle that signals the crust is almost done. A faint crackle means the edges are crisping. If you’re in a hurry, pause the oven and give a quick look; the pizza will finish in a few more minutes. A friend once skipped this step and ended up with a soggy pizza that needed a second bake.
The 5‑Minute Rest That Changes Everything
After baking, let the pizza rest for exactly five minutes. This pause allows the cheese to set, preventing it from sliding off when you slice. It also lets the flavors meld together. I’ve seen people cut immediately and lose the gooey experience; trust me, the rest is worth the wait.
Use a Pizza Stone for Professional Results
A pizza stone mimics a brick oven by absorbing moisture and distributing heat. Place it in the oven during the pre‑heat phase. When you slide the pizza onto it, the stone instantly sears the bottom, creating a crisp base while the cheese melts beautifully.
Keep Toppings Fresh
If you’re using pre‑sliced pepperoni or olives, store them in a sealed container in the fridge for up to 3 days. Fresh toppings keep the pizza from becoming mushy. I’ve once stored pepperoni in a zip‑lock bag, and the flavor was just as vibrant after a day.
Adjust Cheese Ratios for Dietary Needs
If you’re on a low‑fat diet, replace half the cheddar with a low‑fat cheese. For a dairy‑free version, use a blend of coconut milk cheese and nutritional yeast for the parmesan flavor. The texture changes slightly, but the overall experience remains delicious.
Creative Twists and Variations
This recipe is a playground. Here are some of my favorite ways to switch things up:
Vegan Triple‑Cheese Delight
Swap the dairy cheeses for vegan mozzarella, cheddar, and parmesan blends. Add a sprinkle of nutritional yeast for that umami kick. The result is a creamy, plant‑based pizza that still feels indulgent.
BBQ Chicken Upgrade
Replace pepperoni with shredded rotisserie chicken tossed in BBQ sauce. Add sliced red onions and a handful of cilantro after baking. The smoky sweetness pairs wonderfully with the triple cheese base.
Spinach and Feta Fusion
Toss fresh spinach into the sauce before spreading. Sprinkle crumbled feta over the cheese layer. The salty feta contrasts beautifully with the rich cheeses.
Spicy Jalapeño Kick
Add sliced fresh jalapeños and a dash of cayenne pepper to the topping mix. The heat will linger in every bite, making it a spicy adventure.
Herb Garden Boost
Finish the pizza with a generous drizzle of pesto and a handful of fresh basil leaves. The herbaceous aroma elevates the dish to a gourmet level.
Sweet & Savory Pineapple
Add pineapple chunks for a tropical twist. The sweetness balances the saltiness of the cheeses and pepperoni, creating a classic Hawaiian flavor profile.
Storing and Bringing It Back to Life
Fridge Storage
Cool the pizza completely, then wrap it tightly in foil or place it in an airtight container. Store in the fridge for up to 3 days. When ready to reheat, pre‑heat the oven to 375°F (190°C) and bake for 8–10 minutes, or until heated through.
Freezer Friendly
Wrap each slice individually in parchment paper, then place them in a freezer bag. Freeze for up to 2 months. Thaw overnight in the fridge before reheating as described above.
Best Reheating Method
To restore crispness, place the pizza on a pre‑heated skillet over medium heat for 2 minutes, then finish in the oven. Add a tiny splash of water to the skillet before covering to create steam, which helps the cheese re‑melt without drying out.