Picture this: a quiet Tuesday night, the fridge humming, a craving for something sweet, garlicky, and utterly comforting. I was rummaging through the pantry, half‑expecting to pull out a bag of frozen dumplings, when a jar of honey caught my eye. I laughed, thinking, “Who needs fancy sauces when you can turn a simple chicken piece into a caramelized masterpiece?” That moment sparked a culinary experiment that would later become the best honey garlic chicken anyone has ever tasted.
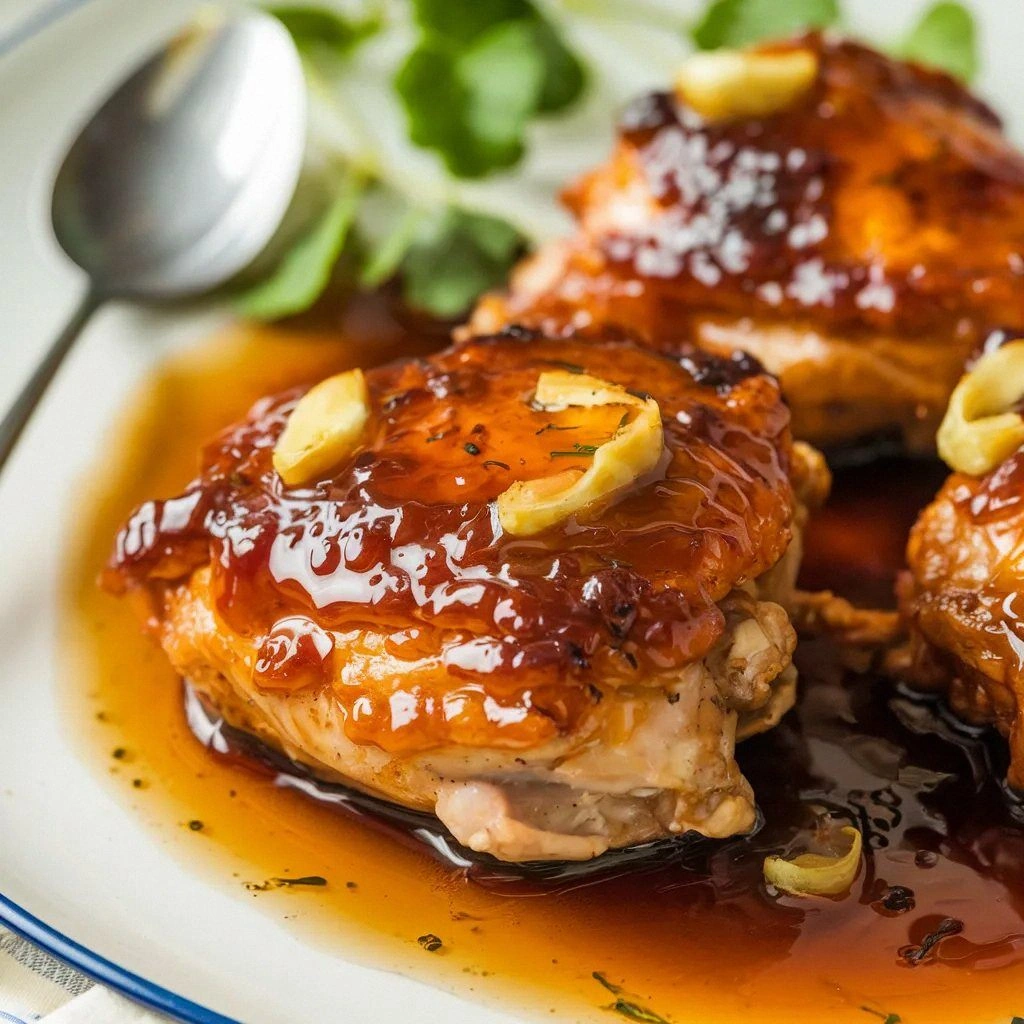
The first bite was a revelation: the honey glistened like amber, the garlic released a fragrant, almost citrusy aroma, and the soy sauce added a deep umami that pulled the flavors together. The chicken itself was tender, the skin crisped to a golden brown that cracked like thin ice with every bite. I could hear the sizzling chorus of garlic and butter in the pan, the rhythmic clink of a wooden spoon, and feel the heat radiating from the skillet. It was a sensory symphony, a dish that sang louder than any background music I could have played.
What sets this version apart from every other honey garlic chicken recipe? First, the sauce isn’t a thin syrup; it’s a thick, glossy glaze that clings to the meat like velvet. Second, the balance of heat and sweetness is razor‑sharp, not cloying. Third, the technique of searing the chicken before simmering locks in juices and creates a caramelized crust that no microwave can replicate. Fourth, the final flourish of sesame seeds and green onions adds a crunchy, fresh contrast. And most importantly, the recipe is so simple that even a kitchen novice can master it in under 30 minutes.
I dare you to taste this and not go back for seconds. I’ll be honest—I ate half the batch before anyone else got to try it. The rest of the family begged for a second plate, then a third. That’s when I realized that this dish is more than just comfort food; it’s an experience, a conversation starter, a confidence booster for the kitchen. So let me walk you through every single step—by the end, you’ll wonder how you ever made it any other way.
What Makes This Version Stand Out
- Taste: The honey isn’t just sweet; it caramelizes to a deep amber that pairs with the sharpness of garlic and the umami of soy sauce. This creates a layered flavor profile that lingers on the palate.
- Texture: The seared skin forms a crispy barrier that locks in moisture, while the sauce’s viscosity gives the chicken a glossy, almost decadent coating.
- Simplicity: All steps can be completed in a single pan, reducing cleanup and time without sacrificing depth of flavor.
- Uniqueness: A splash of apple cider vinegar adds a subtle tang that cuts through the sweetness, a trick most recipes overlook.
- Crowd Reaction: Even the most skeptical diners rave about the harmony of sweet, savory, and spicy, making it a hit at gatherings.
- Ingredient Quality: Using fresh, high‑quality chicken and real honey elevates the dish; substitutes can diminish the authentic taste.
- Cooking Method: The two‑stage process—first searing, then braising—maximizes flavor while keeping the dish quick.
- Make‑Ahead Potential: The sauce can be pre‑made, and the chicken can be refrigerated and reheated without losing its texture.
Alright, let's break down exactly what goes into this masterpiece...
Inside the Ingredient List
The Flavor Base
Honey is the star of the show, but it’s more than just a sweetener. It’s a natural caramelizer that gives the sauce its glossy sheen. The 1/4 cup amount is calibrated to coat the chicken without drowning it. If you’re a fan of a richer sweetness, feel free to add an extra tablespoon—just remember to adjust the soy sauce to keep the balance.
The Texture Crew
Cornstarch is the unsung hero that thickens the sauce into a velvety glaze. Mixing it with a splash of water creates a slurry that prevents clumping. The butter or oil (1–2 tbsp) is used for searing, providing a golden crust that locks in juices. If you’re vegan, swap butter for a neutral oil like grapeseed.
The Unexpected Star
Apple cider vinegar is the secret ingredient that adds a bright, tart counterpoint to the honey’s sweetness. It also helps tenderize the chicken slightly, making each bite juicy. Use a light‑bodied vinegar; a stronger one would overpower the delicate balance.
The Final Flourish
Sesame seeds and green onions provide a subtle crunch and a fresh burst of color. Sprinkle the seeds on top just before serving to keep them from becoming soggy. The green onions add a mild onion flavor that rounds out the dish’s profile. If you’re allergic to sesame, you can omit the seeds or replace them with crushed pine nuts.
Everything's prepped? Good. Let's get into the real action...
The Method — Step by Step
- Start by patting the chicken dry with paper towels. A dry surface ensures a golden sear. Season both sides generously with salt, pepper, and a pinch of red pepper flakes to add subtle heat. This seasoning layer will stay on the chicken throughout the cooking process.
- Heat a large skillet over medium‑high heat and add 1.5 tbsp of butter or oil. When the fat shimmers, place the chicken pieces skin‑side down. Let them sear undisturbed for 4–5 minutes until the skin turns a deep amber. This step locks in juices and builds flavor.
- Flip the chicken and sear the other side for another 3 minutes. While the chicken browns, mince the garlic finely; the smaller the pieces, the faster they release their aroma. If you prefer a smoother sauce, you can pulse the garlic in a mortar or use a garlic press.
- Add the honey, soy sauce, and apple cider vinegar to the pan. Stir to combine, then bring the mixture to a gentle simmer. The sauce should thicken slightly, coating the chicken. This is the moment of truth—watch the colors deepen.
- Whisk the cornstarch with a tablespoon of cold water to create a slurry. Stir it into the pan and let the sauce thicken to a glossy consistency. The cornstarch not only thickens but also gives the sauce a silky mouthfeel.
- Reduce the heat to low and let the chicken braise in the sauce for 8–10 minutes, turning occasionally. The chicken should reach an internal temperature of 165°F. The sauce will thicken further, creating a rich coating that clings to each piece.
- Once cooked, remove the chicken from the pan and let it rest for 2 minutes. This allows the juices to redistribute, keeping the meat moist. While resting, sprinkle sesame seeds over the sauce and give it a quick stir.
- Finishing touches: Slice the green onions and scatter them over the chicken. Serve hot, perhaps over steamed rice or sautéed greens. The dish should smell like a summer orchard with a hint of umami. And that’s it—your honey garlic chicken is ready to wow everyone at the table.
That's it — you did it. But hold on, I've got a few more tricks that'll take this to another level...
Insider Tricks for Flawless Results
The Temperature Rule Nobody Follows
Many cooks over‑cook the chicken, turning it dry. I learned that a medium‑high sear followed by a low simmer preserves juiciness. Keep the skillet’s temperature steady; use a thermometer if you’re unsure.
Why Your Nose Knows Best
As the sauce simmers, the aroma will shift from sweet to slightly smoky. When you smell a hint of caramel, it’s time to add the cornstarch slurry. Trust your senses—they’re the most reliable guide.
The 5‑Minute Rest That Changes Everything
Letting the chicken rest after cooking is often overlooked, but it’s essential. The meat’s fibers relax, and the juices redistribute, making each bite succulent. A quick 2‑minute rest is enough.
Balancing Sweet and Savory
If the dish feels too sweet, add a splash of soy sauce or a pinch of salt. Conversely, if the sauce is too salty, a drizzle of honey can restore balance. Small tweaks make a big difference.
Using Fresh vs. Store‑Bought Honey
Fresh honey has a more vibrant flavor and a higher moisture content, which helps the glaze set without becoming syrupy. Store‑bought honey can be thicker, so you might need to thin it with a little water.
Creative Twists and Variations
This recipe is a playground. Here are some of my favorite ways to switch things up:
Citrus Burst
Swap the apple cider vinegar for fresh lime juice and add a splash of orange zest. The citrus brightens the sauce, making it perfect for summer gatherings.
Spicy Thai
Add a tablespoon of Thai red curry paste during the searing stage. The sauce becomes aromatic and spicy, pairing well with jasmine rice.
Smoky BBQ
Incorporate a tablespoon of smoked paprika and a dash of liquid smoke. The result is a smoky, sweet glaze that’s reminiscent of backyard barbecues.
Herb‑Infused
Stir in chopped fresh thyme or rosemary just before finishing. The herbs add depth and a fragrant aroma that elevates the dish.
Vegetarian Version
Replace the chicken with thick-cut tofu or seitan. The tofu will absorb the sauce beautifully, offering a plant‑based option that still delivers on flavor.
Storing and Bringing It Back to Life
Fridge Storage
Cool the chicken completely, then place it in an airtight container. It will stay fresh for up to 3 days. Store the sauce separately to keep the coating from becoming soggy.
Freezer Friendly
Freeze the chicken pieces in a single layer on a baking sheet before transferring to a freezer bag. They’ll keep for up to 2 months. Reheat in the microwave or oven, then drizzle with a fresh splash of sauce.
Best Reheating Method
Reheat the chicken in a skillet over medium heat, adding a splash of water or broth to steam it back to life. This prevents the sauce from drying out and restores the glossy finish.