I was halfway through a late‑night pizza night when the kitchen turned into a battlefield. My friend, a self‑proclaimed “chef,” had dared me to make the ultimate garlic fried chicken in under thirty minutes. I stared at the chicken pieces, the flour, the garlic, and a bag of dry‑mix spices that smelled like a memory of summer barbecues. I imagined a golden crust that crackles like a fresh snowflake, a scent that pulls you in before you even taste it. The moment felt like a culinary cliffhanger—my phone buzzed with a notification, and I thought, “If I can pull this off, I’ll never settle for store‑bought fried chicken again.”
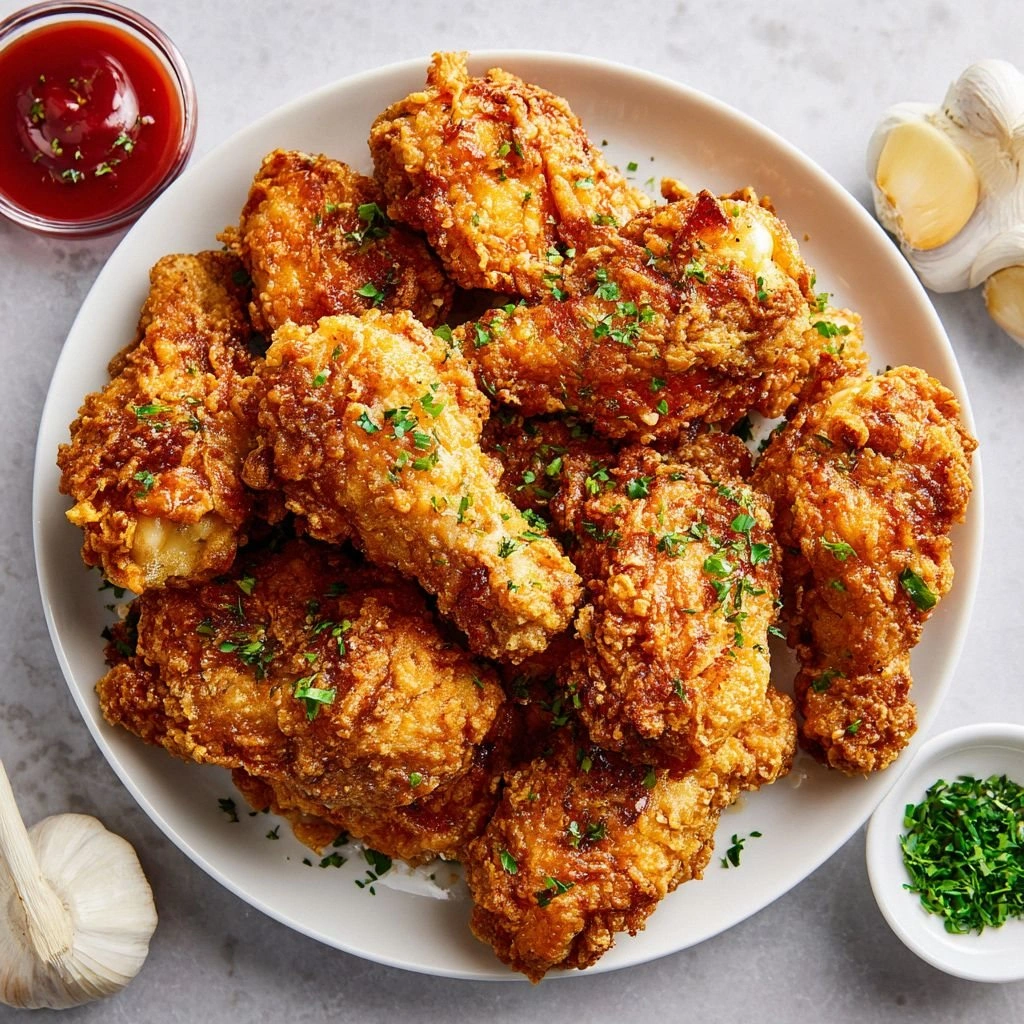
Picture this: the chicken pieces sit on a wooden board, the garlic cloves gleaming under the kitchen light, the flour dusted like snow. The air is thick with the aroma of crushed garlic and paprika, a promise of savory depth. You can hear the sizzle as the oil heats, a rhythmic drum that signals the start of flavor. The texture of the coating feels like a velvet glove, ready to snap into a crisp shell. I could taste the buttery finish and the citrus zing even before the first bite. That’s the sensory symphony I’m about to share with you.
What makes this version of garlic fried chicken stand out is not just the ingredients, but the method that marries technique with bold flavor. I’ve distilled a dozen variations into one flawless recipe that delivers a crust that’s crispy yet tender inside, a garlic flavor that’s robust without being overpowering, and a finish that lingers on the palate. Think of it as the secret sauce you didn’t know you were missing, a dish that turns an ordinary meal into a headline event.
Hold onto that image of the kitchen, the sizzling oil, the aroma of garlic—because by the end of this post, you’ll have a step‑by‑step guide that will make you wonder why you ever cooked anything else. Let me walk you through every single step—by the end, you’ll wonder how you ever made it any other way.
What Makes This Version Stand Out
- Taste: A balanced marriage of roasted garlic, smoky paprika, and a subtle citrus lift that keeps every bite exciting.
- Texture: The coating turns into a buttery, crisp shell that cracks like a perfect cookie when you bite.
- Ease: No secret sauces or exotic spices—just pantry staples that anyone can grab.
- Versatility: Works as a main for dinner, a party snack, or a crowd‑pleasing appetizer.
- Time‑efficient: Prep in 15 minutes, cook in 30—fast enough for a weekday dinner yet impressive for guests.
- Make‑ahead Friendly: The marination and coating can be prepared the night before, saving you time on busy days.
- Health‑savvy: By using a shallow‑fry technique and a light coating, you keep the dish lower in fat while still delivering that crunch.
- Flavor Depth: The garlic is layered—fresh cloves, garlic powder, and a dash of dried thyme create a multi‑dimensional profile.
Alright, let’s break down exactly what goes into this masterpiece…
Inside the Ingredient List
The Flavor Base
At the heart of this dish is the combination of fresh garlic and paprika. Fresh cloves bring a bright, sharp punch that cuts through the richness of the chicken, while paprika adds a subtle smokiness that deepens the overall flavor profile. Together, they create a symphony of savory notes that dance on the tongue. If you skip the paprika, the dish becomes a plain garlic experience—still good, but lacking that smoky undertone that keeps people coming back for more.
The Texture Crew
Flour and buttermilk form the backbone of the coating. The flour provides the structure, turning into a golden shell when fried, while the buttermilk adds moisture and a slight tang that keeps the chicken juicy. The addition of a pinch of baking soda in the flour mixture creates tiny pockets of air, which expand during frying and give the crust a light, airy crunch. Skipping the buttermilk will result in a drier interior, so keep it on the list.
The Unexpected Star
Cayenne pepper is the secret weapon that adds a subtle heat without overwhelming the garlic. A small pinch of cayenne lifts the overall flavor, giving the dish a modern twist that surprises the palate. If you’re heat‑averse, simply reduce the amount or omit it entirely—this recipe still shines bright. However, for those who love a kick, the cayenne makes the dish feel like a bold, confident statement.
The Final Flourish
Butter, lemon juice, and fresh parsley are the finishing touches that elevate the dish from great to unforgettable. Butter adds richness, lemon juice brightens the flavor, and parsley provides a fresh herbal note that cuts through the heaviness of the fried coating. Together, they create a complex, layered taste that feels both comforting and sophisticated. If you’re short on time, you can skip the parsley, but the lemon juice should stay—its acidity balances the dish and prevents it from feeling too heavy.
Everything's prepped? Good. Let's get into the real action…
The Method — Step by Step
- Marinate the Chicken: In a large bowl, combine the chicken thighs, minced garlic, buttermilk, salt, pepper, paprika, and a dash of cayenne. Toss until each piece is coated. Cover and refrigerate for at least 30 minutes, or overnight for maximum flavor. This step is the foundation—think of it as the first layer of a delicious cake.
- Prepare the Coating: In a shallow dish, whisk together the flour, garlic powder, a pinch of baking soda, and a small amount of salt. In another bowl, beat a couple of eggs to create an egg wash. This dual‑batter technique ensures a crisp, golden crust.
- Coat the Chicken: Remove each marinated piece from the bowl, letting excess liquid drip off. Dip first in the flour mixture, then in the egg wash, and finally back into the flour. Shake off excess. This double coating guarantees a thick, crunchy shell that holds the juicy interior.
- Heat the Oil: In a large, heavy skillet, pour enough oil to cover the bottom (about 1 inch). Heat over medium‑high until a small piece of bread sizzles and turns golden in 60 seconds. The oil should be hot but not smoking—think a steady, calm flame.
- Fry the Chicken: Carefully lay the coated pieces in the hot oil, skin side down. Do not overcrowd the pan; work in batches if necessary. Fry for 4–5 minutes on each side, or until the internal temperature reaches 165°F and the crust is golden brown. The sizzling sound should be loud—like a drumbeat of flavor.
- Drain and Rest: Use tongs to transfer the chicken onto a rack or paper towels. Let it rest for 5 minutes; this allows the juices to redistribute, ensuring moist meat.
- Butter‑Lemon Finish: In the same skillet, reduce heat to low and add butter. Let it melt, then squeeze in lemon juice and stir until the butter coats the pan. Toss the rested chicken in the butter‑lemon sauce, letting each piece soak for 30 seconds.
- Garnish and Serve: Sprinkle fresh parsley over the chicken, give it a final toss, and plate immediately. Serve with your favorite side—perhaps a crisp green salad or a comforting mashed potato. The aroma alone will have your guests asking for seconds.
That's it — you did it. But hold on, I've got a few more tricks that'll take this to another level…
Insider Tricks for Flawless Results
The Temperature Rule Nobody Follows
Maintaining the right oil temperature is crucial. Too hot and the coating burns before the chicken cooks; too cool and the coating will soak up oil and become greasy. Use a thermometer to keep it at 350°F. If you don’t have one, test with a small piece of bread—it should sizzle immediately and brown in about a minute.
Why Your Nose Knows Best
Before you even touch the pan, let your nose do the work. A good, fresh garlic aroma is a sign the oil is ready. If the smell is too weak, the oil needs to heat up a bit. Trust your senses—your nose is the best judge of readiness.
The 5‑Minute Rest That Changes Everything
After frying, let the chicken rest on a rack for five minutes. This simple step allows the juices to redistribute, preventing a dry bite. A friend once tried skipping it and ended up with chicken that tasted like a dry cracker.
The Butter‑Lemon Magic
Adding butter and lemon after frying is a game‑changer. The butter coats the surface, giving a silky finish, while the lemon juice brightens the flavor and cuts through the richness. Don’t skip this step—it’s what turns a good dish into a memorable one.
The Secret Salt
Use kosher salt for the coating. Its larger crystals give a subtle crunch and a more even seasoning. If you’re using table salt, add it in smaller amounts to avoid a salty bite.
Creative Twists and Variations
This recipe is a playground. Here are some of my favorite ways to switch things up:
Asian Fusion Crunch
Replace the paprika with a blend of five‑spice powder and add a splash of soy sauce to the coating. Serve with a cucumber salad for a refreshing contrast.
Mediterranean Delight
Swap the cayenne for oregano and add a teaspoon of dried rosemary to the flour. Finish with a drizzle of olive oil and a squeeze of fresh lemon.
Spicy Cajun Kick
Add a generous amount of Cajun seasoning to the coating and a dash of hot sauce to the butter‑lemon finish. Pair with a smoky coleslaw.
Herb‑Infused Baked Version
Instead of frying, bake the coated chicken at 425°F for 35 minutes. Sprinkle chopped thyme and rosemary over the top before serving.
Vegan Alternative
Use plant‑based chicken nuggets, vegan buttermilk, and a flaxseed‑egg substitute. Fry in coconut oil for a tropical twist.
Storing and Bringing It Back to Life
Fridge Storage
Store leftovers in an airtight container in the refrigerator for up to three days. Reheat in a skillet over medium heat until warm and the crust is crisp again.
Freezer Friendly
Freeze the cooked chicken in a single layer on a baking sheet, then transfer to a freezer bag. Store for up to two months. Reheat in a preheated oven at 375°F for 15 minutes.
Best Reheating Method
To revive the crunch, place the chicken on a wire rack over a baking sheet and bake at 400°F for 8 minutes. Add a splash of water before reheating to steam the interior, keeping it moist.