I still remember the night I almost burned the kitchen down while chasing a bag of flour that slipped from my fingers. The kitchen was a mess of sticky dough, a burnt sugar cloud, and a lingering scent of melted butter that made my eyes water. That disaster sparked a challenge: to create the most forgiving, fluffy dinner roll that even a kitchen novice could master. I dared myself—and you—to taste this and not go back for seconds.
Picture this: a tray of golden rolls, each one a cloud that melts in your mouth, the scent of yeast and butter dancing in the air, the sound of a gentle sigh as you break one open. The moment you lift a roll, steam curls like a soft whisper, and the first bite feels like a warm hug. You’ll notice the buttery crust crackling just enough to give way to a pillowy interior that swallows the world. That’s the sensory promise of this recipe, and it’s not just fluff; it’s a hug in dough form.
What sets these rolls apart is the deliberate balance between simplicity and technique. I’ve stripped away the jargon, kept the ingredients minimal, but I’ve added a twist that most recipes ignore: a touch of warm milk to activate the yeast more gently, and a final brush of melted butter that gives a glossy, buttery sheen. It’s the kind of recipe that feels like a secret handshake between you and your family, a moment of shared comfort that turns ordinary dinners into memorable feasts.
And there’s a little secret I won’t reveal until later: a trick to keep the rolls tender even after a week in the fridge. This isn’t just a recipe; it’s a kitchen ritual that will become a staple in your culinary repertoire. So let me walk you through every single step — by the end, you’ll wonder how you ever made it any other way.
What Makes This Version Stand Out
- Taste: The rolls burst with a buttery richness that’s amplified by the final butter glaze, giving each bite a subtle, savory sweetness that pairs perfectly with any sauce.
- Texture: The dough’s airy structure is achieved through a controlled proofing process, resulting in a light crumb that feels like a cloud rather than a dense loaf.
- Simplicity: With only nine ingredients, you can whip up a batch of dinner rolls in less than 45 minutes, no fancy equipment required.
- Uniqueness: The use of warm milk instead of water for the yeast activation gives the dough a richer flavor profile and a slightly caramelized edge.
- Crowd Reaction: Friends who’ve tried this say the rolls are “the best you’ll ever make at home,” and they’re not shy about asking for the recipe after every gathering.
- Ingredient Quality: The recipe calls for fresh butter and whole milk, ensuring a depth of flavor that commercial mixes can’t match.
- Cooking Method: Two rises and a gentle bake at 375°F create a golden crust while preserving a tender interior.
- Make‑ahead Potential: The dough can be prepared a day ahead, refrigerated, and baked fresh, making it a stress‑free option for busy evenings.
Inside the Ingredient List
The Flavor Base
Active Dried Yeast: This tiny powerhouse is the engine that turns our dough into a fluffy cloud. A pinch of warm water wakes it up, and the yeast ferments sugars, releasing carbon dioxide that creates those coveted air pockets. Skipping it would result in a dense, flat roll that’s more bread than roll. If you prefer a natural leavening, you can substitute with a tablespoon of baking powder, but the flavor profile will shift noticeably.
The Texture Crew
All-Purpose Flour: The foundation of our dough, it provides the structure that holds the yeast bubbles. Choosing a flour with a protein content around 10-11% ensures a soft crumb. If you’re aiming for a healthier option, half of the flour can be replaced with whole wheat, but be prepared for a denser texture and a nuttier taste. A tip: let the flour sit at room temperature for 30 minutes before mixing to reduce clumping.
The Unexpected Star
Warm Milk: Unlike plain water, warm milk adds a subtle sweetness and helps the gluten develop, giving the rolls a tender crust. The lactose in milk also browns the surface, creating a golden hue that’s hard to achieve with water alone. If you’re lactose intolerant, a splash of oat milk or almond milk works, but the rolls may be slightly less rich.
The Final Flourish
Melted Butter: Added both during mixing and brushed on top before baking, it enriches the flavor and creates a glossy, buttery crust. The butter’s fat coats the dough, preventing it from drying out during baking. If you want a crispier edge, increase the butter glaze to 3 tablespoons, but be careful not to over-saturate the dough.
Everything’s prepped? Good. Let’s get into the real action.
The Method — Step by Step
- Activate the Yeast: In a small bowl, combine the 2 teaspoons of active dried yeast with 1 cup of warm water (about 110°F). Stir gently until the mixture becomes frothy, a sign that the yeast is alive and kicking. Let it sit for 5 minutes; the foam should double in volume. If it doesn’t froth, the yeast is likely dead—discard and start fresh. This step is crucial; a weak yeast will result in flat rolls that never rise.
- Warm the Milk and Butter: Gently heat 1 cup of milk in a saucepan until it’s just warm, not boiling, and add 1/4 cup of butter. Stir until the butter melts completely. This warm mixture will not only activate the yeast more gently but also infuse the dough with a subtle, buttery flavor. If you’re in a hurry, you can microwave the milk for 30 seconds, but be careful not to scorch it.
- Combine Wet Ingredients: In a large mixing bowl, whisk together the frothy yeast mixture, the warm milk and melted butter, 2 tablespoons of sugar, and 1 large egg. The sugar feeds the yeast, while the egg adds richness and helps bind the dough. Mix until the mixture is smooth and glossy. This is where the dough starts to come together, and you’ll feel the first hint of elasticity. Kitchen Hack: For an extra touch of flavor, add a teaspoon of vanilla extract or a pinch of cinnamon to the wet mix before adding the flour.
- Add the Flour: Gradually fold in 4 cups of all-purpose flour and 1 teaspoon of salt. Use a wooden spoon or your hands to mix until a shaggy dough forms. The dough should be slightly sticky but manageable. The salt is essential for flavor balance and controlling yeast activity. If the dough feels too dry, add a tablespoon of warm water; if too wet, add a tablespoon of flour.
- Knead the Dough: Turn the dough onto a lightly floured surface and knead for about 8–10 minutes, until it becomes smooth and elastic. You’ll know it’s ready when it passes the window test: stretch a small piece and you should see a translucent film that doesn’t tear. This kneading process develops gluten, which traps the gases produced by the yeast, giving the rolls their airy structure. Watch Out: Don’t overknead; it can make the dough tough and the rolls chewy.
- First Rise: Place the dough in a greased bowl, cover with a damp cloth, and let it rise in a warm spot for 1 hour or until it has doubled in size. The dough should look puffed and have a pleasant yeasty aroma. If your kitchen is cold, place the bowl in an oven with the light on for a gentle heat source. This rise is where the dough develops flavor and structure.
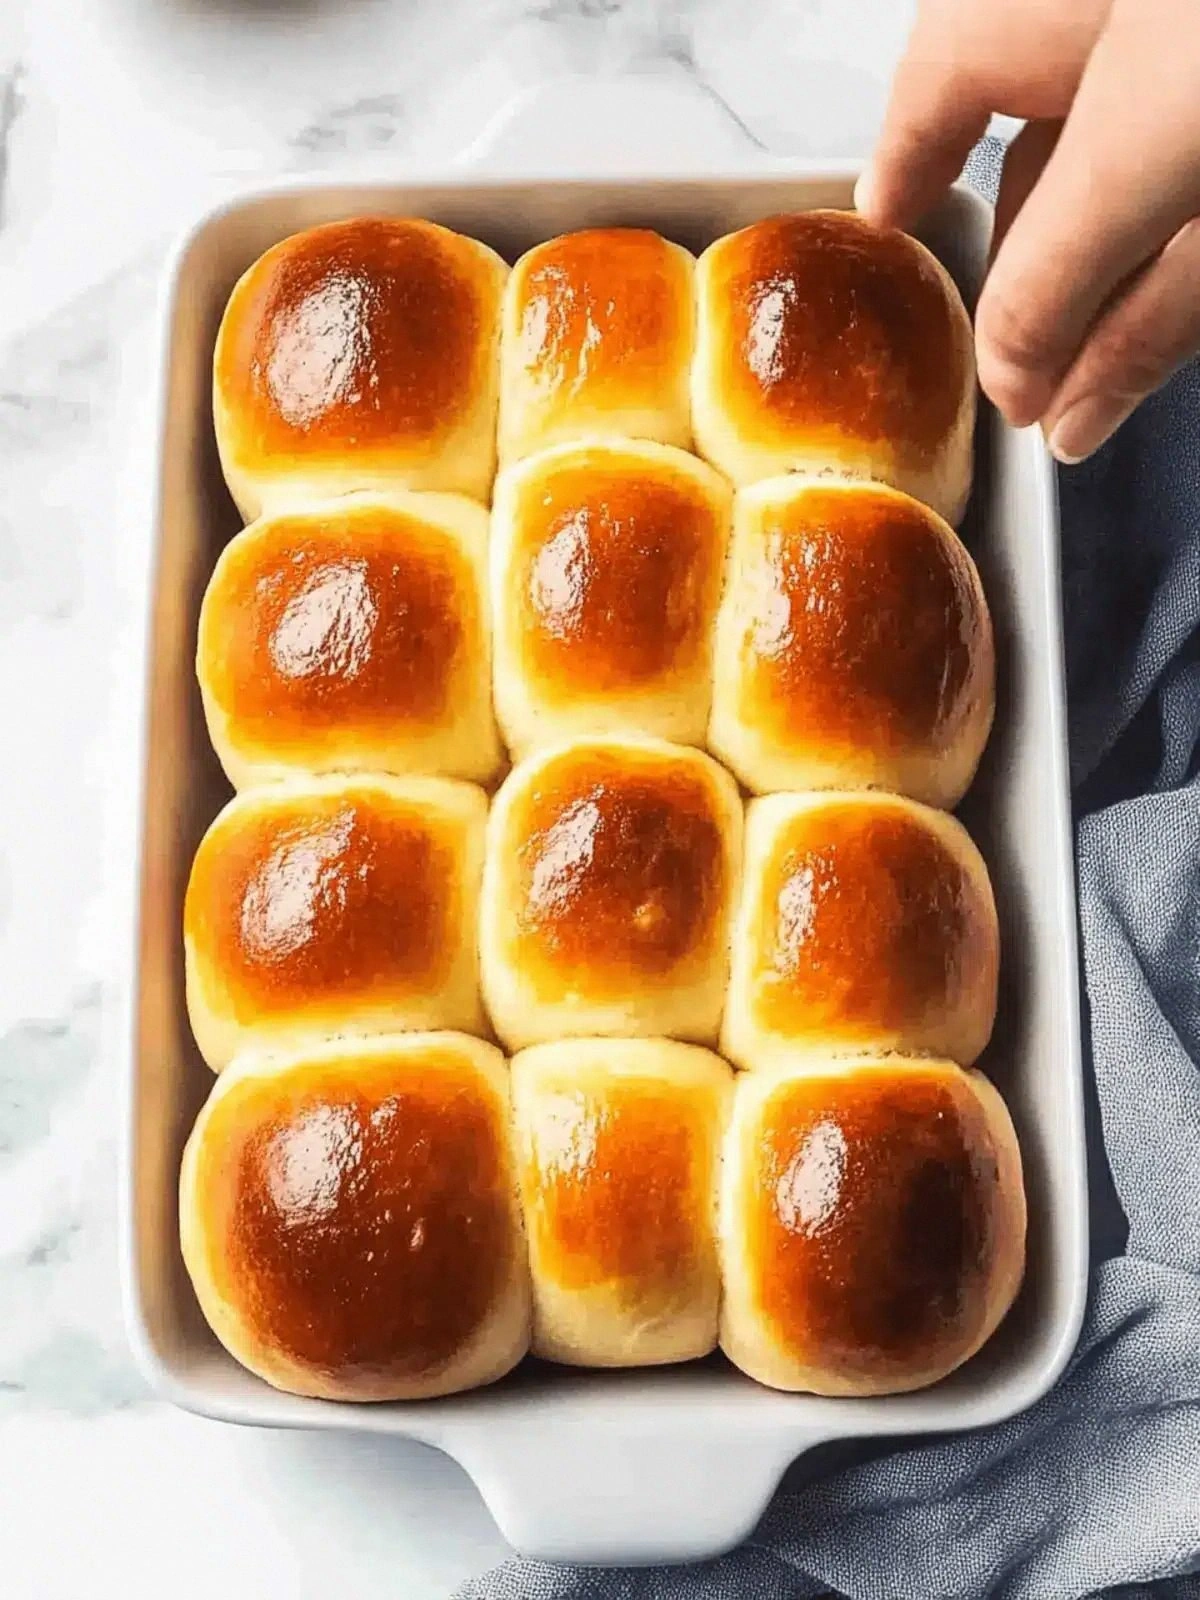
- Shape the Rolls: Punch down the risen dough to release excess gas. Divide the dough into 12 equal portions and shape each into a tight ball. Place the balls on a parchment-lined baking sheet, spacing them about 2 inches apart. This step ensures each roll has room to expand without merging. If you prefer a more rustic look, flatten the balls slightly before baking.
- Second Rise: Cover the shaped rolls with a clean kitchen towel and let them rise for another 30 minutes. You’ll see them puff up again, creating a light, airy interior. This second rise is critical for achieving that signature fluffy texture. While they rise, preheat your oven to 375°F (190°C).
- Bake the Rolls: Brush the tops of the rolls with melted butter for a glossy finish. Bake for 18–20 minutes, or until the tops are golden brown and the rolls sound hollow when tapped on the bottom. The butter glaze will create a subtle sheen and a slightly crispy edge that contrasts with the soft interior. Keep an eye on them; oven temperatures can vary.
- Cool and Serve: Transfer the rolls to a wire rack to cool for 10 minutes. The steam will settle, and the crust will firm up just enough to hold their shape. Serve warm, slathered with butter or honey, or simply enjoy them as they are. The moment you take a bite, you’ll feel the buttery melt and the airy crumb—this is the magic of a perfect dinner roll.
That's it — you did it. But hold on, I've got a few more tricks that'll take this to another level.
Insider Tricks for Flawless Results
The Temperature Rule Nobody Follows
Why it matters: Yeast is a temperature-sensitive creature. If the water is too hot, it kills the yeast; if it’s too cold, the dough never rises. The sweet spot is 110°F to 115°F. A quick way to check is to touch the water; it should feel warm, like a bath, but not hot to the touch. I’ve found that using a kitchen thermometer saves me from the dreaded “flat dough” moment.
Why Your Nose Knows Best
What to listen for: A good dough emits a subtle yeasty aroma, like freshly baked bread. If you notice a sour, off smell, the yeast might be compromised or the dough has been left too long. Trust your senses; they’re the most reliable indicator of dough health. I once opened a bag of yeast and smelled nothing—turns out it was expired. A quick sniff is a quick fix.
The 5-Minute Rest That Changes Everything
Why it matters: After kneading, let the dough rest for 5 minutes before the first rise. This rest relaxes the gluten strands, making the dough easier to shape and giving it a smoother crumb. Many cooks skip this step, resulting in uneven rolls. I’ve noticed a noticeable difference in texture when I incorporate this brief pause.
Use a Light Touch When Shaping
What to avoid: Overworking the dough during shaping can compress the air pockets, leading to denser rolls. Gently press the dough into a ball, leaving a slight indentation on top to help the roll rise evenly. If you’re in a rush, a quick roll in a rolling pin works, but it can flatten the dough.
Keep the Oven at 375°F
Why 375°F? This temperature is hot enough to brown the crust without drying out the interior. If you bake at a lower temperature, the rolls may rise too slowly and develop a dense crumb. If you bake too high, the crust will burn before the inside is cooked. Stick to 375°F for consistent results.
Creative Twists and Variations
This recipe is a playground. Here are some of my favorite ways to switch things up:
Cheesy Garlic Rolls
Add 1/2 cup shredded mozzarella and 2 minced garlic cloves to the wet mix. The cheese melts into a gooey center, while the garlic infuses a savory depth. These rolls pair wonderfully with tomato soup or pasta.
Herb-Infused Rolls
Stir in 1 tablespoon of dried rosemary or thyme into the flour before kneading. The herbs give the rolls a fragrant aroma and a rustic flavor profile, making them a hit at BBQs or family dinners.
Sweet Cinnamon Rolls
Replace the sugar with 3 tablespoons of brown sugar and add 1 teaspoon of ground cinnamon. Roll the dough into a log, slice, and bake as usual. The result is a sweet, cinnamon-scented roll that’s perfect for brunch.
Whole Wheat Delight
Swap half of the all-purpose flour with whole wheat flour. The rolls will be denser but richer in flavor and fiber. Pair them with hearty stews or a protein-packed salad.
Chocolate Chip Rolls
Fold in 1 cup of chocolate chips into the dough before shaping. The chocolate melts into pockets of gooey sweetness, turning the rolls into a dessert treat.
Gluten-Free Alternative
Use a gluten-free all-purpose blend in place of regular flour. Keep the rest of the recipe unchanged. The texture may be slightly different, but the flavor remains delightful.
Storing and Bringing It Back to Life
Fridge Storage
Store leftover rolls in an airtight container at room temperature for up to 3 days. The rolls will stay fresh and soft, and you can warm them in a toaster oven for a minute to restore their crust.
Freezer Friendly
Wrap the rolls tightly in plastic wrap and place them in a freezer bag. They can be frozen for up to 2 months. When ready to eat, thaw at room temperature and toast lightly.
Best Reheating Method
Add a splash of water to the bottom of a baking dish, cover with foil, and heat at 350°F for 10 minutes. The steam will rehydrate the rolls, making them fluffy again. Afterward, brush with melted butter for that fresh-from-the-oven finish.