I still remember the exact moment these buttery cheese garlic rolls changed my life. It was 2:47 AM on a Tuesday, I was wearing mismatched socks, and I had just burned my third batch of frozen dinner rolls because I got distracted binge-watching cooking videos. The smoke alarm was serenading my neighbors, my cat was judging me from the countertop, and I was ready to swear off carbs forever. But then, in a moment of what I can only describe as sleep-deprived genius mixed with desperation, I started throwing ingredients together like some kind of carb-crazed mad scientist. The result? These ridiculously addictive rolls that made me dance around my kitchen in my polka-dot pajamas, doing what I can only describe as the "carb happy dance" while my cat looked on in horror.
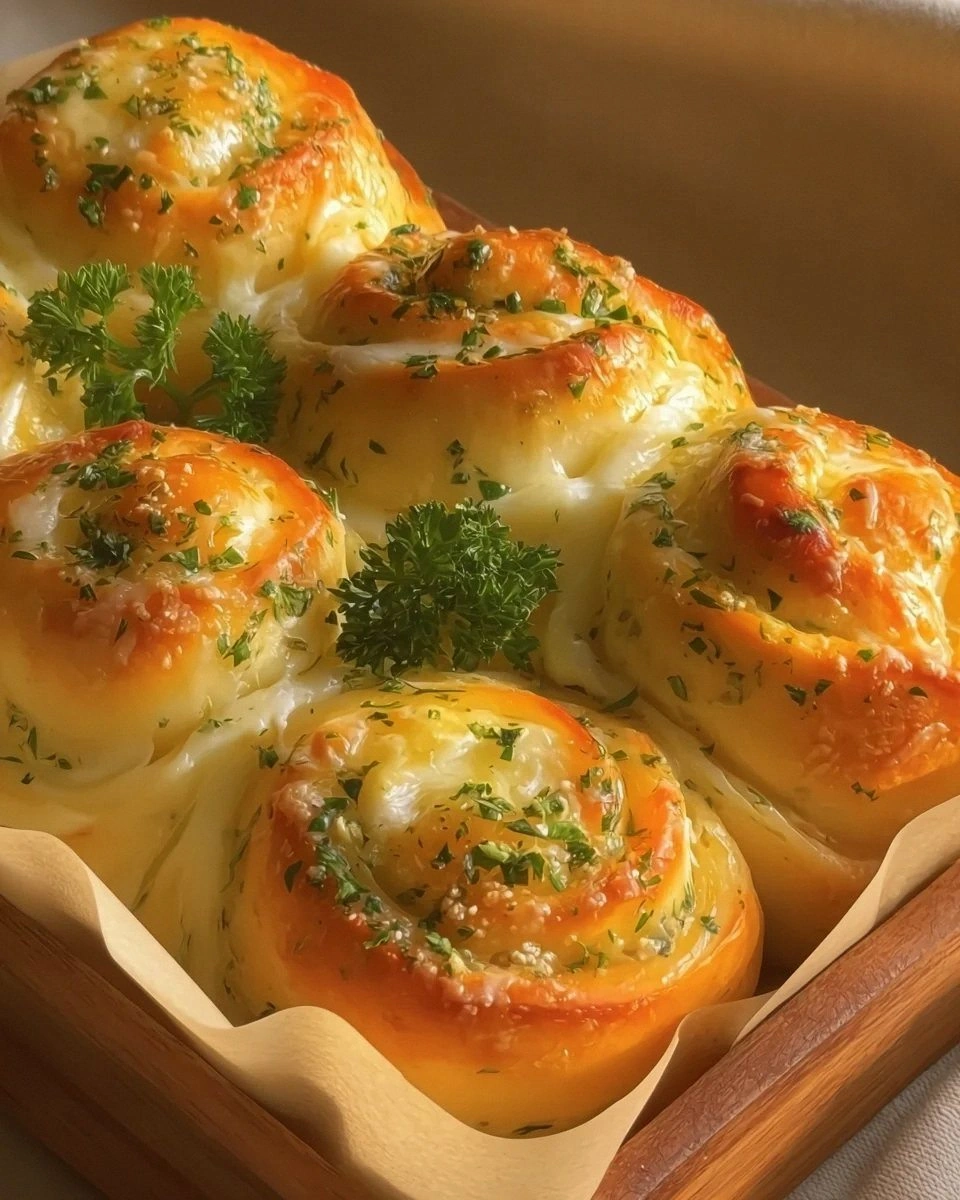
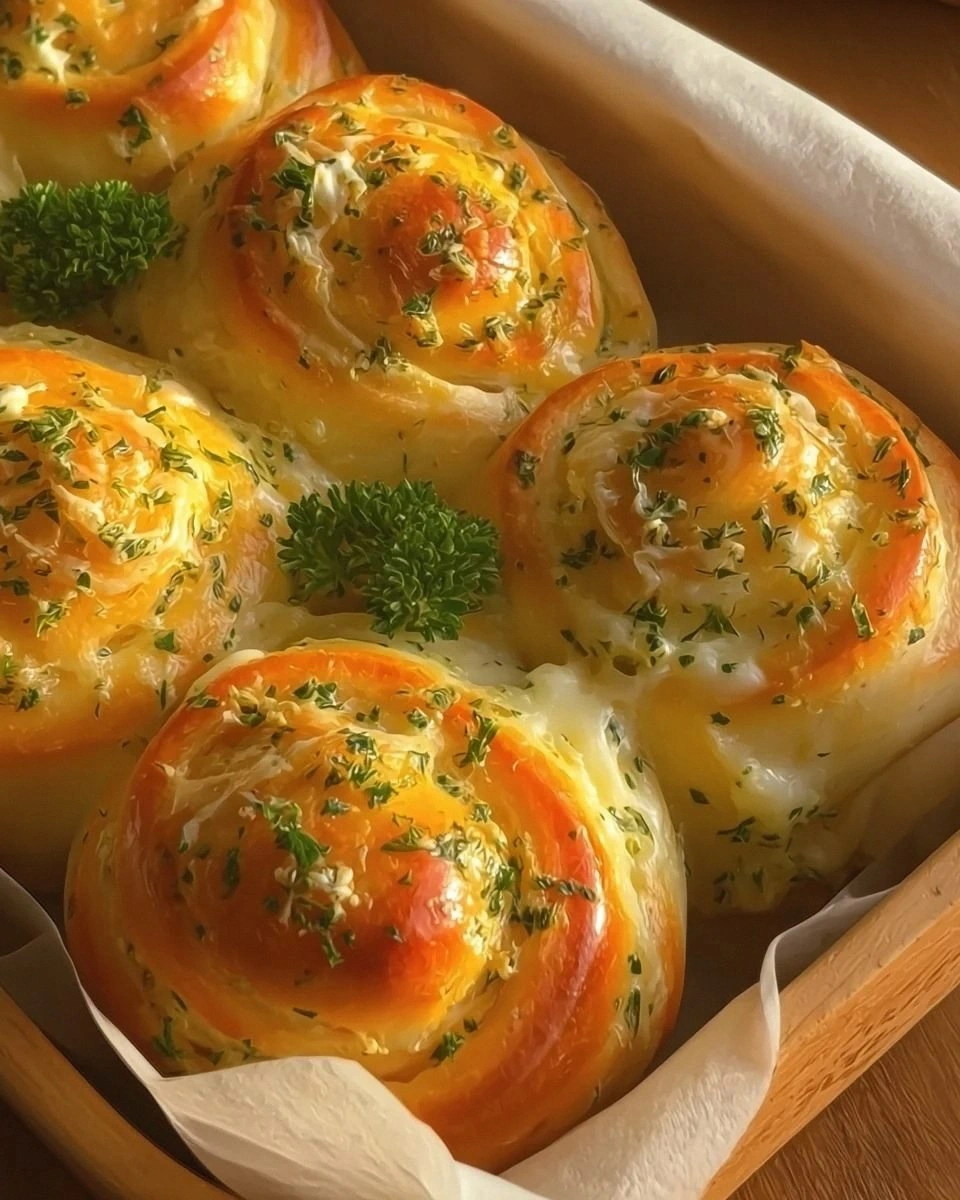
Picture this: golden-brown rolls that crackle when you bite into them, releasing a cloud of garlicky steam that smells so good it could wake the dead. The butter pools in little pockets, mixing with melted cheese that stretches like a cheesy Instagram video when you pull them apart. The edges get crispy and caramelized while the inside stays soft and pillowy, like a savory cinnamon roll that decided to live its best life. I'm not exaggerating when I say that my neighbor knocked on my door at 3 AM asking what smelled so incredible, and I may have eaten five rolls straight from the pan while deciding whether to share. My roommate tried one the next morning cold from the fridge and actually moaned out loud, which was awkward for everyone involved but honestly validated my entire existence.
Here's the thing about most garlic roll recipes floating around the internet — they're either too bland, too complicated, or they taste like you just rolled bread through a garlic salt mine. Some recipes want you to make dough from scratch like we're all medieval bakers with unlimited free time, while others rely on that sad jarred garlic that tastes like disappointment and broken dreams. This version? It's the Goldilocks of garlic rolls — not too hard, not too boring, but exactly what you want when carb cravings hit like a freight train. The secret lies in a few simple techniques that transform ordinary ingredients into something that'll make you famous at potlucks and family gatherings.
Okay, ready for the game-changer? We're using a combination of fresh garlic AND roasted garlic, plus a three-cheese blend that'll make your taste buds do backflips. The butter gets infused with herbs first, then we brush it on at three different stages for maximum flavor impact. Trust me, this isn't just another garlic roll recipe — this is THE garlic roll recipe that'll ruin all others for you forever. Let me walk you through every single step — by the end, you'll wonder how you ever made it any other way.
What Makes This Version Stand Out
Flavor Bomb: Most recipes stop at one sad clove of garlic, but we're building layers of garlicky goodness with both fresh and roasted garlic, plus garlic powder for that umami punch that clings to every crevice of the rolls. The roasted garlic adds this incredible sweetness that balances the sharp bite of fresh garlic, creating a complexity that'll have people asking for your secret.
Cheese Strategy: This isn't just a sprinkle of parmesan on top — we're talking about a strategic blend of mozzarella for stretch, sharp cheddar for depth, and pecorino romano for that salty, nutty finish that makes your mouth water just thinking about it. Each cheese plays a specific role, melting into the nooks and crannies like they were made for each other.
Texture Magic: The contrast between the crispy, buttery edges and the soft, cheesy interior is what separates amateur hour from championship level. We're achieving this with a specific baking technique that creates steam inside while browning the outside to golden perfection that shatters like thin ice under your teeth.
Time Hacking: Despite tasting like you spent hours slaving away, these come together in under 45 minutes using store-bought roll dough that tastes completely homemade after our flavor transformation. It's the ultimate party trick — impressive results with minimal effort, like having your cake and eating it too.
Crowd Control: I've never seen anyone eat just one of these rolls. They're engineered for maximum addictiveness, with that perfect balance of salty, buttery, garlicky goodness that makes it impossible to stop. Bring these to a party and watch grown adults fight over the last one like it's the last lifeboat on the Titanic.
Make-Ahead Champion: You can prep these rolls, freeze them, and bake them fresh whenever the craving strikes. They're like having a secret weapon in your freezer for emergencies, late-night snacks, or when you need to impress unexpected guests without breaking a sweat.
Ingredient Quality Focus: Using real butter (never margarine), fresh herbs instead of dried, and good quality cheese makes a difference you can taste in every single bite. This isn't the place to skimp — your taste buds will thank you, and you'll understand why some ingredients are worth the extra few dollars.
Inside the Ingredient List
The Flavor Base
Butter is the foundation of everything good in this world, and these rolls are no exception. We're using European-style butter with higher fat content because it carries flavors better and creates that restaurant-quality richness that makes people close their eyes when they taste it. The butter gets melted with garlic and herbs first, infusing every molecule with flavor before it even touches the rolls. Don't even think about using margarine here — I tried it once in a pinch and the results tasted like disappointment wrapped in artificial sadness. The real magic happens when the butter meets the hot rolls, creating steam that carries garlic and herbs into every pocket of the bread.
The Texture Crew
The roll selection is crucial — you want something sturdy enough to hold all that buttery, cheesy goodness without falling apart, but soft enough to absorb all the flavors like a sponge. I tested this with everything from Hawaiian rolls to crusty baguette slices, and the winner every time was those soft dinner rolls from the grocery store bakery section. They're like the Switzerland of bread — neutral enough to let the flavors shine while providing the perfect vehicle for maximum butter absorption. The slight sweetness balances the garlic beautifully, creating harmony in every bite that'll make you want to write poetry about carbohydrates.
The Unexpected Star
Here's where things get interesting — we're adding a touch of honey to the butter mixture. Before you click away thinking I've lost my mind, hear me out. The honey doesn't make these sweet, but it balances the harshness of raw garlic and helps everything caramelize to that perfect golden-brown color that looks like edible sunshine. It also creates these little pockets of sticky, garlicky goodness in the bottom of the pan that people will fight over. My Aunt Betty licked the pan clean the first time I made these, and honestly, I respected her for it.
The Final Flourish
Fresh parsley isn't just for color — it adds this bright, clean flavor that cuts through all that richness and makes you feel slightly less guilty about eating your body weight in butter and cheese. The trick is adding it at two different stages: some gets mixed into the butter for flavor, and more gets sprinkled on top fresh for that pop of color that makes these look like they came from a fancy restaurant. Chives would work too if you're feeling rebellious, but parsley is the classic for a reason. Plus, it gives you something green to point at when someone questions the nutritional value of your third roll.
Quality Matters
The difference between good garlic rolls and life-changing garlic rolls often comes down to ingredient quality. That pre-minced garlic in oil? Leave it on the shelf — it tastes like garage and loses all its punch within days of opening. Fresh garlic costs pennies and delivers flavor that'll make your mouth sing opera. Same goes for herbs — dried herbs have their place, but fresh parsley adds a brightness that dried just can't match. And please, for the love of all that is holy in the kitchen, use real butter. Your grandmother didn't survive the Great Depression for you to put margarine in these rolls.
The Method — Step by Step
- The first step is where the magic begins — preheat your oven to 375°F and grab a 9x13 baking dish. This isn't just about getting hot air circulating; it's about creating the perfect environment for your rolls to transform from ordinary to extraordinary. While the oven heats, melt your butter in a small saucepan over medium heat, and here's where you need to pay attention. Don't just melt it — let it foam slightly and start to turn golden, which takes about 2-3 minutes. That slight browning adds a nutty flavor that takes these rolls from good to "why can't I stop eating these" territory.
- Now comes the aromatics dance — add your minced garlic to the butter and watch it sizzle like it's performing for you. The key here is timing: 30 seconds for fresh garlic, max. Any longer and it turns bitter, like that ex who still comments on your social media. You want it fragrant but not brown, like it just woke up from a butter spa treatment. If you're using both fresh and roasted garlic (which you absolutely should), add the roasted garlic now since it's already mellow and sweet.
- Herbs come next, and this is where people mess up by adding them too early. Fresh parsley, dried oregano, a whisper of red pepper flakes if you're feeling spicy — they all go in after you pull the butter off the heat. The residual warmth releases their oils without turning them into sad, brown flecks that taste like lawn clippings. Give it a good stir and let it sit while you prep the rolls, allowing the flavors to meld like old friends reuniting after years apart.
- The roll preparation is where precision meets artistry — slice your rolls almost but not quite all the way through, creating little accordion-style cuts that'll hold maximum butter and cheese. Place them in your baking dish like little soldiers standing at attention, ready for their buttery baptism. If you're using pull-apart rolls, keep them connected; if using individual rolls, pack them tightly so they support each other during baking. This isn't just about aesthetics — the rolls touching each other creates steam that keeps them soft while the tops get crispy.
- Now for the fun part — brush those rolls with your garlic butter like you're painting the Sistine Chapel ceiling. Get in all the nooks and crannies, between each slice, under the bottoms. Don't be shy here; this isn't the time for restraint. Use about two-thirds of your butter mixture now, saving the rest for later applications. The rolls should look glossy and decadent, like they're ready for a butter magazine photoshoot.
- Cheese time is where dreams come true — stuff the shredded mozzarella between the slices first, pushing it down so it melts into every available space. Then sprinkle the cheddar and pecorino on top, creating a three-cheese situation that's basically a hug for your taste buds. The mozzarella gives you those Instagram-worthy cheese pulls, while the cheddar adds sharpness and the pecorino brings that salty, nutty complexity that makes people ask "what's in these?" between mouthfuls.
- Into the oven they go, and here's where you need to channel your inner kitchen ninja. Bake for 15 minutes, then rotate the pan 180 degrees for even browning. After another 10-12 minutes, they should be golden on top and the cheese should be bubbling like a savory jacuzzi. If the tops are browning too quickly, tent with foil — we're going for golden, not charcoal. The smell at this point will have you hovering by the oven like a moth to a flame, but resist opening the door too often or you'll let out all that precious steam.
- The final butter application happens right when they come out of the oven — brush the remaining garlic butter over the hot rolls, watching it seep into every crevice like liquid gold. This second application ensures maximum flavor and that glossy finish that makes these look like they came from a professional kitchen. Sprinkle with fresh parsley for color and that final hit of brightness, then let them sit for exactly 5 minutes. This brief rest allows the cheese to set slightly so you don't burn your mouth in your eagerness, though honestly, I've never waited that long.
That's it — you did it. But hold on, I've got a few more tricks that'll take this to another level...
Insider Tricks for Flawless Results
The Temperature Rule Nobody Follows
Room temperature ingredients aren't just a suggestion — they're the difference between rolls that taste like they came from a restaurant versus ones that taste like you gave up halfway through. Cold cheese doesn't melt evenly, creating sad little cheese pebbles instead of that glorious cheese blanket we're after. Let your cheese sit out for 30 minutes before grating, and your butter should be cool room temperature, not rock hard from the fridge. I learned this the hard way when I tried to rush the process and ended up with rolls that looked like they had cheese dandruff — edible but deeply disappointing.
Why Your Nose Knows Best
Forget timers — your nose is the most sophisticated kitchen tool you own. When these rolls are perfectly done, your kitchen will smell like garlic bread heaven with just a whisper of nuttiness from the browning cheese. If you start to smell anything sharp or acrid, you've gone too far and need to pull them immediately. The human nose can detect over one trillion scents, and it's particularly attuned to the Maillard reaction happening on these rolls. Trust your senses over the clock every time — unless you're my cousin Mike who once forgot about garlic bread for an hour and set off every smoke alarm in a three-block radius.
The 5-Minute Rest That Changes Everything
I know, I know — when garlic rolls are hot and fragrant, waiting feels like torture. But here's the thing: those five minutes of rest time allow the cheese to set slightly, preventing that tragic moment when you bite into a roll and all the cheese slides off like it's trying to escape. The butter also has time to fully absorb into the rolls rather than running everywhere when you cut or pull them apart. Think of it as the rolls' spa moment — they're finishing their transformation from good to legendary. Use this time to set the table, pour yourself a glass of wine, or just hover over the pan inhaling deeply like a normal, well-adjusted adult.
The Garlic Timing Secret
Most recipes tell you to add garlic at the wrong time, resulting in either raw harshness or bitter burnt disappointment. The secret is adding it in stages — some in the butter for base flavor, some roasted and mixed with the cheese for sweetness, and a tiny bit of fresh garlic mixed with parsley for that final bright punch. It's like a garlic symphony where each section plays at the right moment for maximum impact. My neighbor tried making these with garlic powder only and wondered why they tasted like disappointment. Fresh garlic is non-negotiable, but timing is everything.
Creative Twists and Variations
This recipe is a playground. Here are some of my favorite ways to switch things up:
The Everything Bagel Remix
Swap out the Italian herbs for everything bagel seasoning, use cream cheese mixed with mozzarella for stuffing, and add thin slices of smoked salmon on top right before serving. These brunch-worthy rolls taste like your favorite bagel shop got drunk and made out with a garlic knot. The everything seasoning adds crunch and complexity, while the cream cheese creates these little pockets of tangy goodness that balance all that richness. Top with fresh dill and maybe a squeeze of lemon if you're feeling fancy.
The Pizza Party Version
Mix mini pepperoni into the cheese blend, add Italian seasoning to the butter, and serve with warm marinara for dipping. These disappear faster than free pizza at a college party. The pepperoni gets crispy edges while staying chewy inside, creating textural contrast that'll make you wonder why all garlic rolls don't include meat. Use a mix of provolone and mozzarella for that authentic pizza joint flavor, and don't skip the red pepper flakes — they add just enough heat to keep things interesting.
The Truffle Shuffle
Add a few drops of truffle oil to the butter mixture and use a mix of fontina and parmesan for ultimate indulgence. These taste expensive — like, "I should be wearing pearls while eating these" expensive. The truffle oil is potent stuff, so go easy or you'll feel like you're eating a forest floor. Fontina melts like a dream and adds nuttiness that plays beautifully with the truffle. Save these for when you want to impress someone or when you need to feel like you're living your best life.
The Jalapeño Popper Take
Mix diced pickled jalapeños into the cheese blend and add crispy bacon bits on top. The tang from the pickled peppers cuts through all that richness like a knife through butter. Use a mix of cream cheese and cheddar for that authentic popper experience, and don't skip the bacon — it adds smoky saltiness that makes these dangerously addictive. Serve with ranch dressing for dipping if you're fully committing to the sports bar experience.
The Mediterranean Dream
Add chopped sun-dried tomatoes, kalamata olives, and feta cheese to the mix. Use oregano and thyme in the butter, and finish with a squeeze of fresh lemon. These transport you straight to a Greek island where calories don't count and everyone eats bread with every meal. The sun-dried tomatoes add tangy sweetness, while the feta brings salty creaminess that plays against the buttery rolls. It's like vacation in bread form, minus the expensive plane ticket.
The Breakfast Champion
Add cooked breakfast sausage and scrambled eggs between the rolls, use white cheddar and a touch of maple syrup in the butter. These are what Sunday mornings dream about — sweet, savory, and utterly satisfying. The maple butter sounds weird but trust me, it's what separates these from ordinary breakfast rolls. The slight sweetness makes the sausage taste more savory by comparison, creating a flavor rollercoaster that'll have you setting your alarm early on weekends.
Storing and Bringing It Back to Life
Fridge Storage
These rolls will keep in an airtight container in the fridge for up to 4 days, though honestly, they've never lasted more than 2 days in my house. The key is letting them cool completely before storing — warm rolls create condensation that leads to soggy, sad bread. Line the container with paper towels to absorb excess moisture, and place another layer between rolls if you're stacking them. They'll taste best if reheated rather than eaten cold, because cold butter congeals into something that feels like eating flavored candles.
Freezer Friendly
These freeze beautifully for up to 3 months — assuming you have the self-control to not eat them all immediately. Wrap individual rolls tightly in plastic wrap, then place in a freezer bag with all the air squeezed out. Pro tip: flash freeze them on a baking sheet first, then wrap individually. This prevents them from turning into one giant bread blob that requires a chisel to separate. Label the bag with the date and contents, because three months from now, "mystery bread" isn't going to sound appetizing even if it is delicious.
Best Reheating Method
The oven is your friend here — 350°F for 8-10 minutes wrapped in foil to prevent burning, then unwrap for the last 2 minutes to crisp up the tops. The microwave works in a pinch, but wrap in a damp paper towel first to prevent them from turning into rubbery frisbees. Add a tiny splash of water before reheating — it steams back to perfection, recreating that fresh-from-the-oven experience. Whatever you do, don't overheat them or the cheese will separate and become oily, like it's trying to escape from the bread.